
Blog Date: December 7, 2021
VMware vCenter Server 7.0 Update 2d used.
VMware NSX-T Data Center 3.1.3.1 used.
Assumptions:
In a previous post titled vSphere with Tanzu on VMware Cloud Foundation/vSphere with NSX-T requirements, I went over the requirements I pass along to customers, along with the supporting VMware documentation, and this post assumes those requirements and those in the VMware documentation have been met. The same networking requirements exist here for standard vSphere 7 deployments with NSX-T.
- Validate and deploy an NSX-T edge cluster. For more information see: Configuring NSX-T Data Center for vSphere with Tanzu.
- Validate/Add NSX-T Network Segments
- Validate/Configure NSX-T IP Prefixes on the Tier-0 Gateway
- Validate/Configure NSX-T Route Maps on the Tier-0 Gateway
- Validate MTU greater than or equal to 1600 on all networks that will carry Tanzu traffic i.e. management network, NSX Tunnel (Host TEP, Edge TEP) networks, and the external network.
- Create a Subscribed Content Library for vSphere with Kubernetes.
- Create Storage Policies for vSphere with Tanzu.
- Deploy vSphere with Tanzu:
Deployment Steps:
In the vSphere Client, select Menu > Workload Management.
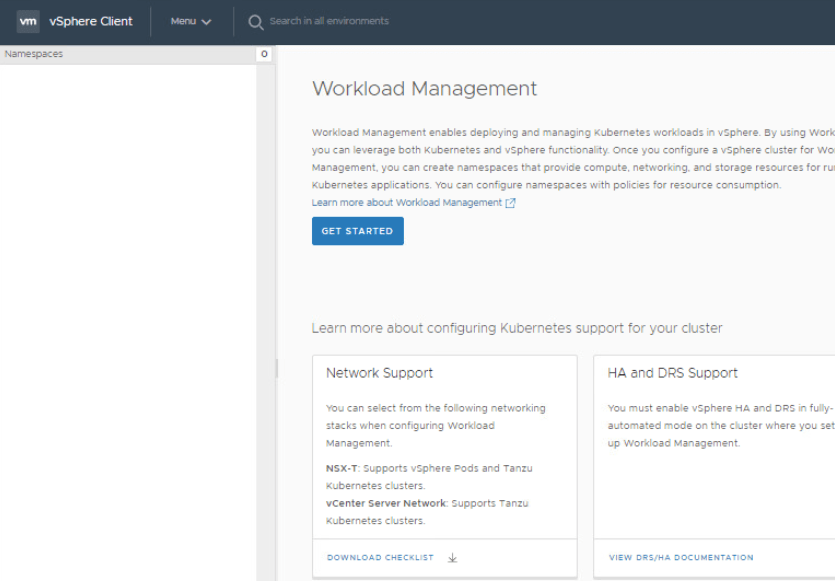
Click Get Started. (The Enable Workload Management wizard opens.)
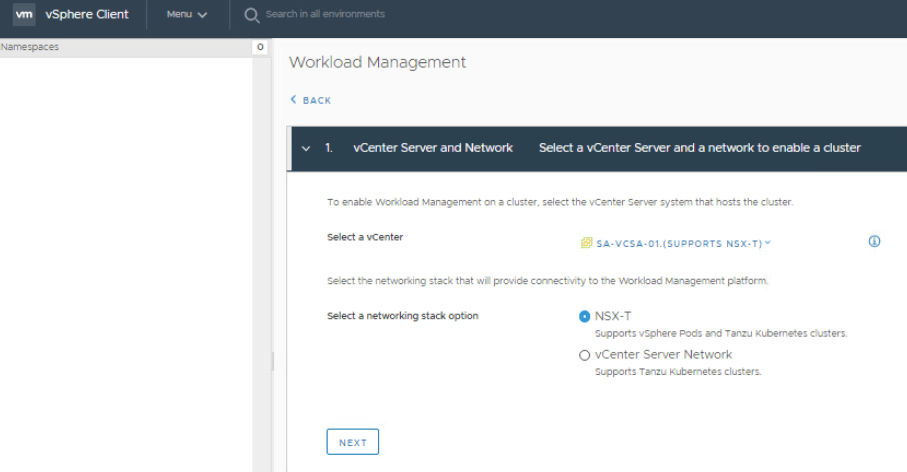
On the vCenter Server and Network section, select NSX-T. Click Next.
On the Select a Cluster section, select the ESXi cluster to support vSphere with Tanzu.
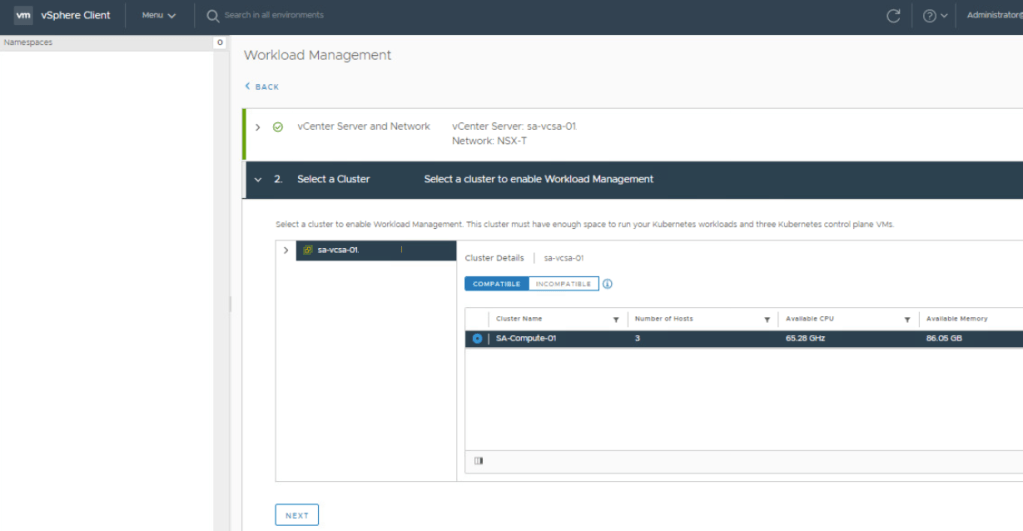
Next, select the size of the control plane. Click Next.

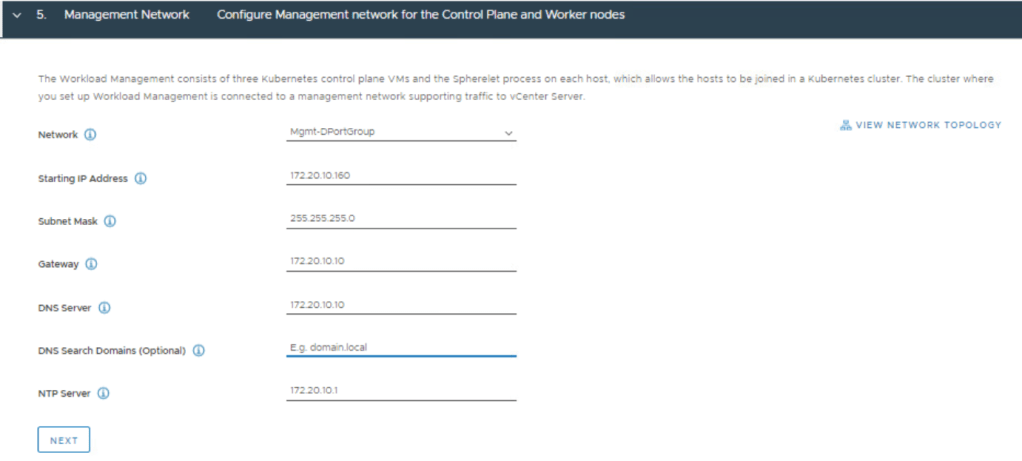
Fill in the Management Network details.
Scroll down, and fill in the Workload Network details. As mentioned in a previous post, I will argue that the API Server endpoint FQDN entry is mandatory when applying a certificate. NOTE: The Pod and Service CIDRs are non-routable. The UI provides default values that can be used, otherwise you specify your own. The Ingress and Egress CIDRs will be routable networks defined by the network team. Click Next.

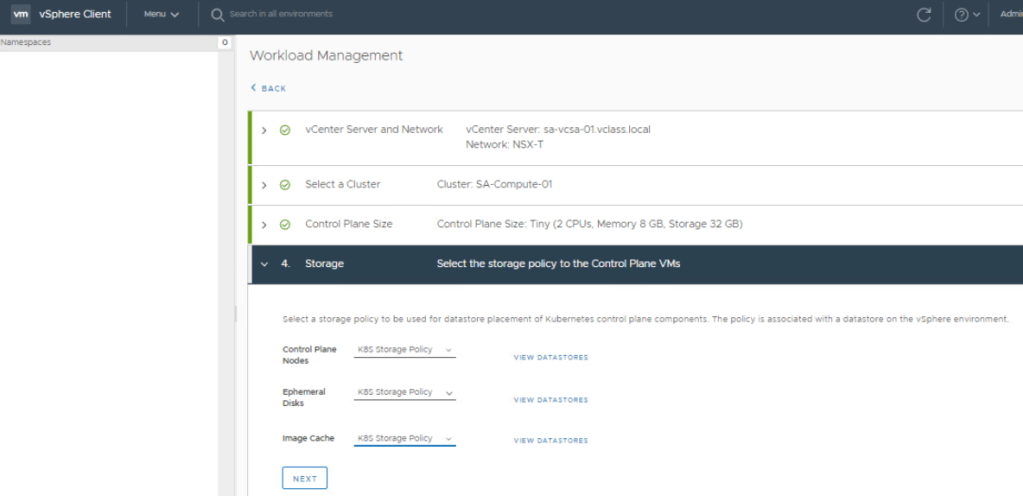
Select the storage policy for Control Plane Nodes, Ephemeral Disks, Image cache. vSAN Default Storage Policy can be used if only storage/cluster provided. Click Next.
That’s it. Click Finish. The Tanzu deployment will now proceed (The entire process can take up to 45 minutes to complete).

The Control Plane Node IP address is the same API Server Endpoint we referred to earlier in this post. This will be the end point where you can download and install the vSphere plugin and the vSphere docker credential helper. To validate connectivity, simply open a web browser and go to the IP address http://<ip-address>

If you are not able to reach the Control Plane Node IP address/API Server Endpoint, it is possible that you might have invalid MTU settings in your environment that will require further troubleshooting. I did come across this at a customer site, and documented the MTU troubleshooting process here. Good luck.
In my next post, I will cover how to configure your first namespace.

You must be logged in to post a comment.