
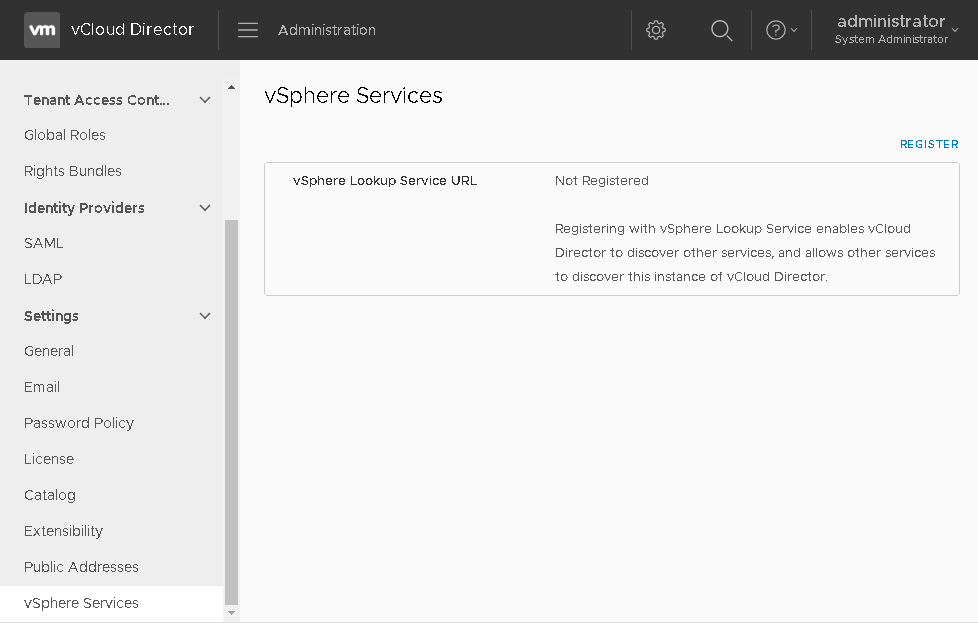
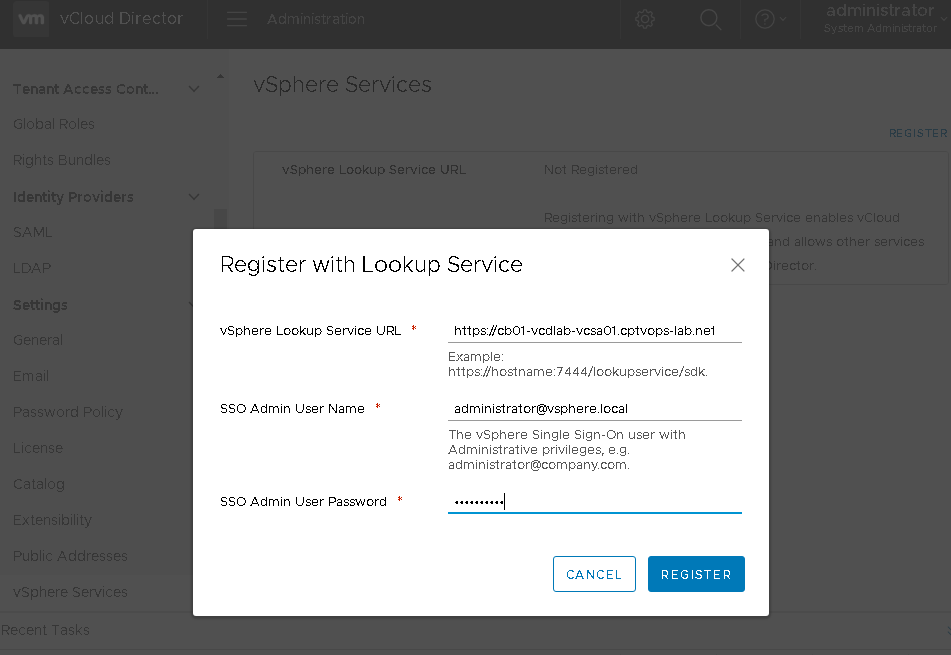
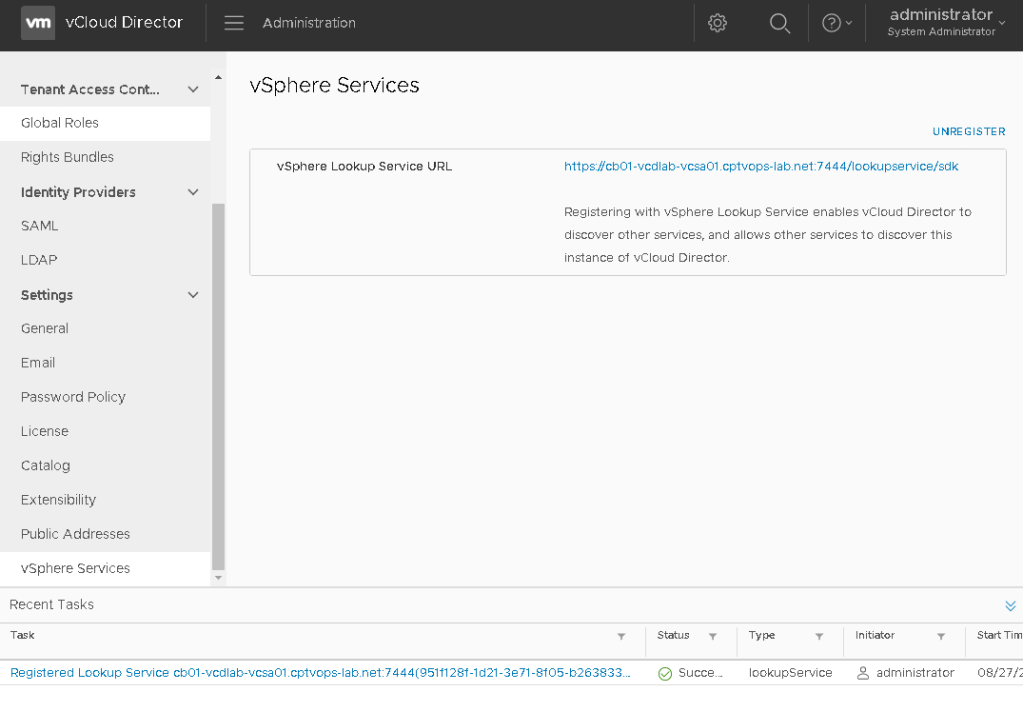
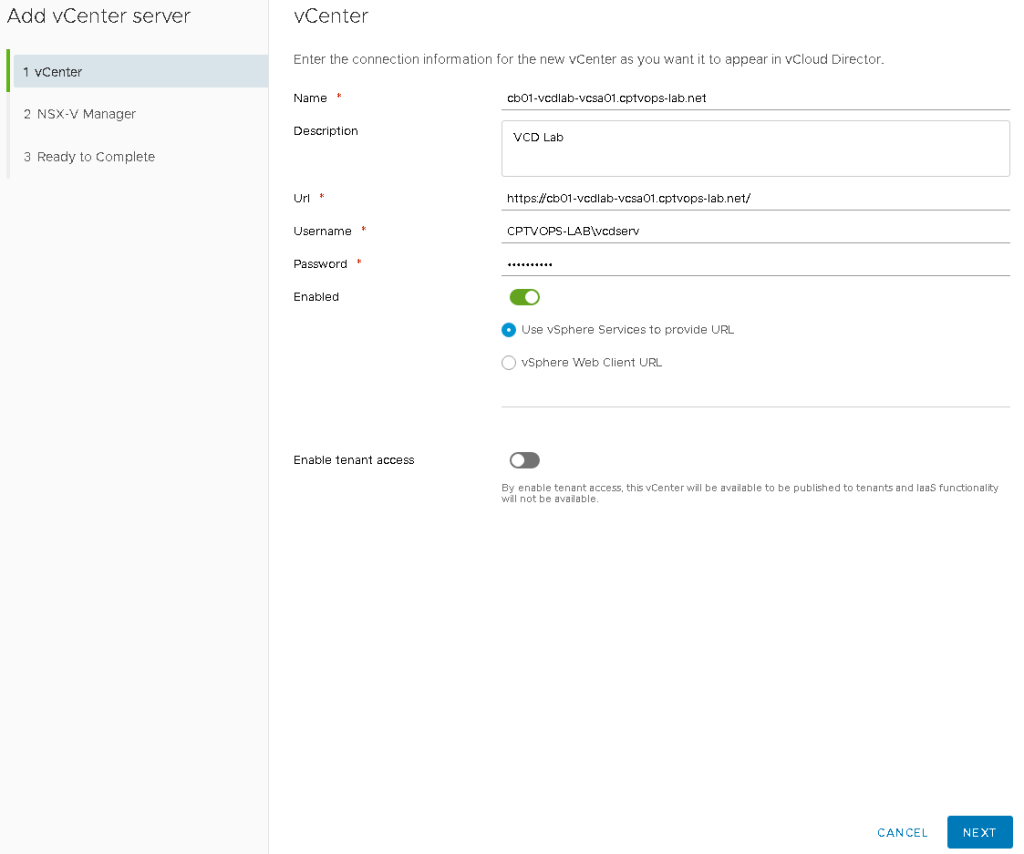
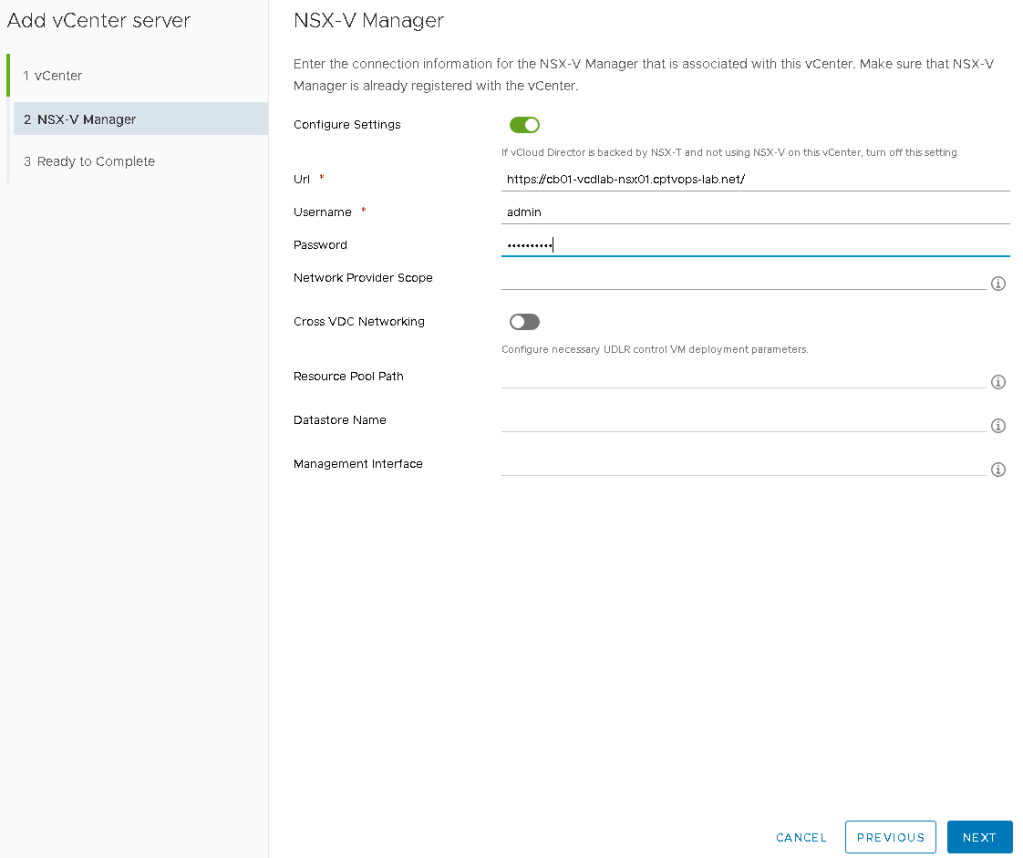
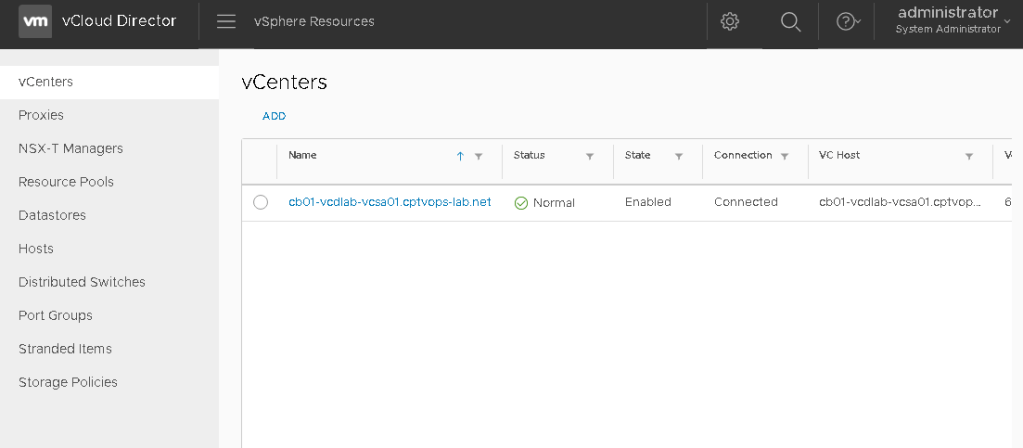
This is a continuation of deploying VMware Cloud Director 10. In my last post, I walked through configuring the vSphere lookup service, and adding the vCenter (here). In this post I’ll go over adding a Provider Virtual Data Center (PVDC).
Adding a PVDC
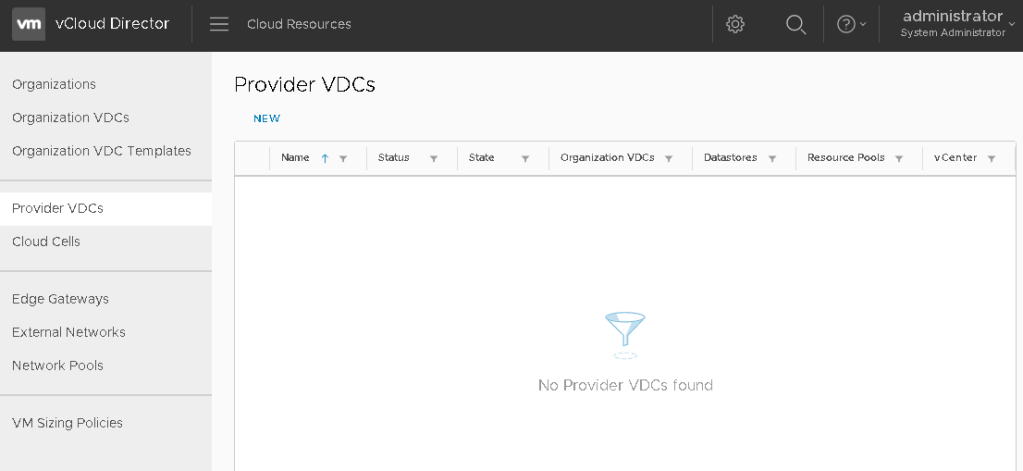
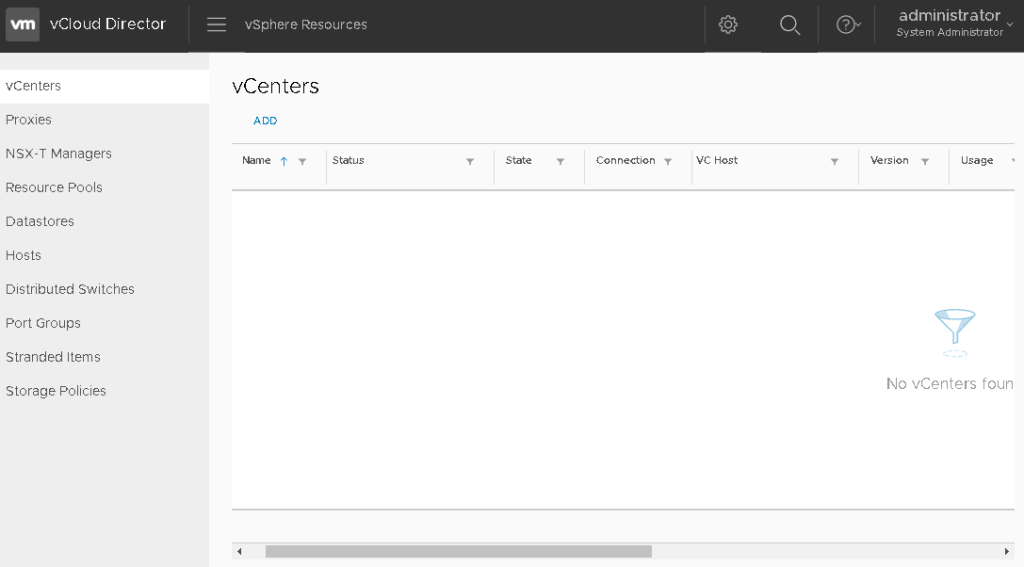
Log into the vCD provider interface, and switch to the Cloud Resources view by clicking the menu to the right of vCloud Director logo. Select the Provider VDCs option in the menu on the left, and then “NEW” link to begin.
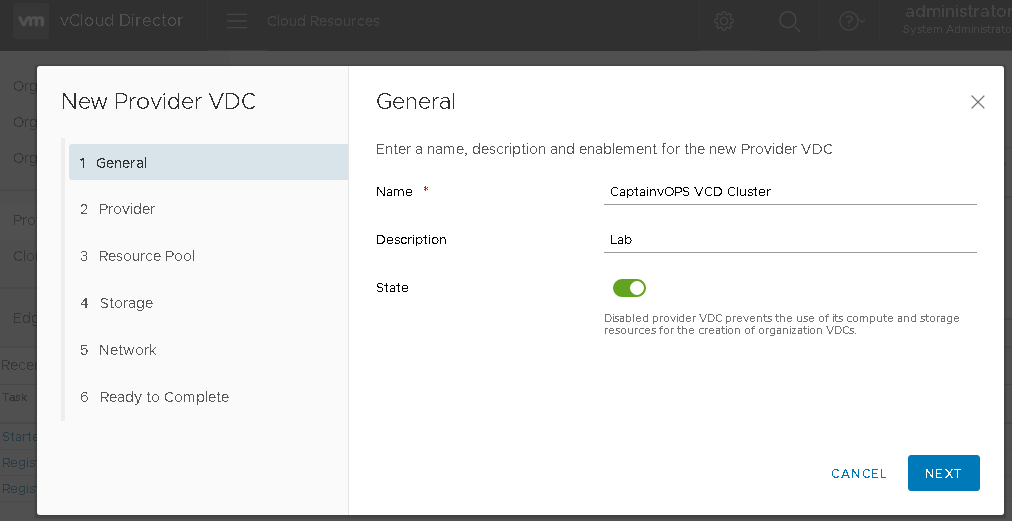
On page 1, you’ll have to fill in some general information about the PVDC. Give it a name and description meaningful to the resources the PVDC will be connected to. In this example, I am connecting to my home lab. Click NEXT.
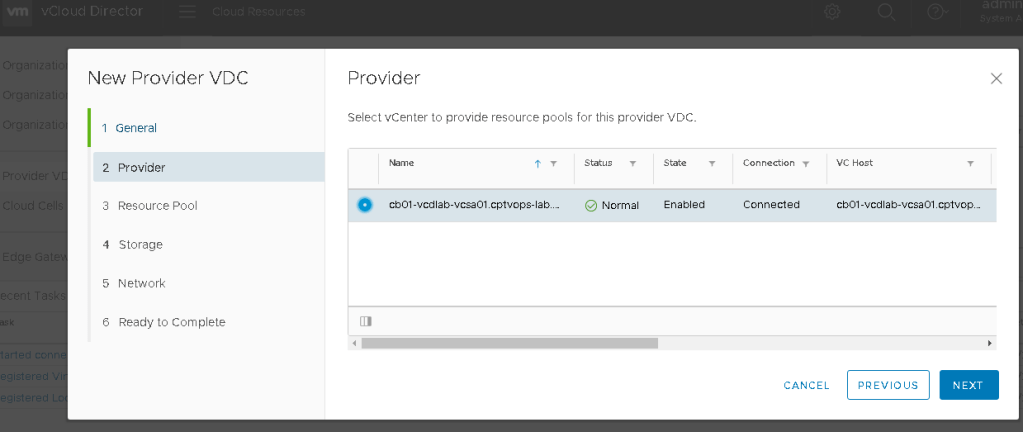
On page 2, select the vCenter and click NEXT.
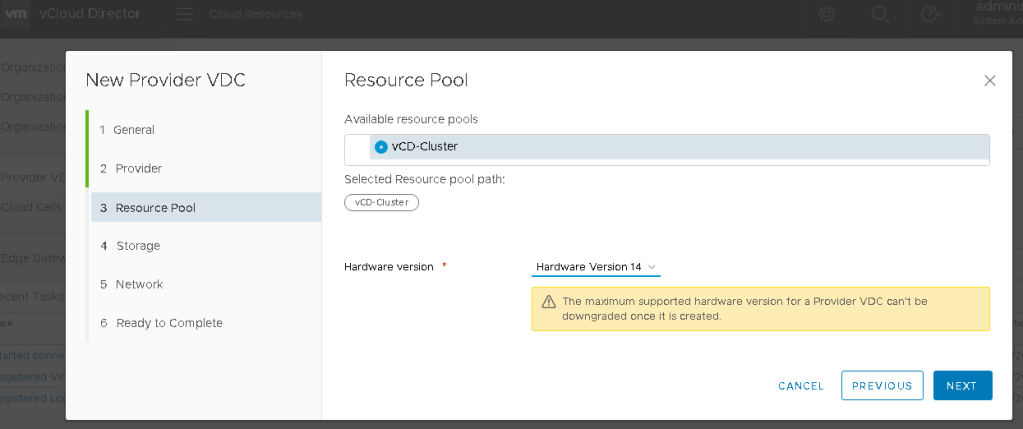
On page 3, you’ll see the available resources. This would be for both compute and storage. In this example I am using a lab, so I only have one available. Hardware compatibility is also configured here for the future tenants deployed to this PVDC. Click NEXT
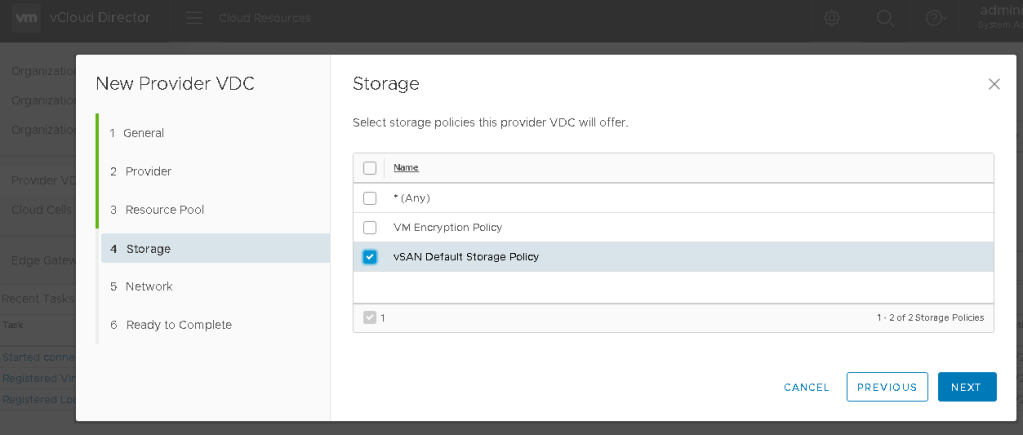
On Page 4, the available storage policies configured in the vCenter that the tenants would use in this PVDC, will be available for selection here. Click NEXT.
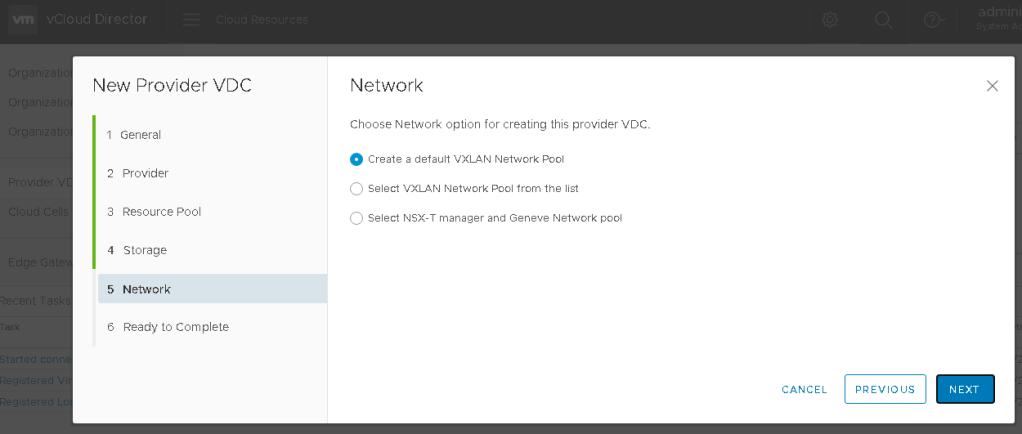
On Page 5, your mileage may vary depending how your environment is configured. In my lab example, I have chosen the default selection. Click NEXT.
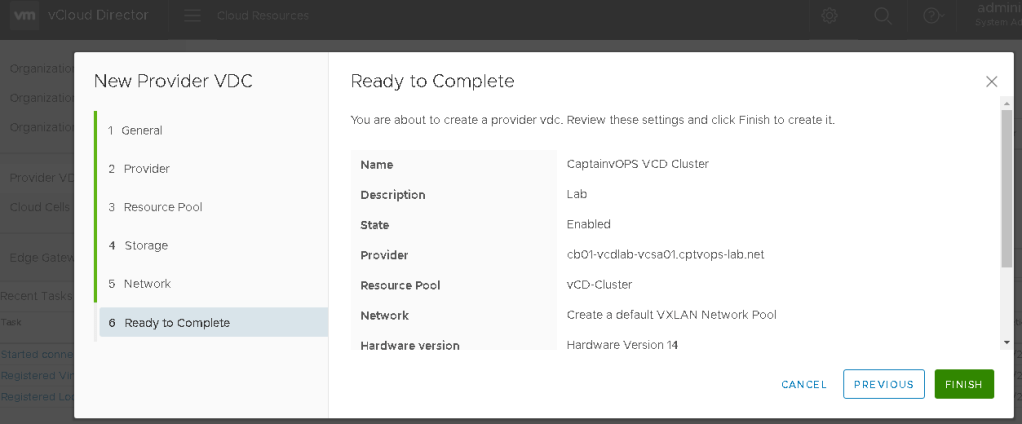
On page 6, you are presented with a confirmation of the selected config. Make any adjustments, and click FINISH.
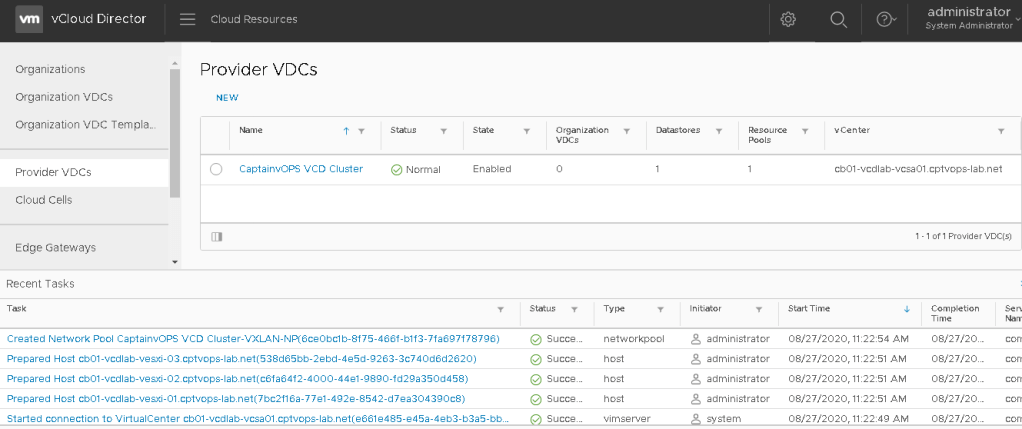
Be patient as it can take some time to build the PVDC. Just monitor the recent tasks for task progress and completion. The end result should show a “Normal” for a status under the configured Provider VDCs.
At this point, the provider side configuration is almost complete. We still need to configure the public facing address. If this were a production deployment, we also find it necessary to configure a VIP/load balancer to place in front of the VCD appliances to handle traffic load. For production deployments there would also be the need to setup signed certificates for the appliances.
In my next blog I’ll go over configuring the public address.

You must be logged in to post a comment.