VMware Cloud Foundation 9: Upgrade to 9.1 – Part 2: Upgrading SDDC Manager and Deploying VCF Service Components

Blog Date: May 2026.

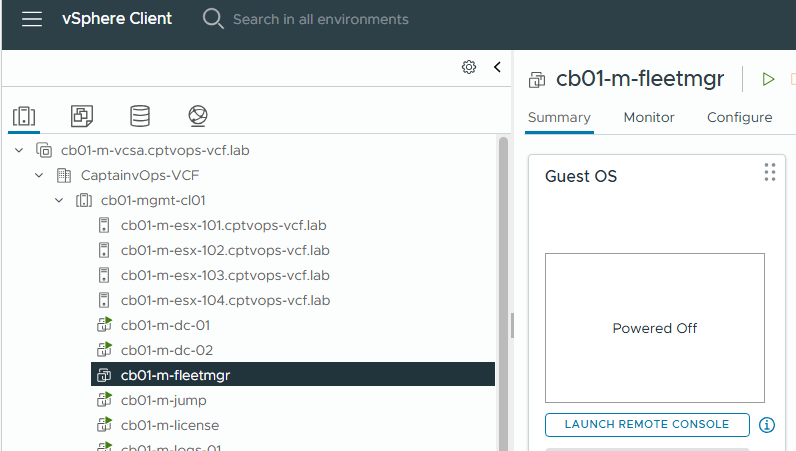
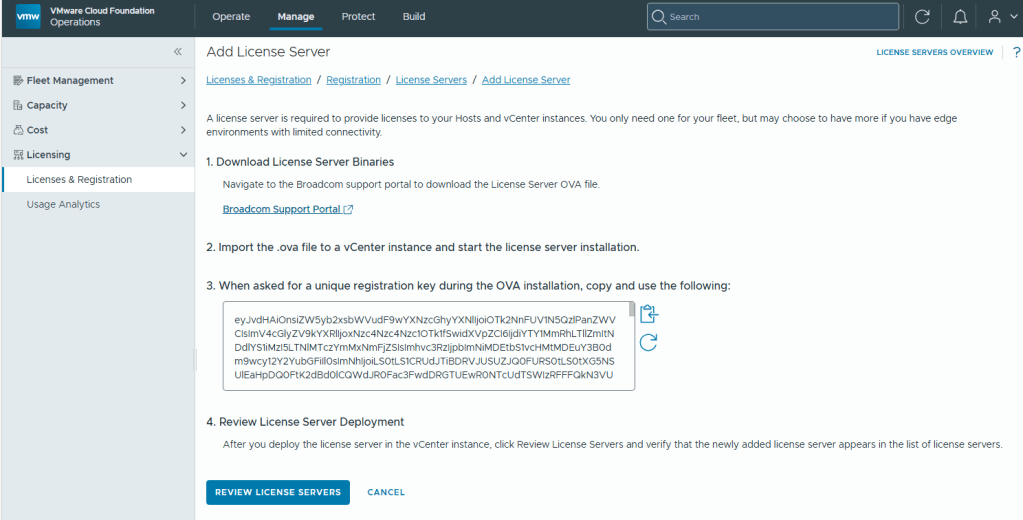
In my previous Blog entitled: VMware Cloud Foundation 9: Upgrade to 9.1 – Part 1: Upgrading VCF Ops to 9.1 and VCF License Appliance Deployment, I covered the steps to Upgrade VCF Ops which decommissioned VCF Fleet Manager, and then the deployment and configuration of the new VCF License appliance.

In this blog, I will walk through the upgrade of the SDDC Manager and the deployment of the new VCF Service components.

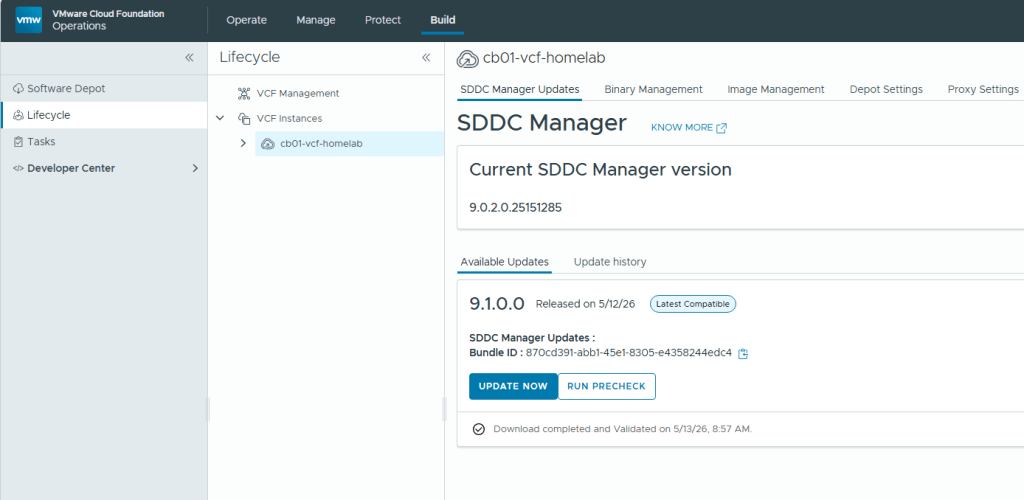
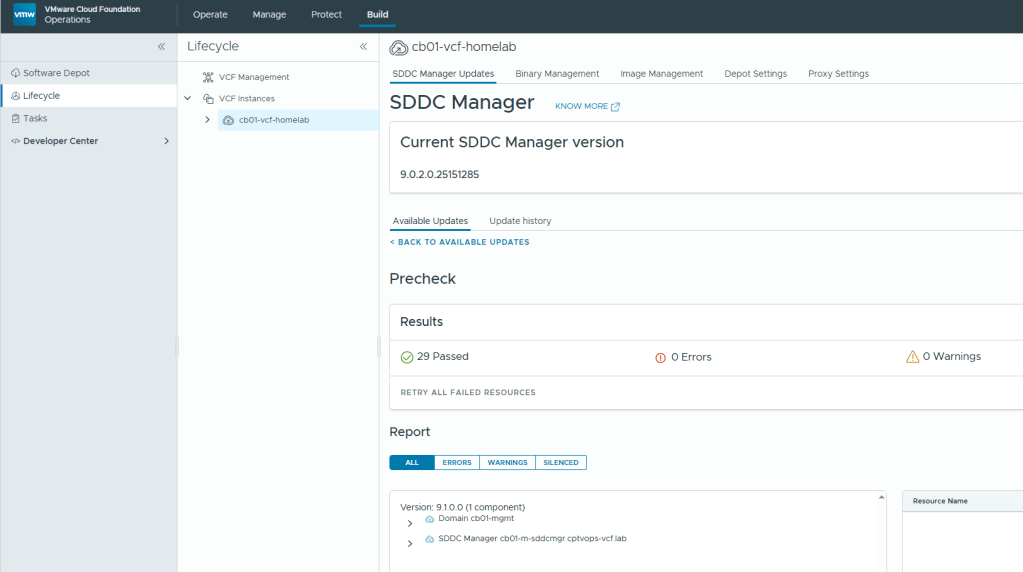
The upgrade from 9.0.2 to 9.1 is straight forward. Take the standard snapshot, run the prechecks, and then click the ‘UPDATE NOW’ button.

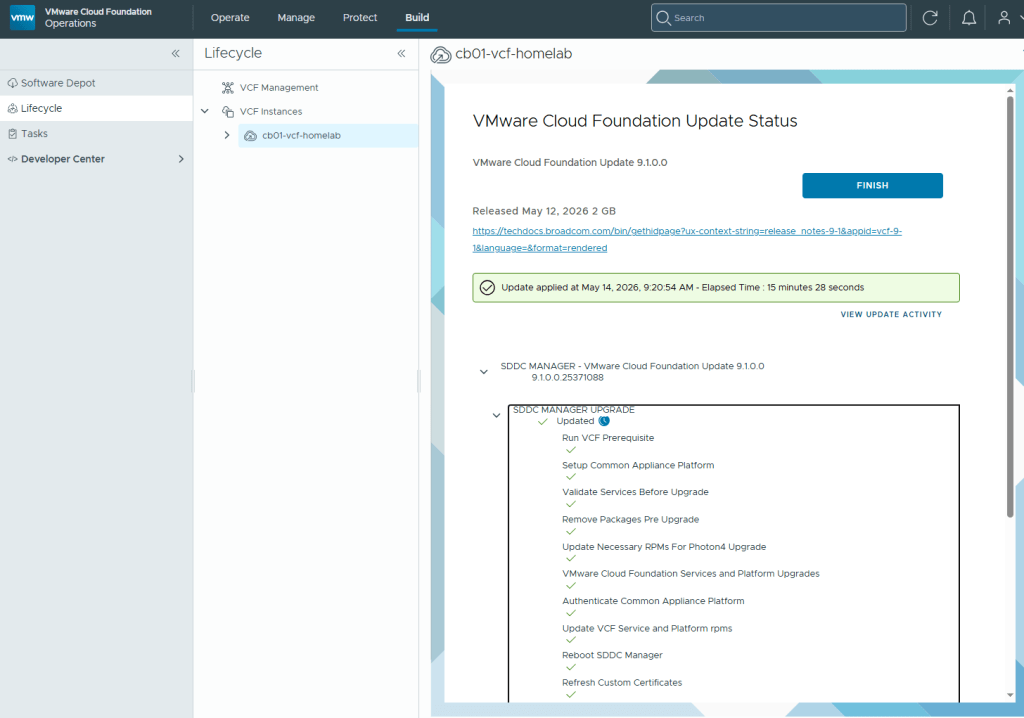
For my lab environment, the SDDC manager upgrade took just over 15 minutes to complete.

Now that the SDDC manager has been upgraded to VCF 9.1, customers are required to download the binaries for the new VCF License Server, and Management Services.

Please see the following Broadcom Tech Docs link for What’s new with VCF 9.1: https://techdocs.broadcom.com/us/en/vmware-cis/vcf/vcf-9-0-and-later/9-1/release-notes/vmware-cloud-foundation-9-1-0-0-release-notes/what-s-new.html

See the following Broadcom Tech Docs link for more details on VCF 9.1 Management Services Components: https://techdocs.broadcom.com/us/en/vmware-cis/vcf/vcf-9-0-and-later/9-1/deployment/vcf-management-appliances.html#GUID-2bab6de2-024a-4900-9716-7fba53ea0721-en_id-677f5f42-5fd2-4885-a3e0-9c9617cc2907

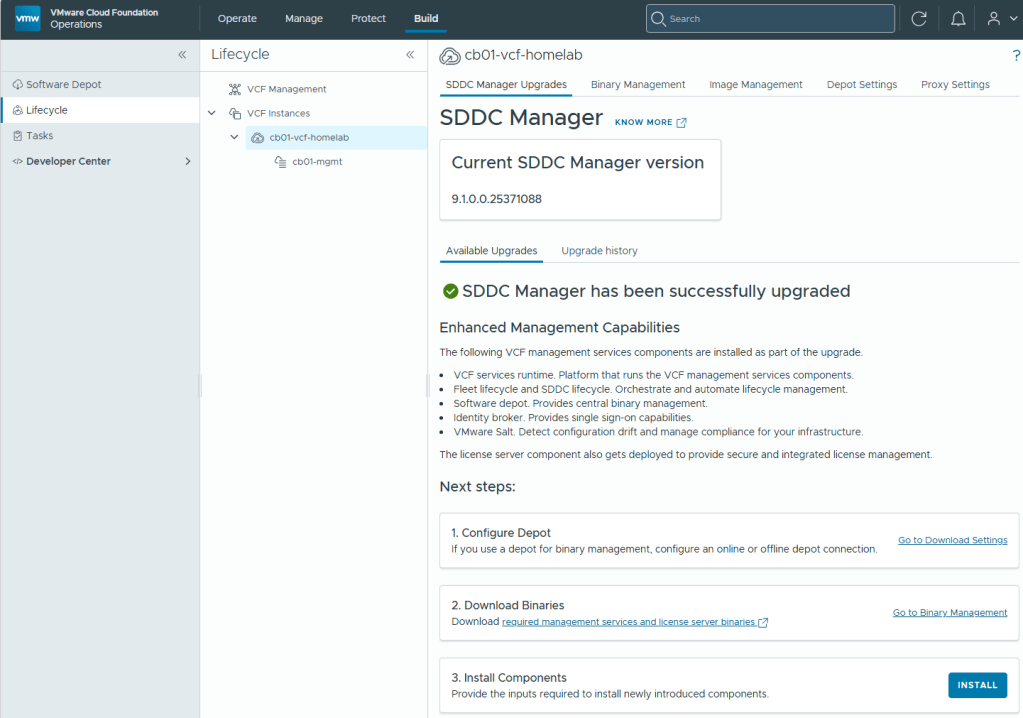
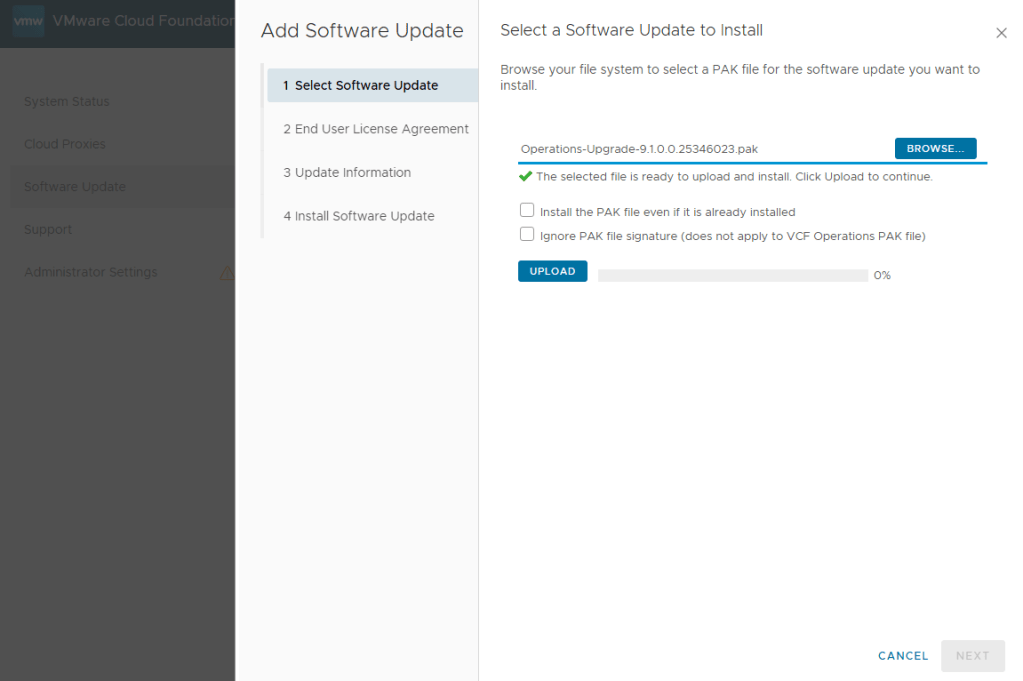
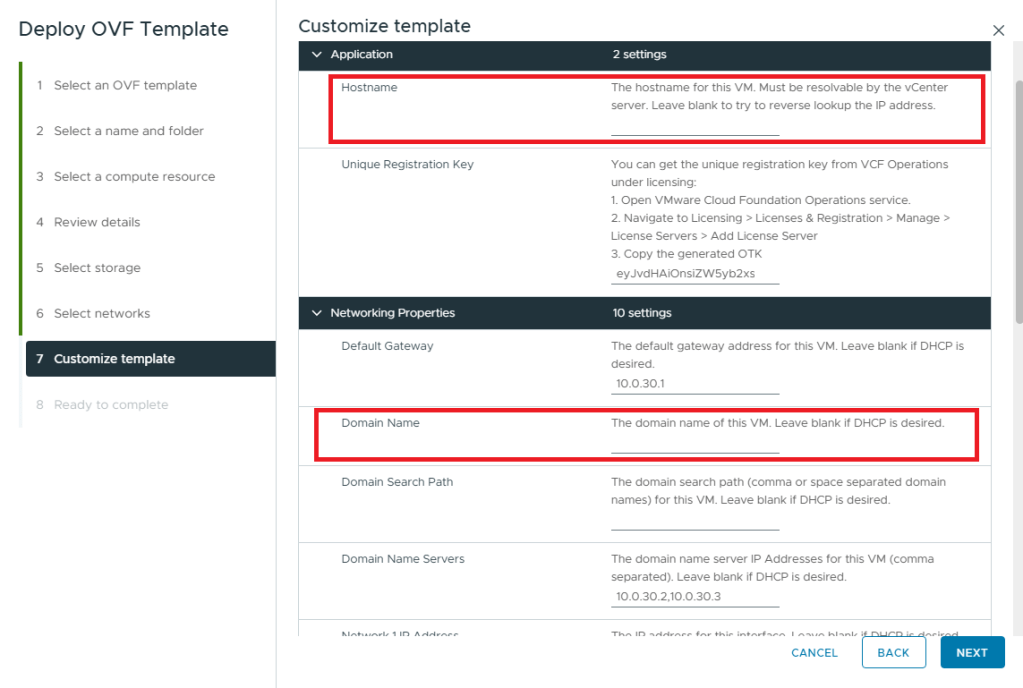
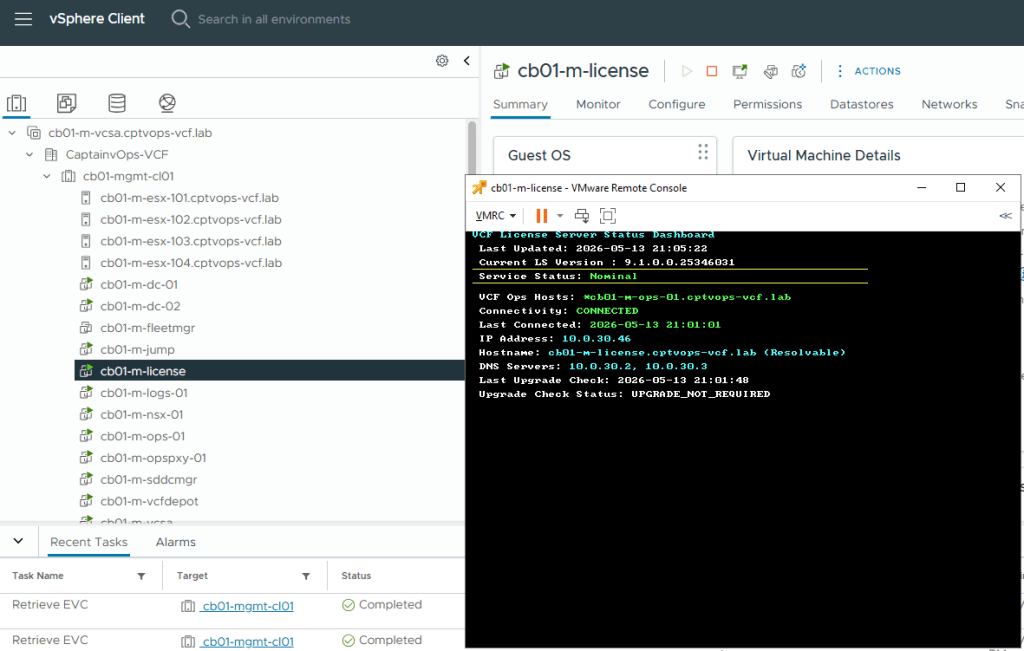
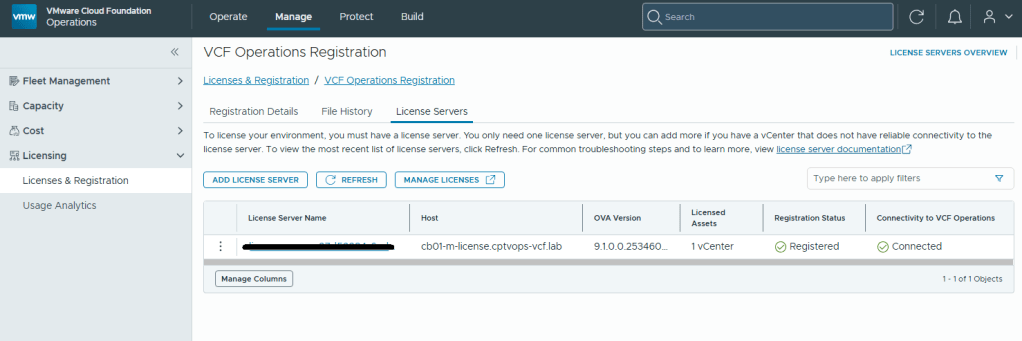
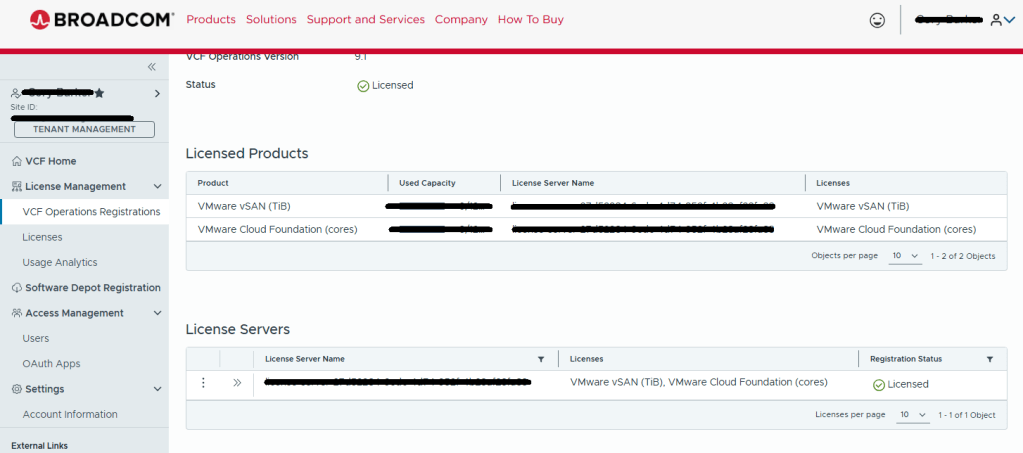
I covered how to setup the new VCF License server in my last blog, so I’ll instead jump right into deploying the new VCF management services. You will need to go into Binary management and download the installer binaries per the Broadcom documentation.

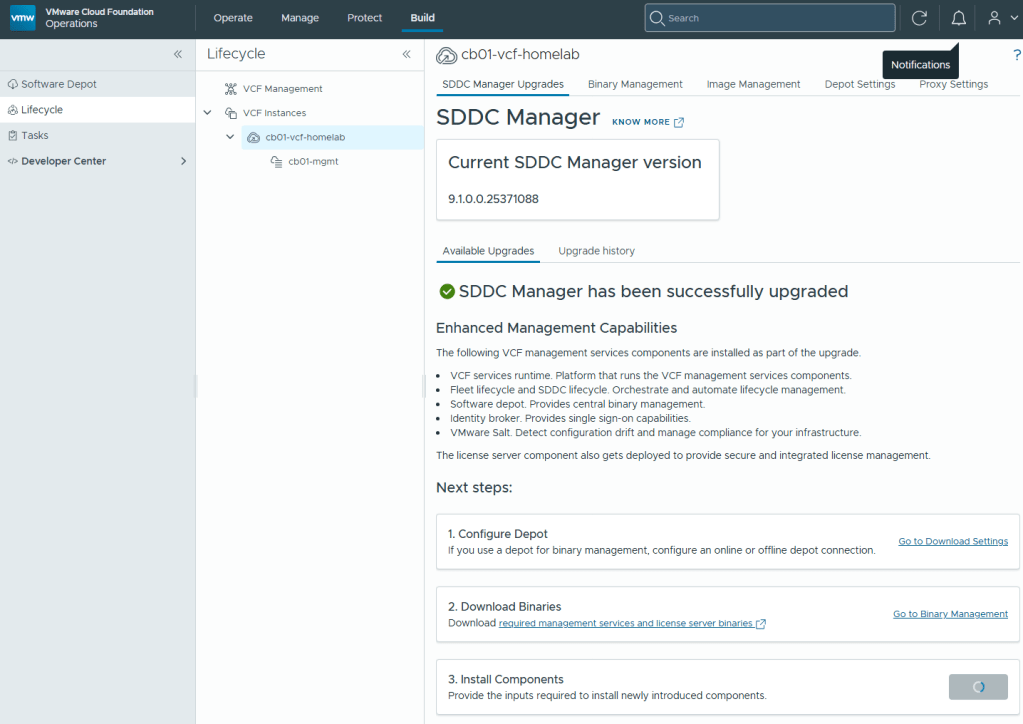
Once completed, under the “Next Steps” section on the previous screen to upgrade the SDDC manager, Click the ‘INSTALL’ button on step 3.

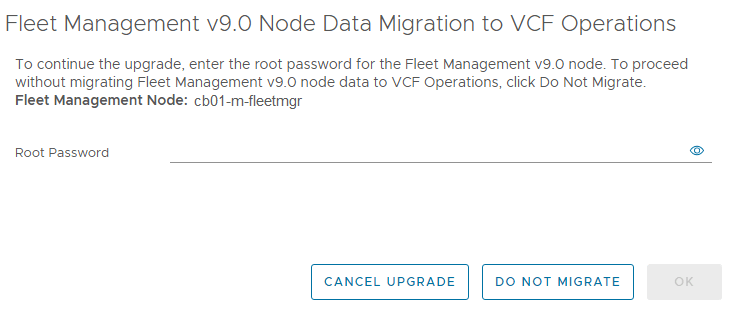
You will be prompted to enter the connection details for your VCF Operations deployment.

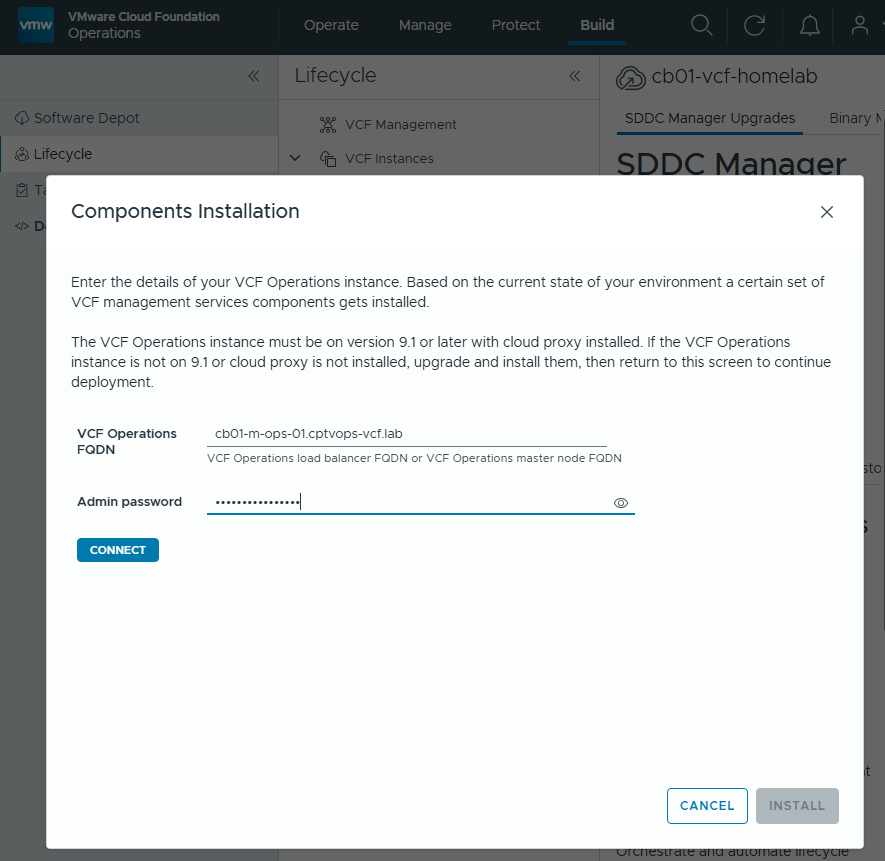
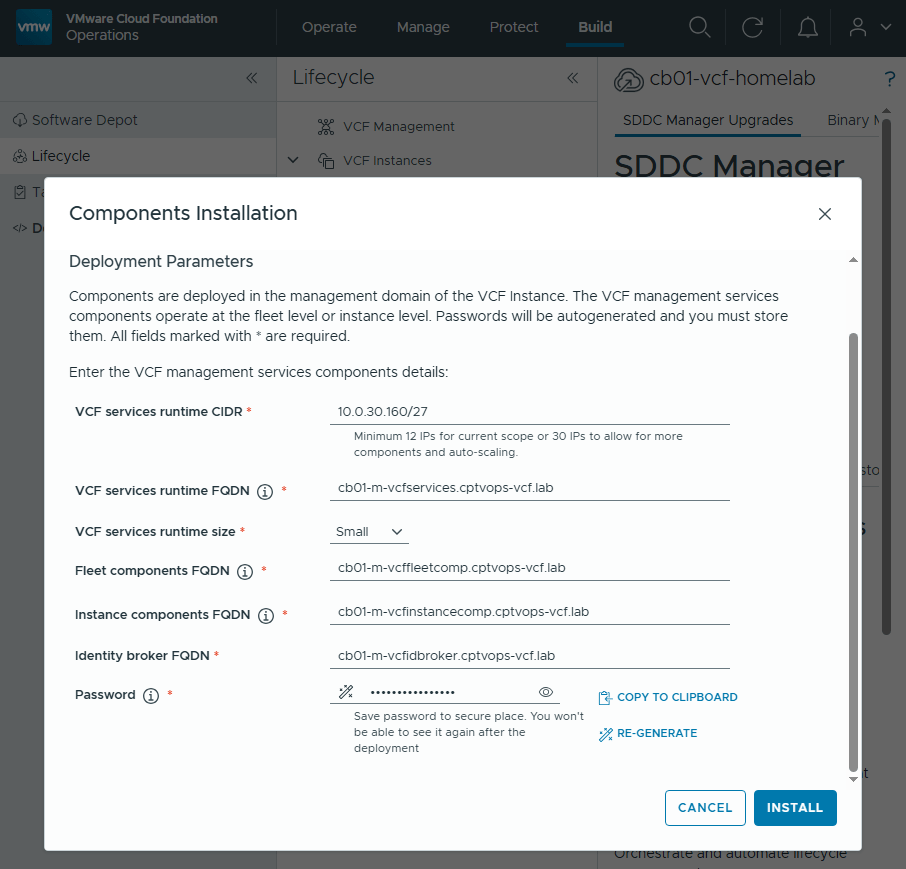
Once you click the ‘INSTALL’ button, you will eventually be lead to the Components Installation section where you need to add the deployment Parameters.

These will be containers running behind a VIP FQDNs that you will need to specify in DNS. VCF 9.1 requires a minimum of 12 Ips for the “current scope”, but I have been hearing rumors that defining a scope of 30 IPs is the way to go here to avoid heartburn. Click ‘INSTALL’ when ready.

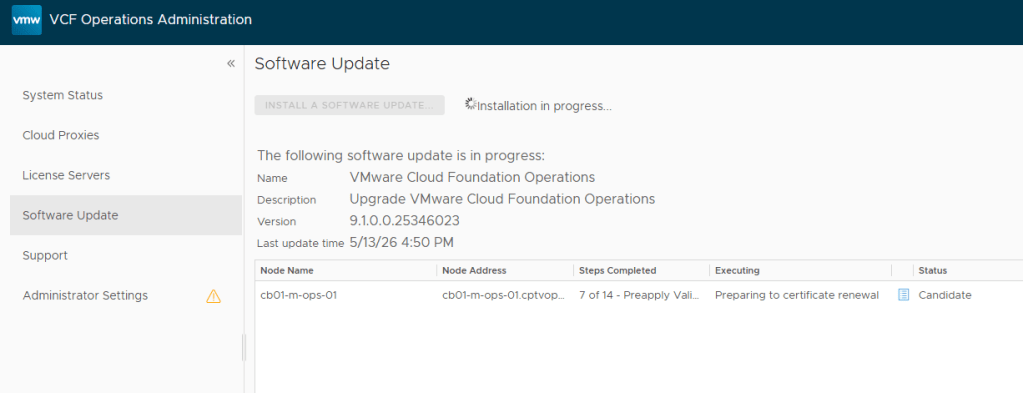
You will be kicked back to this screen, where the only indication that something is happening will be the “Step 3” install button has changed to a progress indicator.

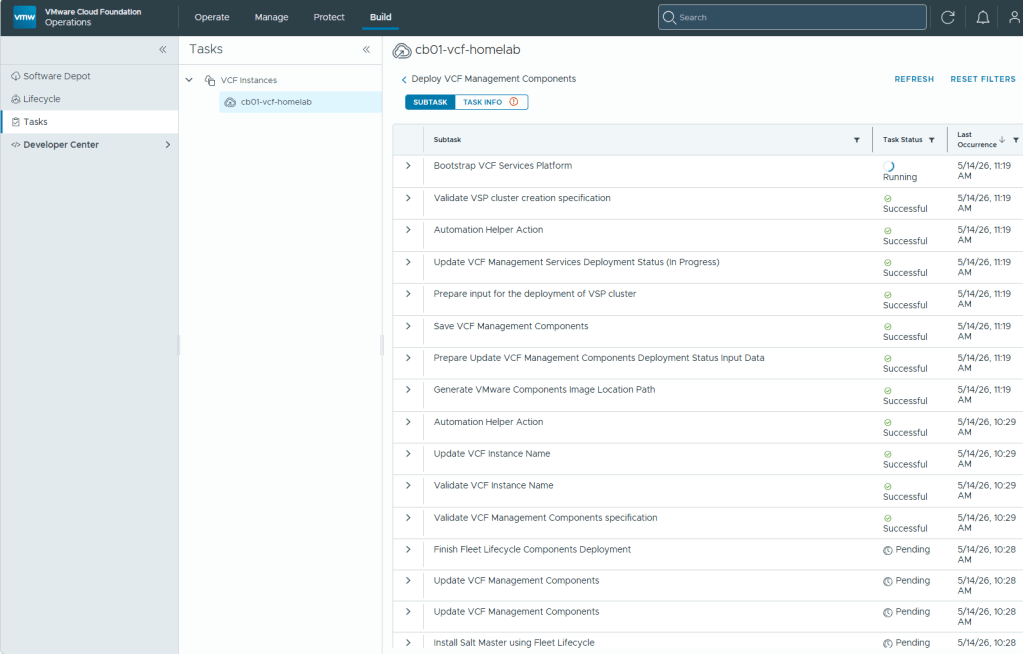
In the navigation menu on the left, click the “Tasks” tab for more details on the current deployment progress.

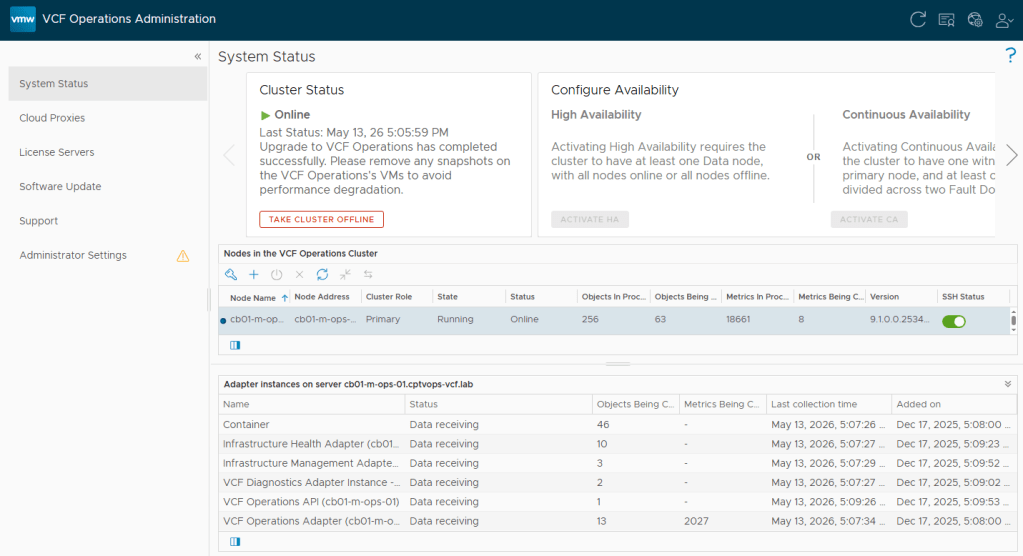
In my lab, the deployment and configuration of these new VCF 9.1 Management Services Components took over an hour to complete.

With the SDDC manager now upgraded to 9.1, and the new VCF Management services now deployed, In my next blog post I’ll continue the VCF 9.1 upgrade.

VMware Cloud Foundation 9: Upgrade to 9.1 – Part 1: Upgrading VCF Ops to 9.1 and VCF License Appliance Deployment

Blog Date: May 2026

In part 1 of this blog series, I will run through how I upgraded my VCF 9.0.2 instance to VCF 9.1.

The upgrade itself is partially automated with a few out of band steps involved.

Note: In this upgrade, the fleet management appliance will be automatically powered off for decommissioning.

Part 1: Manually Upgrade VCF Operations to 9.1

1) First, Snapshots of the VCF Ops appliances.

2) Access the admin page for the primary/master VCF Operations appliance (https://vcfops-fqdn/admin), and login using an admin account. On the left hand menu, select Software Update, and then click the “Install A Software Update…” button. In my case, I had the upgrade.pak file already downloaded from the Broadcom support portal, so I just needed to browse for it.

Click UPLOAD.

3) Once the upgrade is started, and VCF Ops reboots for the first time, you’ll need to log back into the admin page. There will be a prompt asking for the root password of the fleet management appliance, to begin the migration and eventually shutdown the appliance. Click OK

4) Sit back and give the upgrade time to complete.

5) In my lab, it took around 10 minutes or so, but production times may vary.

6) The old fleet management appliance should now be powered off in the vCenter.

Logging back into the normal VCF Operations 9.1 user interface, will reveal that Broadcom now requires a new VCF license appliance to be deployed by way of a banner across the top of the screen.

Part 2: VCF License Appliance Deployment

VCF Operations 9.1 comes with a new interface! I know… Every time they change the interface and I finally get used to where everything is, they change it again.

1) Select the Manage tab on the top, and then under Licensing in the left menu, select “Licenses & Registration”. Here you will be presented with a link to the Broadcom portal to download the new license appliance. You will also note the unique registration key that is needed for the OVA installation.

      2) Deploying the License Appliance OVA to management domain vCenter is pretty straight forward, however I did want to call out a bug/feature I noticed. Once this appliance deploys, it connects to VCF Operations, and then automatically connects to the Broadcom VCF Business Services Portal, registers itself, and licenses should be automatically applied. The bug/feature I found was during the License Appliance OVA deployment, and specifically on step 7 while customizing the template.

      I found that if I specify a hostname and/or specify the domain name, the appliance would configure as hostname.domain.domain. It didn’t matter if I just defined the hostname with the Domain Search Path defined, or if I just defined the Domain Name (FQDN) of of the appliance.

      My workaround here was to avoid populating the Hostname and Domain Name fields leaving them blank, and trust that DNS is working properly in my lab and forward and reverse lookup is defined.

      The appliance itself is rather small. It comes with three 4GB disks, 2 CPUs, and 4GB of memory. It does define an internal container IP address of 172.x.x.x, and I did not see a way to change the internal IP it uses.

      3) Turn the appliance on. Assuming it is on a network that it can reach DNS and the gateway, the first boot scripts will configure this black box. Once those configuration scripts complete and the license appliance finishes booting up, it will first connect to the VCF Operations deployment registering itself with the unique key that was provided during the deployment. It will within 15 minutes connect to the VCF Business Services portal and automatically register itself and licenses will be applied.

      4) In VCF Operations, you should see something like this if the deployment and configuration were a success. Registration Status (Registered) and Connectivity to VCF Operations (Connected).

      5) Eventually the Broadcom VCF Business Services Portal will look something like this. Broadcom does say that the process can take around 15 minutes to complete.


      In my next post, I’ll start the upgrade process for the rest of the VCF Homelab.