
vSphere 8
Windows Server 2019 Certificate Authority
Blog Date: December 16, 2022
Replacing the machine SSL certificate is a breeze in vSphere 7 and 8. Many organizations have security requirements and need for the vSphere web interface to have that secure padlock icon. Most organizations I have come across have a Microsoft Certificate Authority in house, but there are exceptions. In my lab, I have a Microsoft CA configured, and that is what I’ll be using in this example.
VMware has a pretty good KB2097936 article that discusses how to use vSphere Certificate manager.
Installing and managing custom signed certificates is not difficult. Can this be done during normal business hours? I would argue, yes. Some organizations will choose to do it after hours, however. When the certificate is installed, services are restarted on the vCenter to reflect the change. During that minute or two, you won’t be able to manage your vSphere infrastructure from the vSphere client, but all of your ESXi hosts, and all of your workloads will continue to run untouched. If the certificate is bad, you can always revert to snapshot and have everything as it was prior to replacing the SSL certificate in a matter of minutes. Again, the ESXi and VMs will be unaffected. However, what you do need to keep in mind, is that when you replace the certificate on the vCenter, other services that direct connect to the vCenter like Aria (vRealize) Operations, log insight, automation, network insight, etc., would all need to have their connection to the vCenter refreshed. Any third party solutions out there would also need to have their connection to the vCenter refreshed.
- I recommend that you take a snapshot prior to messing with certificates.
- After you’ve logged into the vSphere client with an admin level account, click the three hash marks next ‘vSphere Client’ in the upper left (some call it a hamburger), and select “Administration” from the menu.
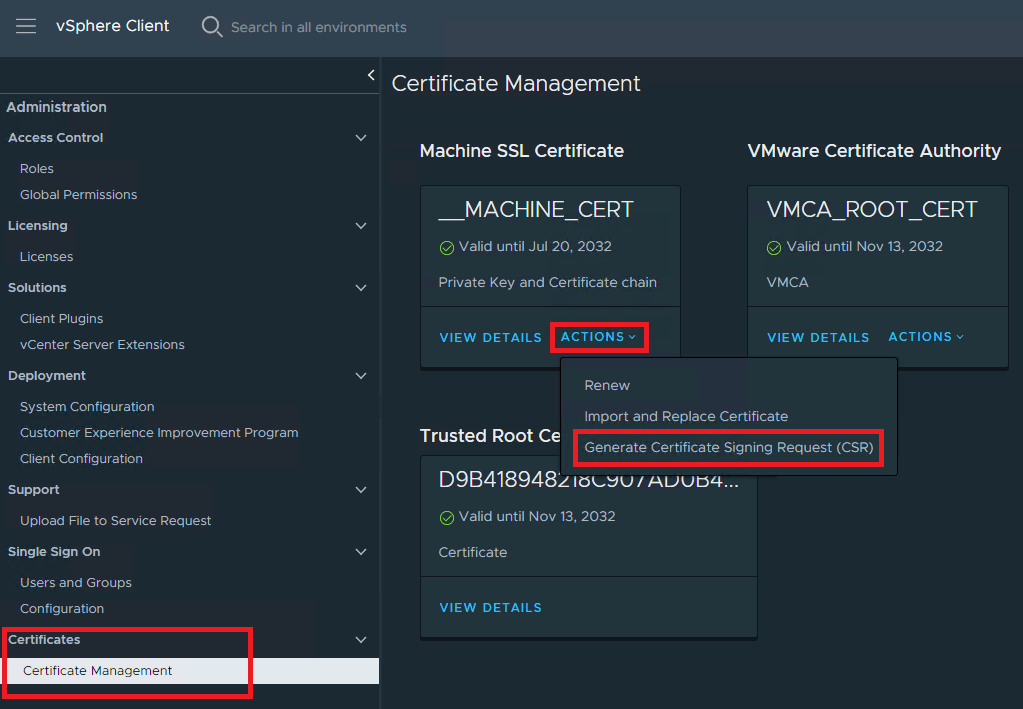
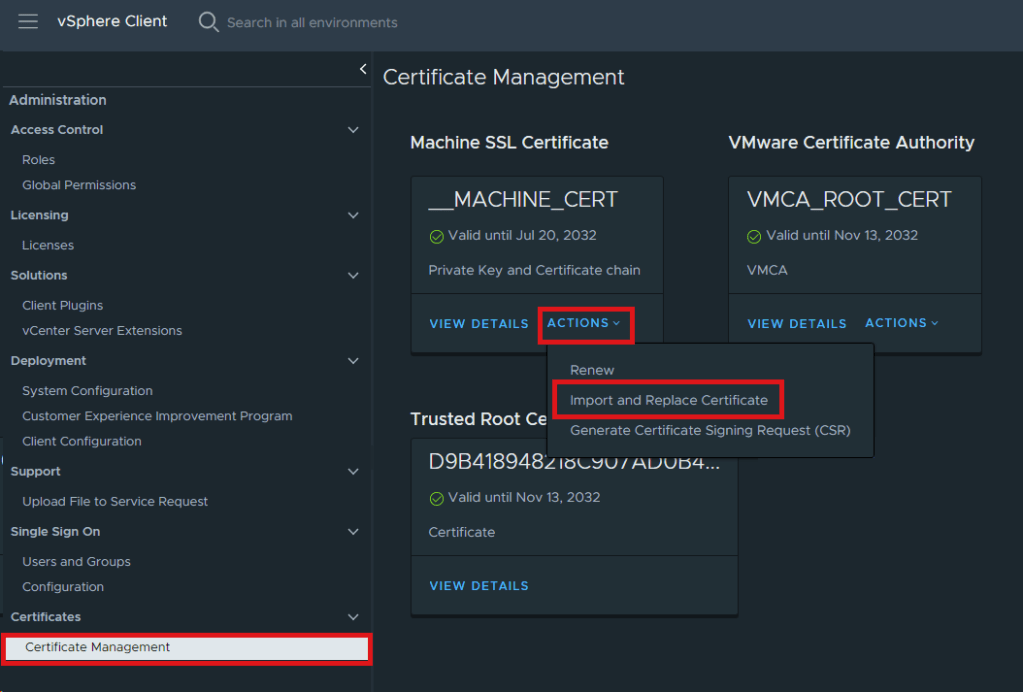
- On the Administration page, select “Certificate Management” under ‘Certificates’.
- On the Certificate Management screen, you will see Trusted Root Certificate at the bottom and Machine SSL Certificate at the top. In this example, we are only worried about the Machine SSL Certificate. Just below it, you will see an “Actions” drop menu, and from the menu we need to select Generate Certificate Signing Request (CSR).
5. Fill out the specific details for your certificate. Every box should be filled out. Boxes marked optional are just that. I personally fill out the Subject Alternative Name with the FQDN and IP address on the vCenter comma separated. Click NEXT.

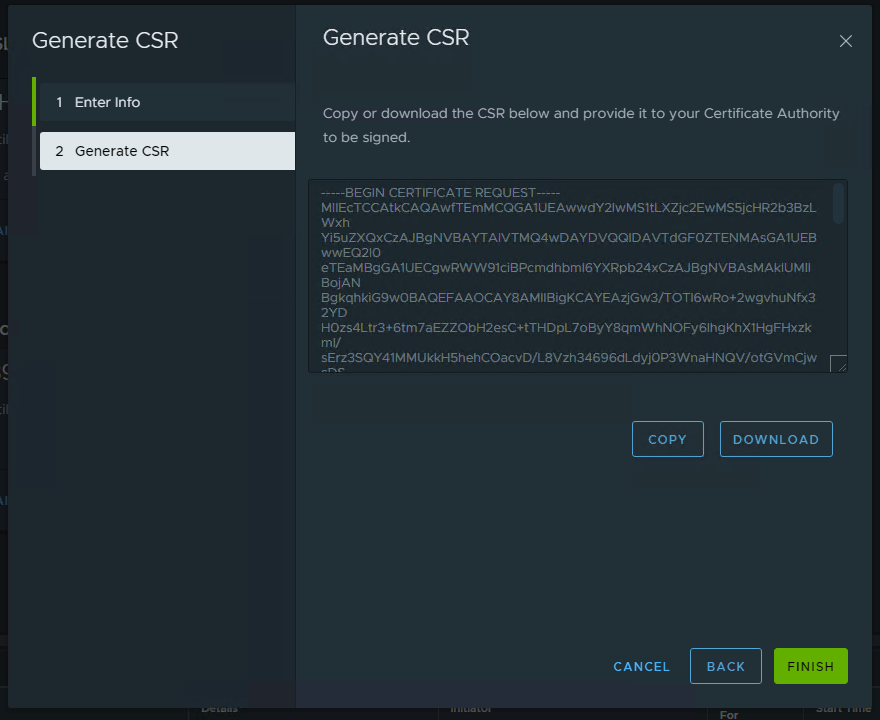
6. You can COPY or DOWNLOAD the CSR. In this example, click COPY and then click finish.
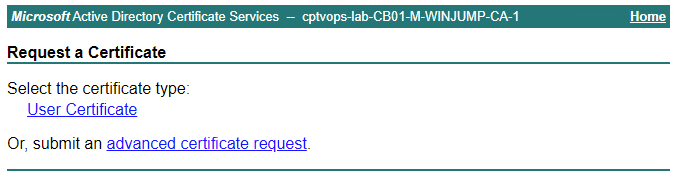
7. Now we need to connect to the Microsoft CA web portal. Click “Request a Certificate”.

8. Click advanced certificate request
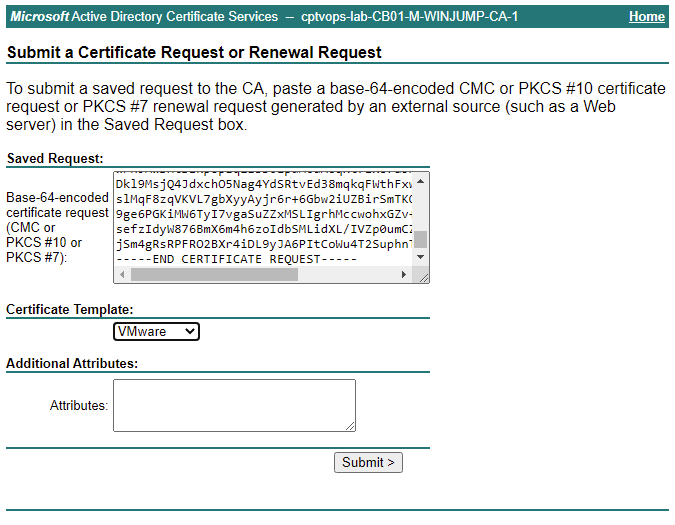
9. Paste the vCenter CSR created earlier into the saved request box. Next, chose the Certificate Template. I created a VMware template using the VMware knowledge base article here KB2112009.
10. Select “Base 64 encoded”, and then click “Download certificate”.

11. Now that we have downloaded the base 64 encoded certificate for the vCenter, we also need the CA certificate. We can download this from the Microsoft CA Web Portal homepage. Click “Download a CA certificate”
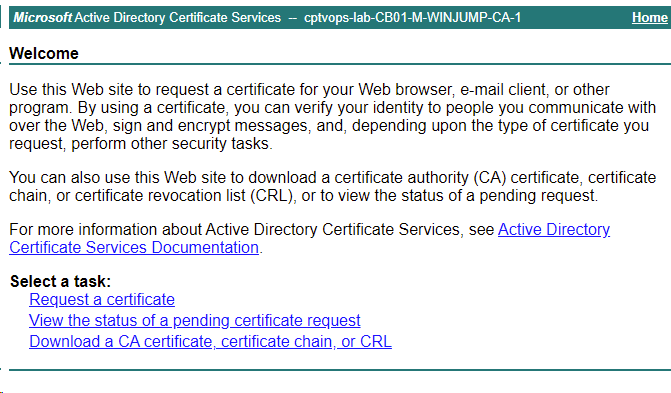
12. For the Encoding Method, select Base 64, then click “Download CA certificate”.

13. In the vSphere client Certificate Management screen, click the Actions drop menu and select “Import and Replace Certificate”.
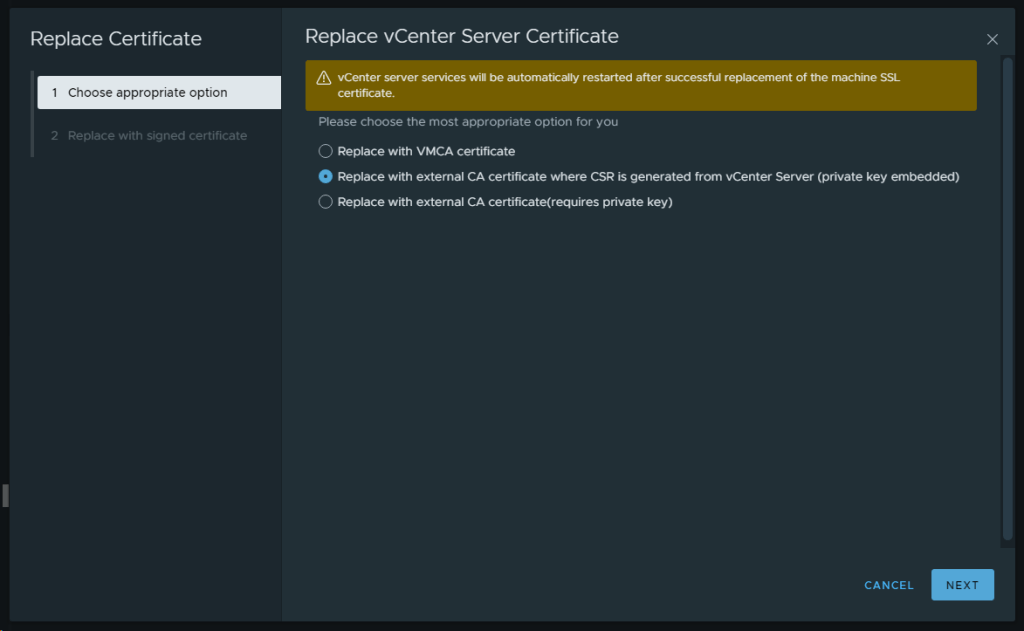
14. On the Replace vCenter Server Certificate screen, select the “Replace with external CA certificate where CSR is generated from the vCenter Server….” option and click NEXT.
15. Upload the vCenter Machine SSL Certificate in the top box, and the CA certificate in the bottom box. In some configurations, your organization might have more than one CA, so you may need to upload a chain CA root certificate(s). In this example, I only have one CA certificate, so there’s only one to upload. Once you click REPLACE, know that the vCenter will become unavailable while services are restarted.

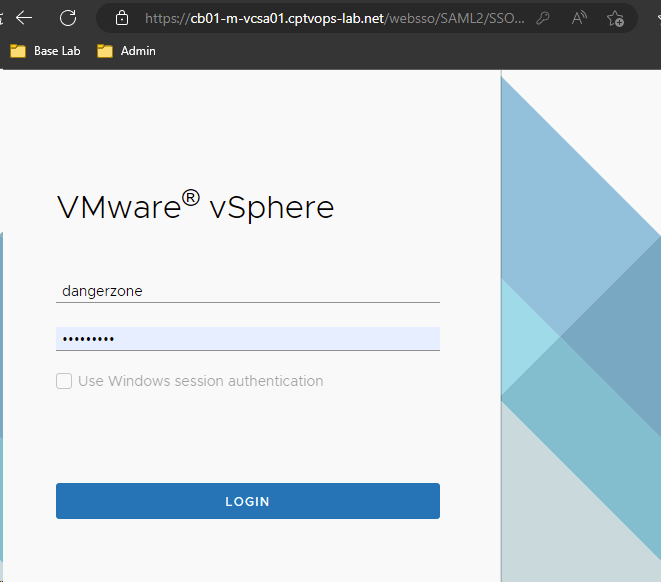
16. You will either need to dump your existing cookies for the vSphere environment that you just replaced the certificate for, or use private/incognito browser mode and reconnect to the vCenter. Services should restart in a few moments. As long as your certificate was correct, you should now see the secure padlock.
17. Once logged into the vCenter, you can go back to the Certificate Management screen, and you should see the new Machine SSL Certificate. You will also see a new Trusted root certificate has been installed. From this point forward, you will need to manage both the Machine SSL certificate and the CA Trusted Root Certificate that has been installed on the vCenter. Depending on organizational policies, the validity length of these certificates will differ. In my home lab, I have my Microsoft CA configured for 10 years because I know I will rebuild it prior to the certificates expiring, and I don’t want to manage certificates more than I have to.

When everything checks out, don’t forget to clean your room and delete the snapshot.


You must be logged in to post a comment.