In my previous bog HERE, I walk through the steps of creating a backup directory on a QNAP NAS, enable SFTP connections, and created a service account. In this blog, I will complete the backup configuration in the SDDC manager for this VCF 9 deployment in my home lab.
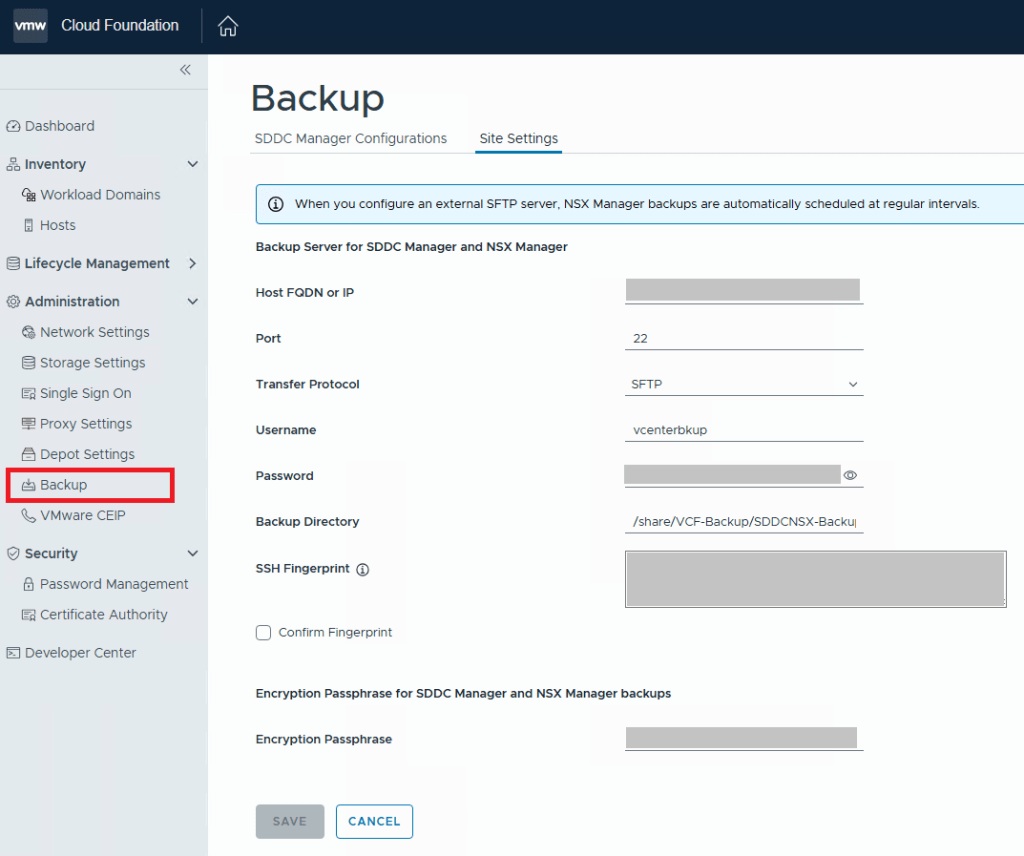
For VCF 9.0.X, and previous versions, you log into the SDDC manager, and click on Backup on the left side menu under Administration. On the “Site Settings” tab, you then fill in your specifics for backup configuration.
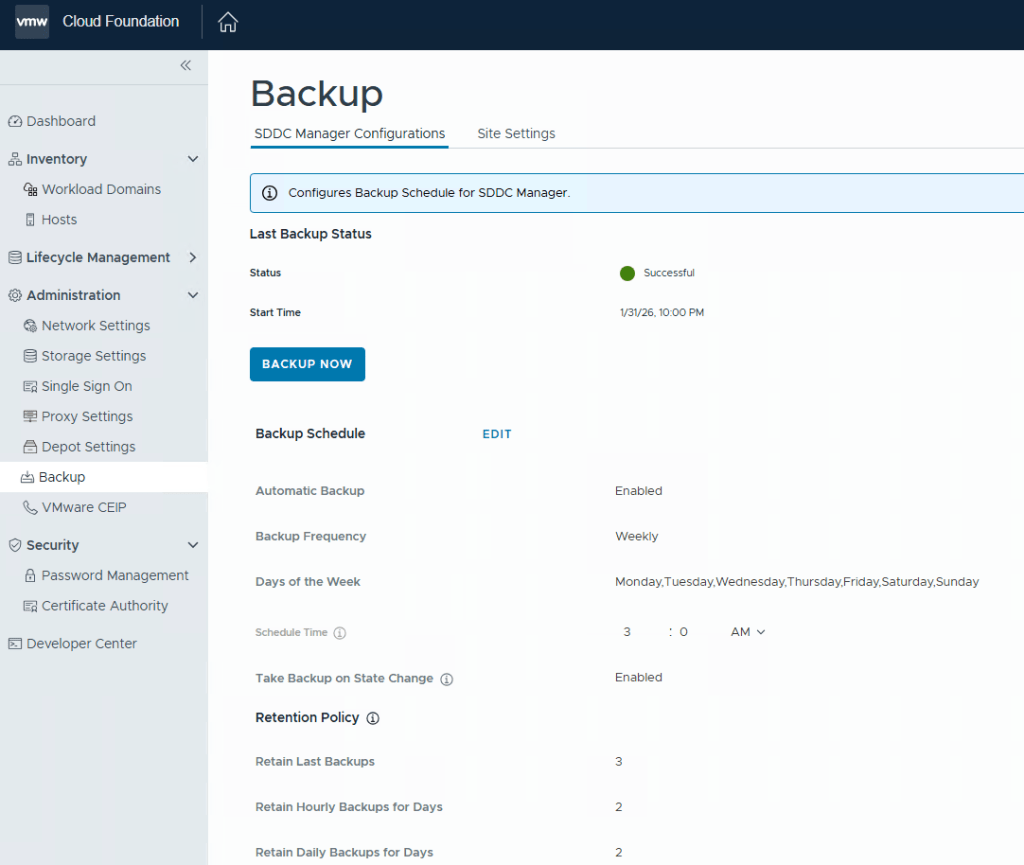
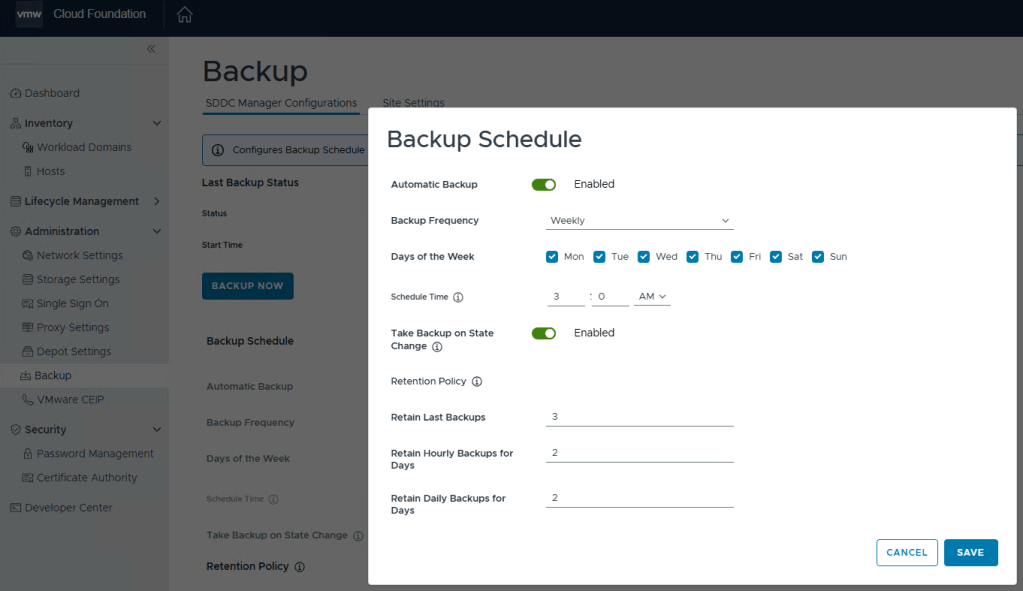
After you click the Save button, go back to the “SDDC Manager Configurations” tab, and now you will be able to click “EDIT” next to the backup schedule.
You can define the backup schedule to suit your needs depending on how busy your environment is, and how often workload domains are updated. This schedule however, does not reflect your NSX backup which is counter intuitive considering enabling the backups in the SDDC manager also enables the backups in NSX. Just not the schedule.
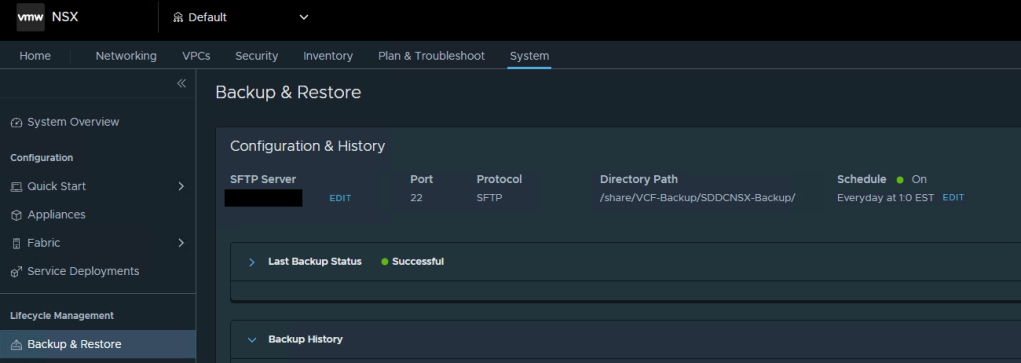
To modify the NSX backup schedule, you’ll need to log into NSX, click the “System” tab, and then select “Backup & Restore” under Lifecycle management on the left menu.
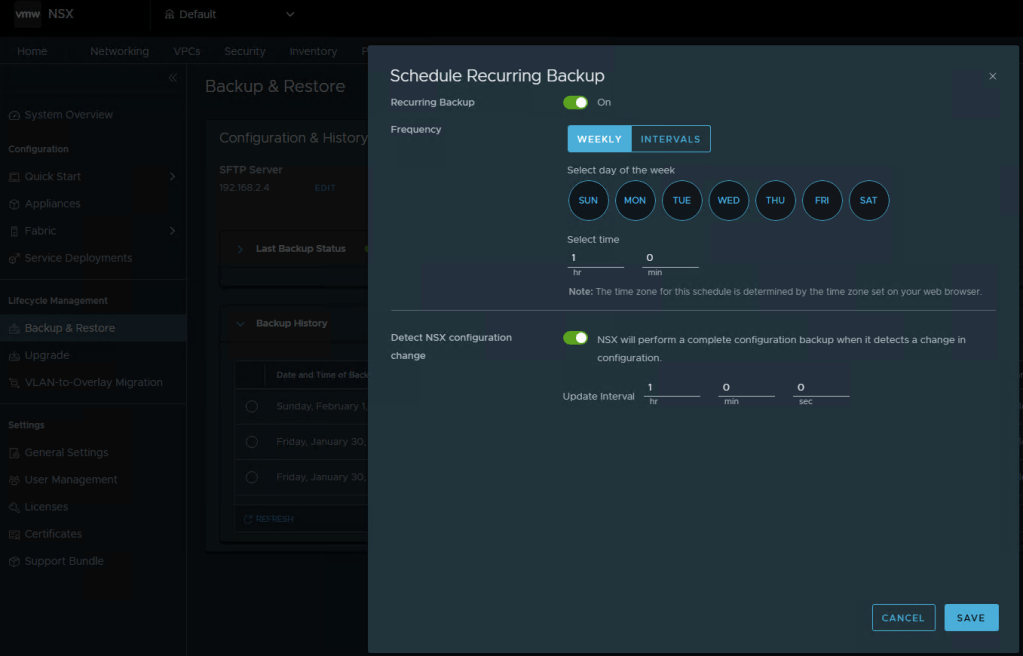
Here you can click “EDIT” to adjust the NSX backup schedule to suite your needs. Click SAVE when finished.
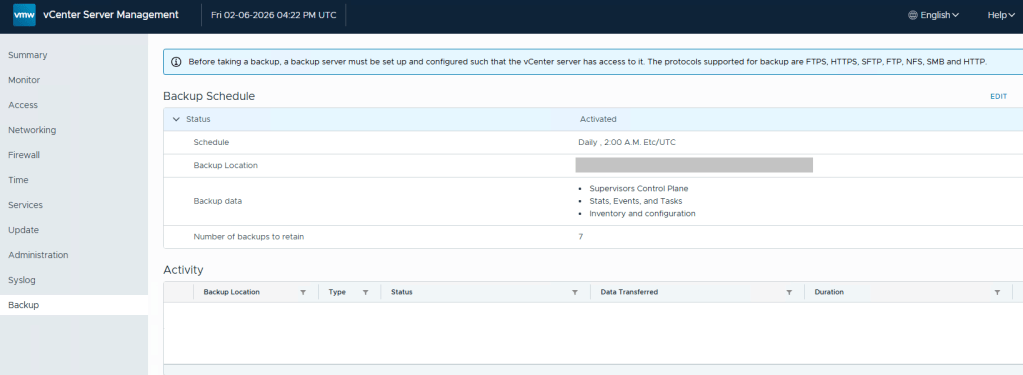
Lastly, we still need to define the backups schedule in the vCenter 5480/vami administration page.
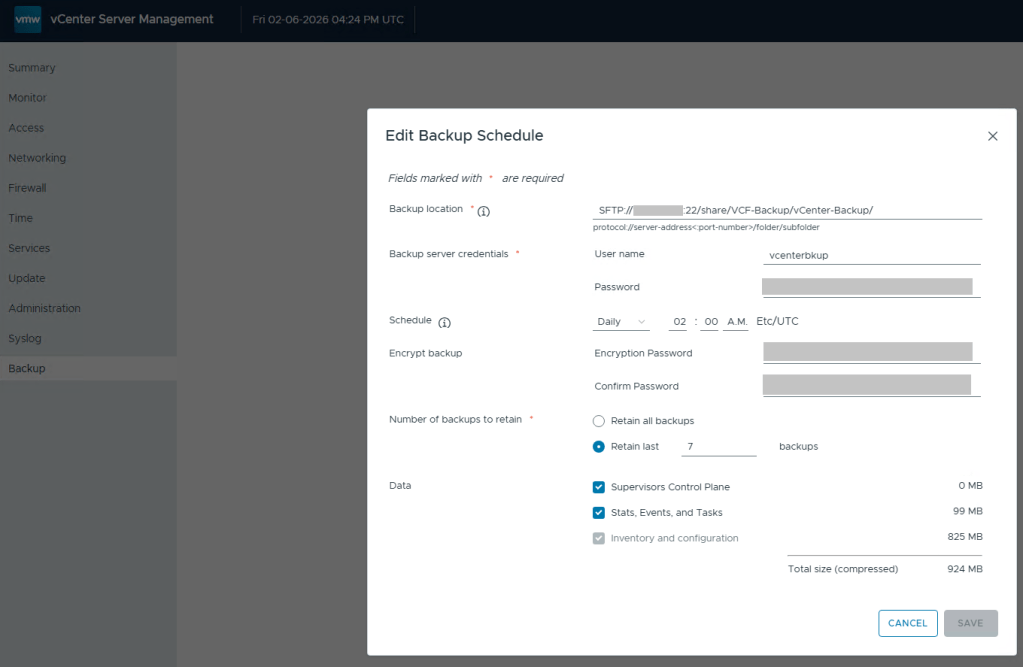
Define the backup schedule that will suit the needs for your environment. Keep in mind that when you install updates/upgrades to the VCF environment, the pre-check will fail if there’s not a recent backup within the last 24 hours. My advise here would be to schedule daily backups to avoid the precheck critical failure. Honestly, it should just be a warning, but I digress…
After you define a backup schedule, it’s a good idea to manually kick off a backup job to be sure the configuration works.
Continuing my series on my new VCF 9 Home Lab build (My VMware Cloud Foundation 9 Home Lab), in this post I’ll go over the basic setup for SFTP backups that need to be configured for the SDDC, NSXT, and vCenter, using my QNAP NAS.
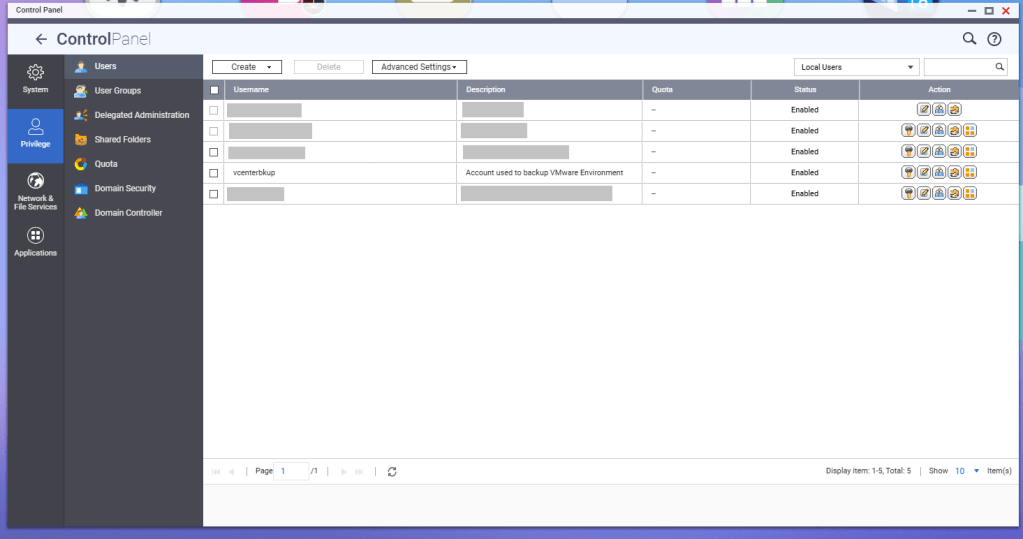
First, a service account should be created for these backup jobs. In this example, I have a service account called ‘vcenterbkup’ already created for my old VMware lab, and just plan to reuse it. You can either make this user part of the administrators group to allow SSH/SFTP connections, or you can tinker and edit the SSH configuration files (e.g., /etc/config/ssh/sshd_config) by adding AllowUsers directives.
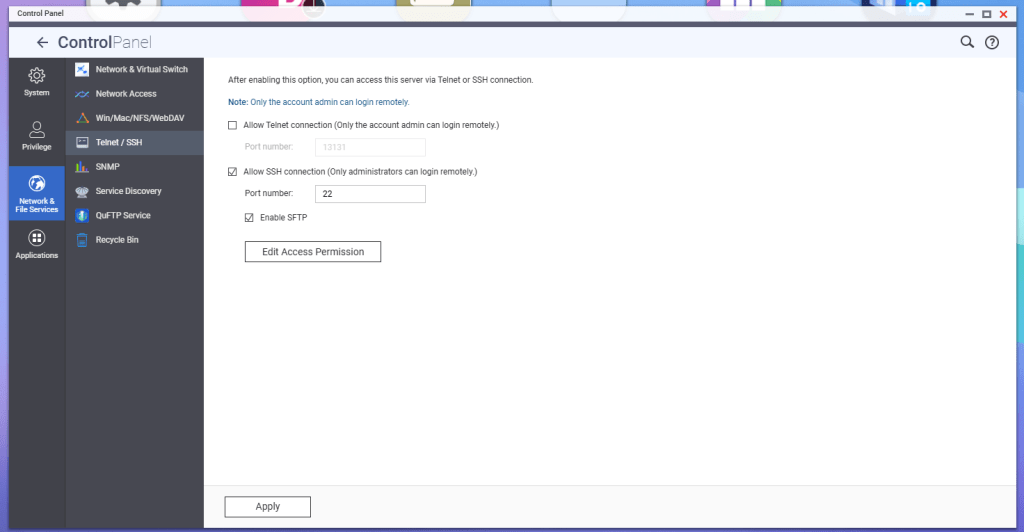
According to QNAP, in order to enable SFTP connections to the NAS, the SSH service must be enabled first, and then the SFTP enablement will be available. Go to Telnet/SSH in the Control Panel, and enable these services.
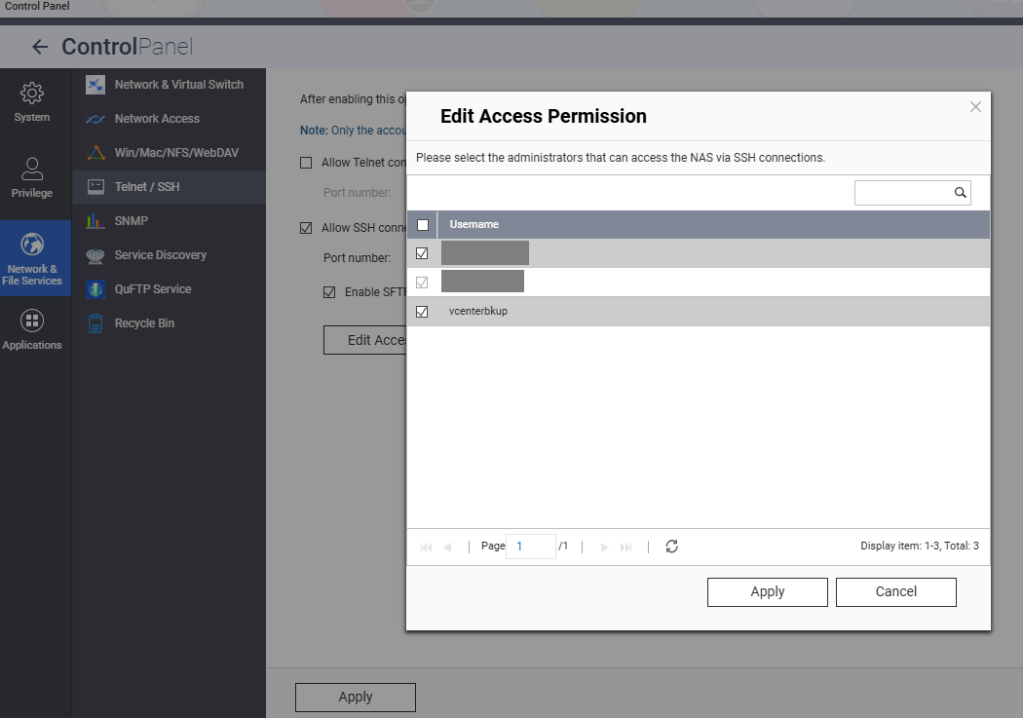
Hit the Edit Access Permission button, and add the service account created earlier, in this example ‘vcenterbkup’.
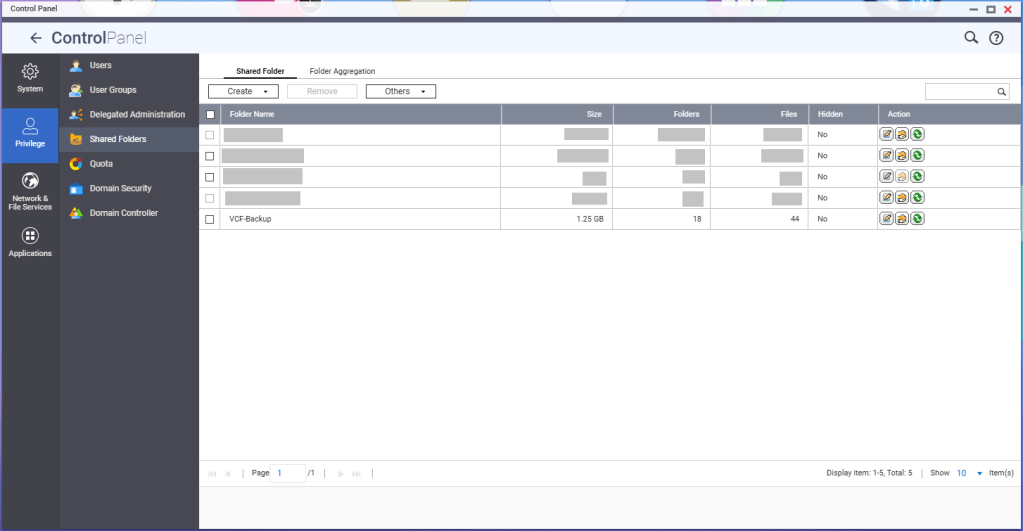
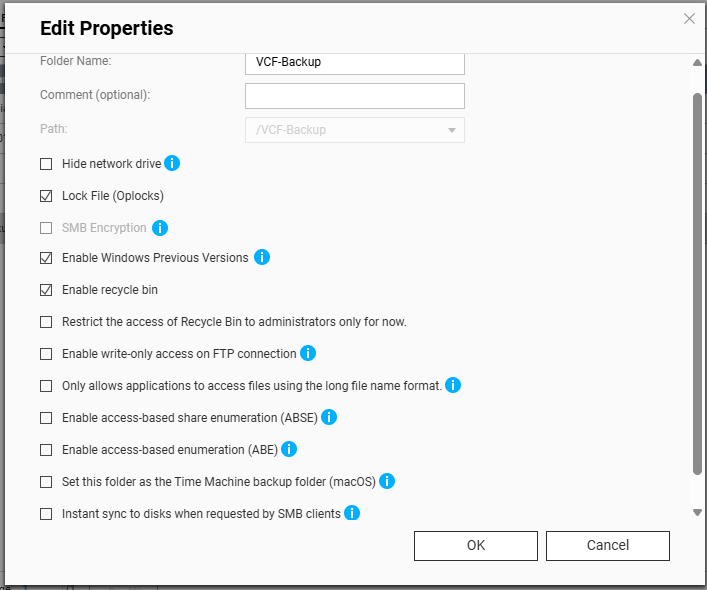
You’ll need to create a shared folder on the NAS, and assign the service account created earlier, in this example ‘vcenterbkup’, with read/write privileges. In this example, I used the folder name of ‘VCF-Backup’.
The size of the folder will depend on your backup strategy for your home lab. One important note, even though the folder path shows as “/VCF-Backup” in the UI, the actual directory will be ‘/share/VCF-Backup/ ‘. This will be important later when backups in the SDDC manager and vCenter are configured.
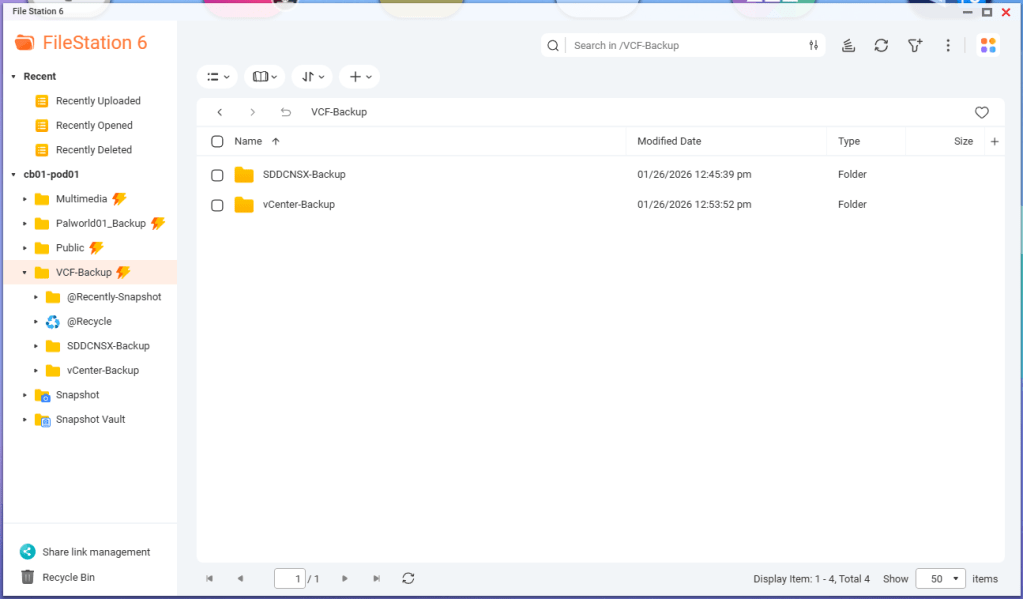
Lastly, I created sub directories inside the VCF-Backup folder. One called ‘SDDCNSX-Backup’, and the other called ‘vCenter-Backup’.
In my next blog, I’ll cover configuring the backups in the SDDC manager, NSXT, and vCenter. NSXT gets configured when the backups are configured in the SDDC manager, however it will need to be tweaked.
I first applied to be a VMware Expert back at the end of 2016 after attending my first VMworld in Las Vegas, and began sharing my experience with the vCommunity through this Captain vOPS blog.
I was lucky enough to join VMware Inc. as an employee in February 2021 to continue working in the Professional Services division working with SLED customers. VMware employee’s had it good back in the day, and we had a pretty robust internal lab environment that I would use for VMware Cloud Foundation Customer projects. I can say with the utmost certainty, that I wouldn’t be where I am today without having a lab to familiarize myself with the VMware product line, both for work and for learning at home. In March of 2025 a little more than a year after the Broadcom acquisition, Broadcom announced that 80% of VMware projects would be sent to Broadcom partners, and the VMware badged PS consultants who were affected by this new strategy, were given the opportunity to transition with them to partners.
The Broadcom partner ecosystem is currently building their own lab environments for VMware consultants, but myself and many others could not afford to wait. Many of us built new home labs with the expectation that we would be able to deploy VCF 9 after Broadcom made the GA announcement late July before Explore. It took the VMUG Advantage team a few extra months to build new backend systems that would adhere to Broadcom’s new VMware subscription and usage reporting system, and many of us were excited to hear that the system finally went live in November. I blogged about how to set that up HERE.
I’ve been deploying VCF for customers through Cloud providers, partners, and VMware itself, going all the way back to the VCF 2.X days. For me, the VMUG Advantage partnership program with the vExpert program, isn’t just a mechanism to get licenses for my VMware home lab. It is a CRITICAL enabler for me to do my job.
It has been a rough year with all of these changes to the VMware brand I once fought for. To that end, I send my heart felt thanks to the VMUG Advantage team, and the vExpert program. They are terrific communities to be a part of. The vExpert program along with its partnership with VMUG Advantage license program has really enabled me to keep doing the job that I love, working with VMware customers, helping them achieve their private cloud goals, as we all try to navigate this new landscape together. A special thanks to Corey Romero and Eric Nielsen for keeping these communities alive before, during, and after the transition.
In my previous post, I walked through the process of getting the VMUG Advantage token configured in the Cloud Foundation Installer, to establish the connection to the online depot and download the VCF bits, HERE. This post assumes those bits have all been downloaded successfully.
Before continuing with your VCF 9 home lab deployment, or even a production deployment, be sure to check out this post HERE, where I cover the updated password requirements for VCF, and how missing those requirements will cause the deployment to fail.
For a VCF 9 home lab running on hardware that’s not part of the VMware HCL, it will be necessary to bypass the vSAN ESA precheck during VMware Cloud Foundation (VCF) deployment using the Cloud Foundation Installer. If compatible vSAN ESA hardware is not available in your home lab, the deployment fails during the HCL validation phase. To bypass this, log in to the VCF Installer and append the following configuration parameter to the following /etc/vmware/vcf/domainmanager/application-prod.properties file:
Next, you’ll either need to restart the the appliance, or you can just restart the service with the following:
systemctl restart domainmanager
Time to start the VCF 9 deployment.
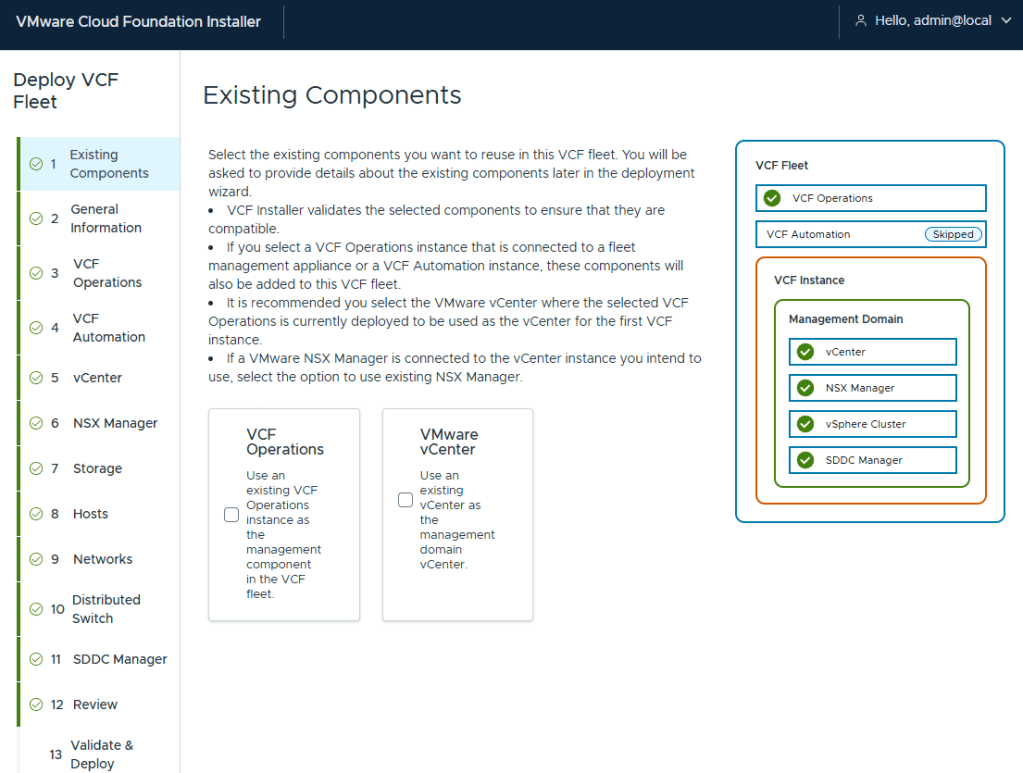
I’ve been deploying VCF for customers since the 2.X days, so I have mixed feelings about this new wizard. However, I must say I do enjoy not having to fill in multiple deployment workbooks. I am deploying a greenfield VCF home lab, so I do not have existing components
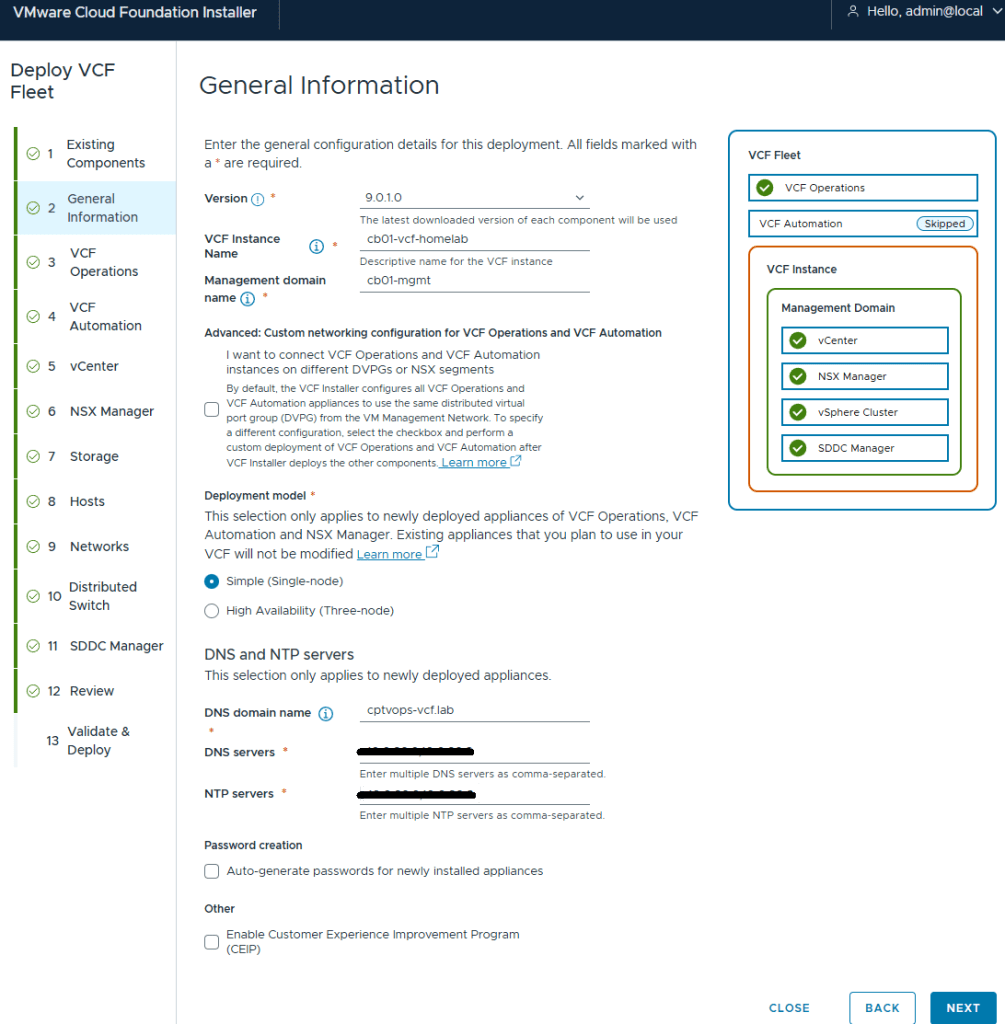
I elected to do a simple deployment for my homelab. I did notice through testing that the Installer will hallucinate if one of the NTP servers is not reachable. Later on during the pre-check validations, I saw error messages stating the NTP value was null. Probably my favorite was when it hallucinated NTP values that I did not configure, but said that it couldn’t reach them (duh). My only indication of the actual problem was that the pre-check failed when it couldn’t validate the ESX hosts connection to the second NTP and DNS server. I wonder how much vibe coding the VCF devs were doing that day?
I hadn’t deployed my second domain controller yet that I would also use as my second NTP source, and was hoping that I could set it during the Core VCF deployment, and deploy the server after. I ended up just deleting the second DNS and NTP server address in the Installer. I’ll just add it later. I left them configured on the ESX hosts.
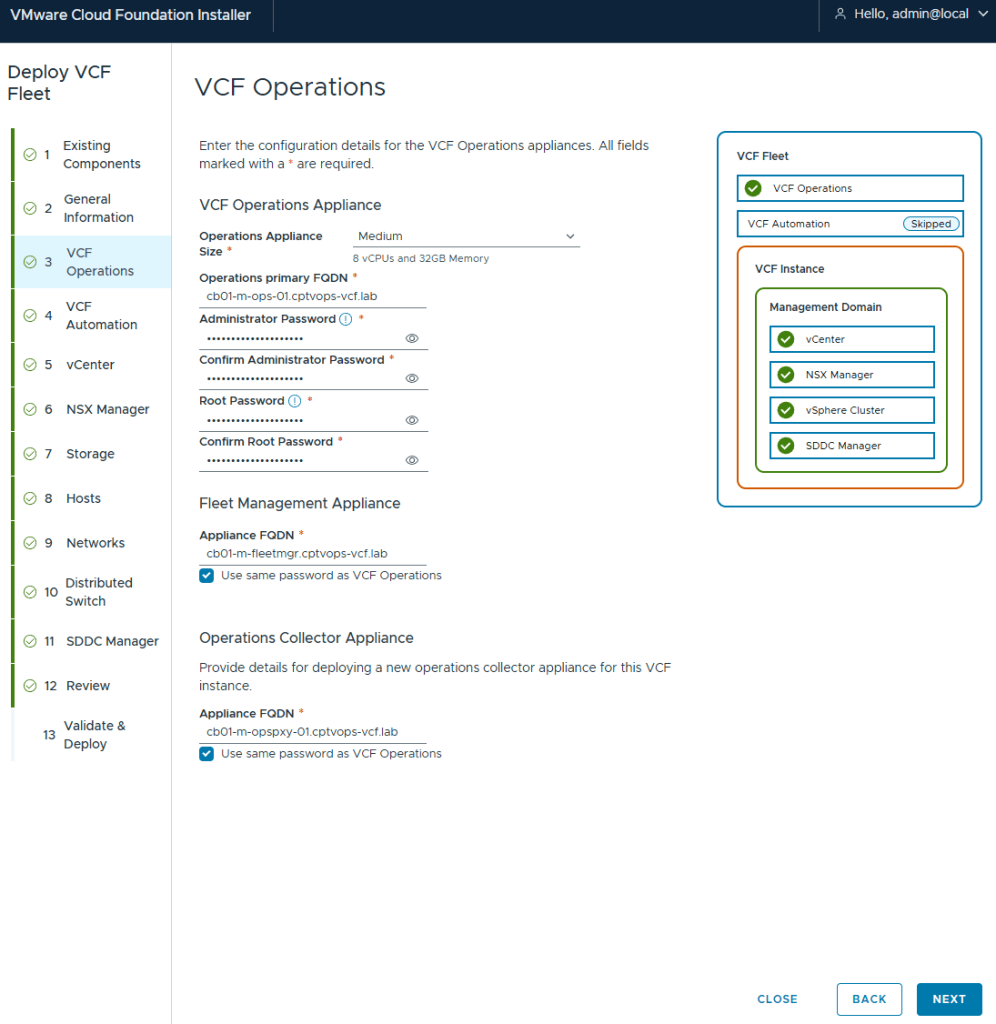
Deployment for VCF (Aria) Operations and Fleet Management Appliance (Aria Suite LCM)
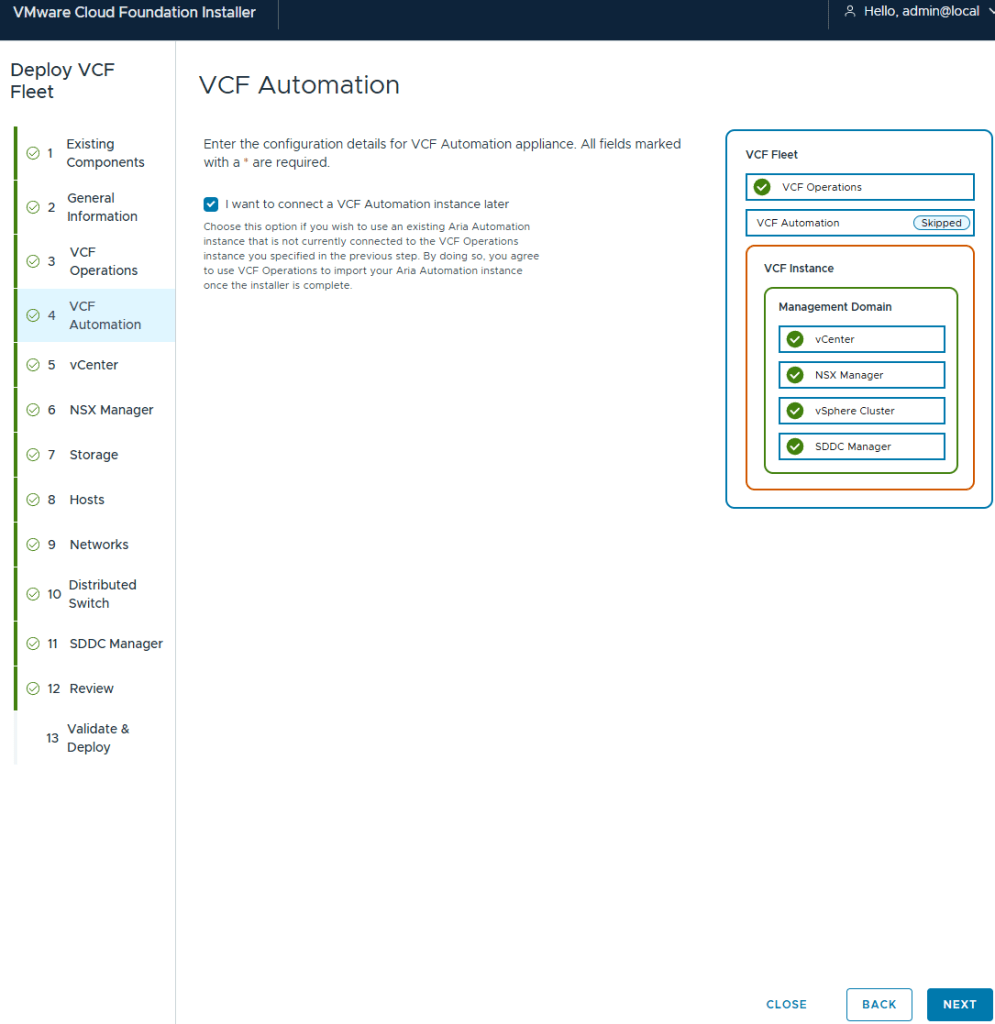
I elected to not deploy VCF (Aria) Automation. I’ll deploy this after.
I deployed my management vCenter using the medium size to avoid the smaller appliances performance issues.
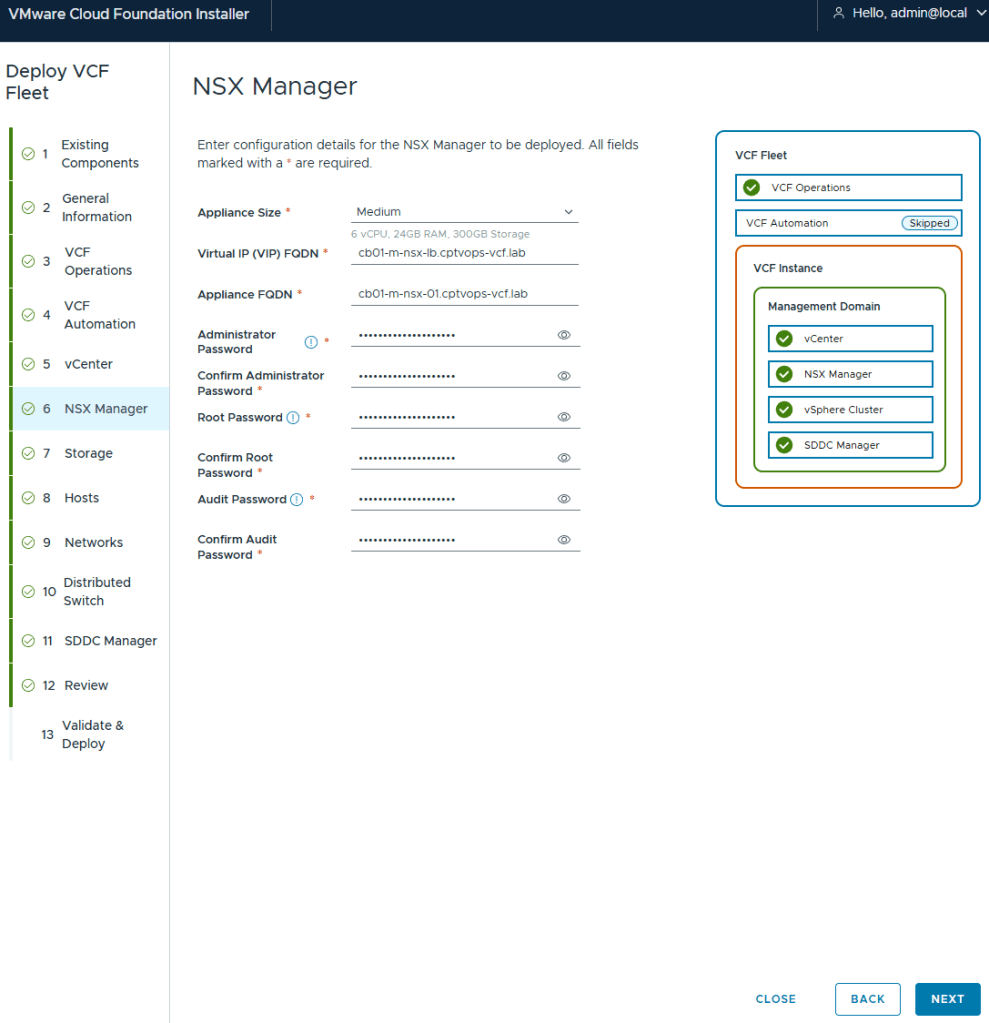
Even though the “simple deployment” was chosen, you are still required to define a Virtual IP for NSX.
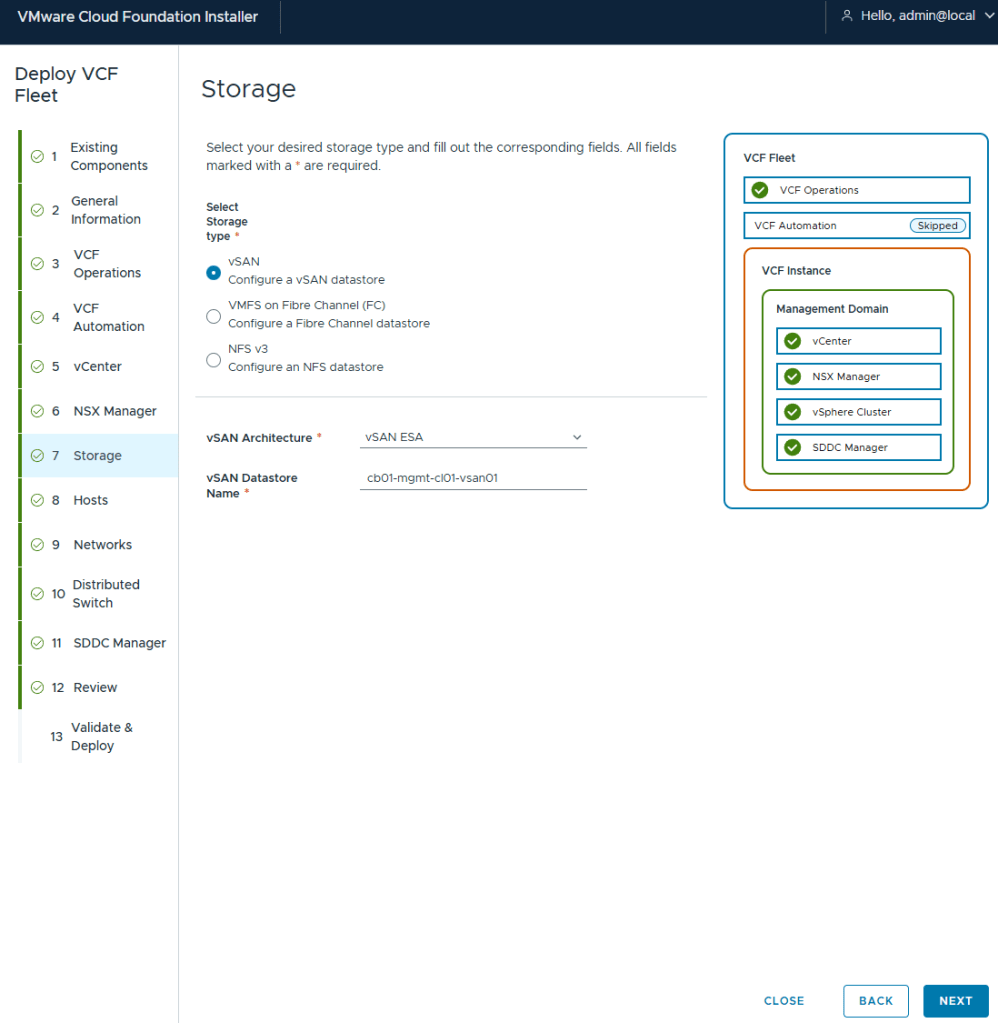
Out of all the VMware home labs I have built, this is my first using vSAN, but I wanted to try out ESA. In the past I avoided vSAN just because in certain situations it made host maintenance painful.
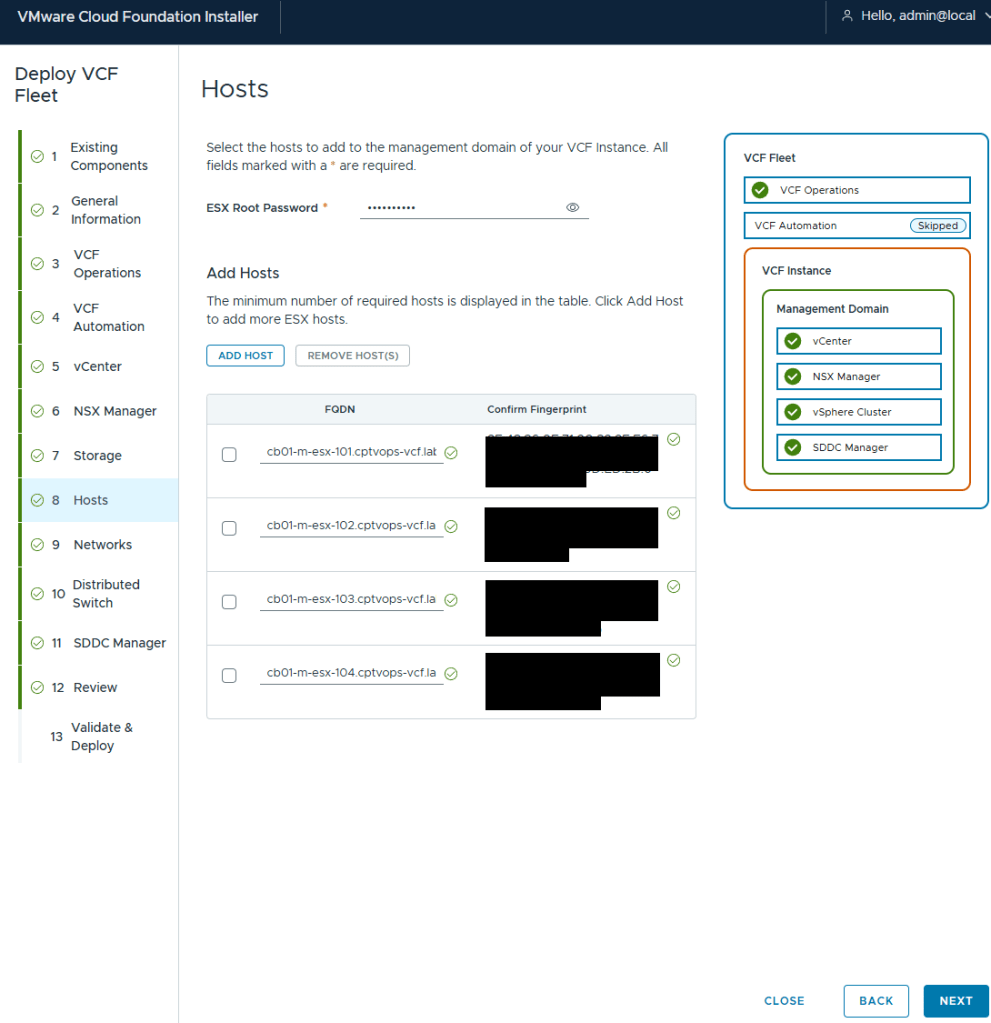
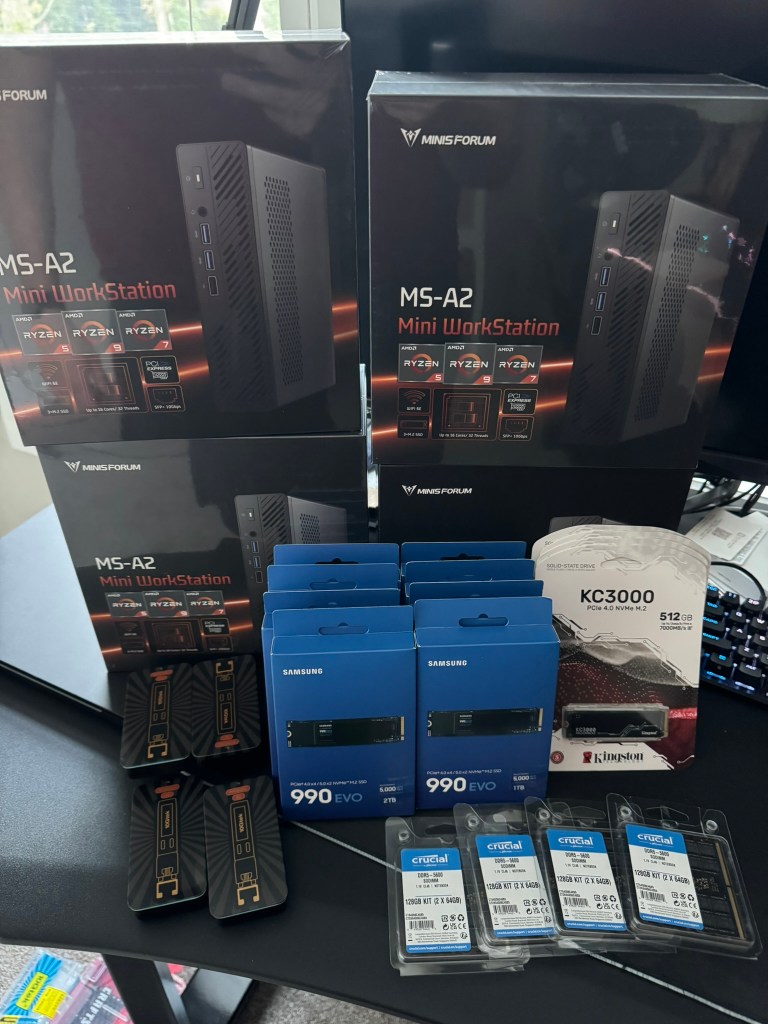
I’ve got my 4 MINISFORUM MS-A2 hosts added.
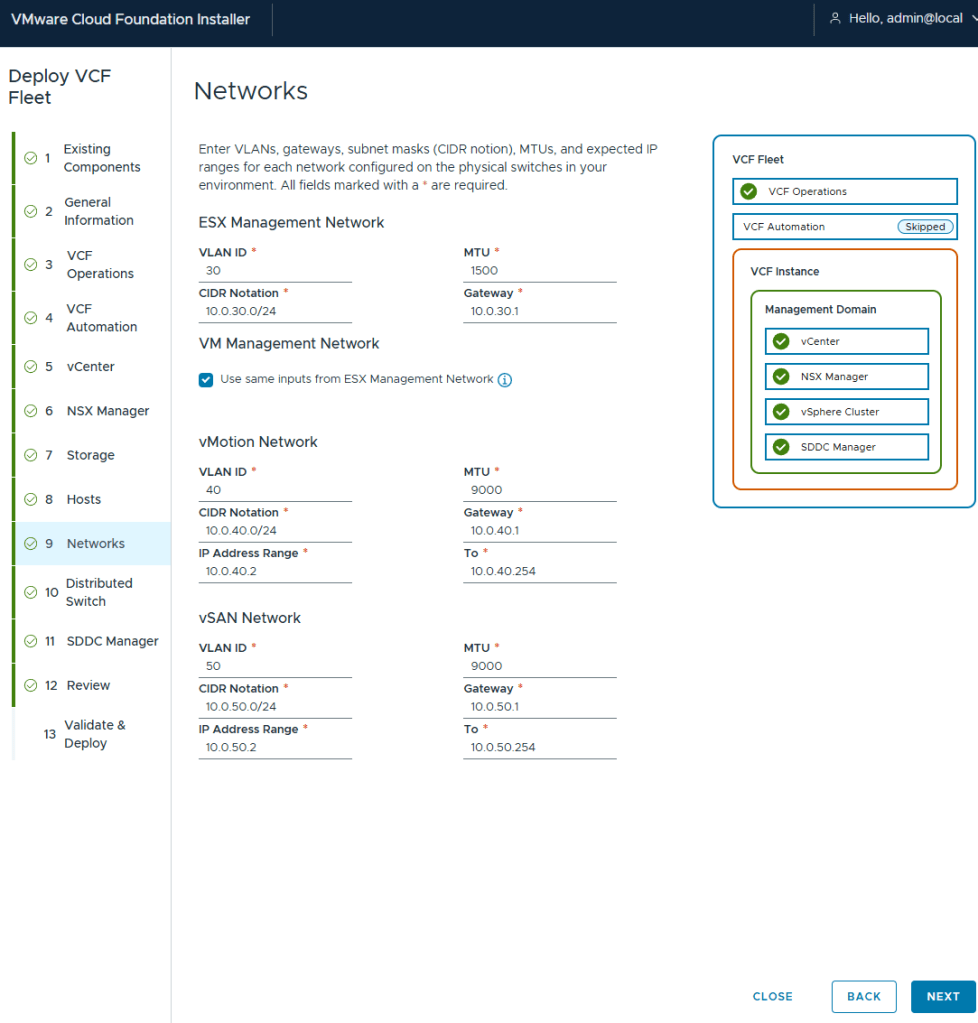
I elected to keep my deployment simple in my home lab, and have my management VMs share the same network as my ESX hosts.
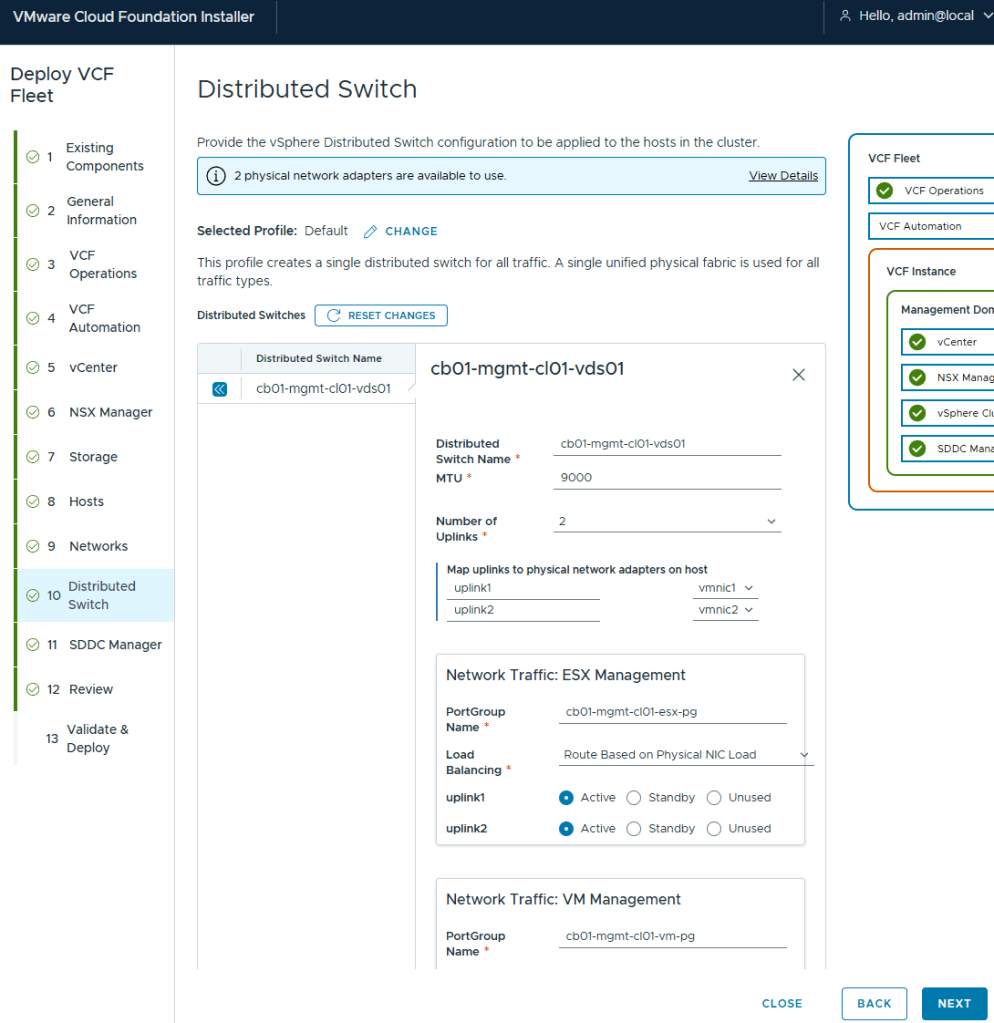
I chose the Default virtual distributed switch config
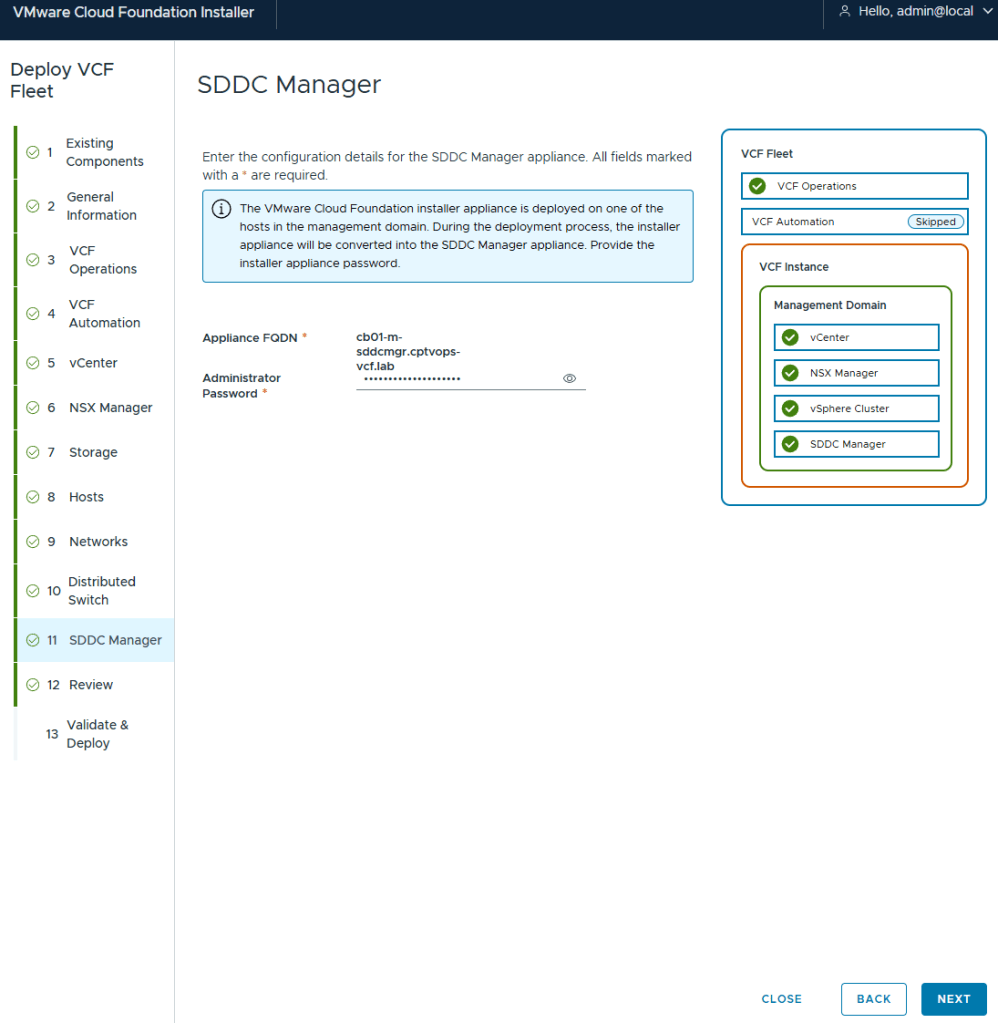
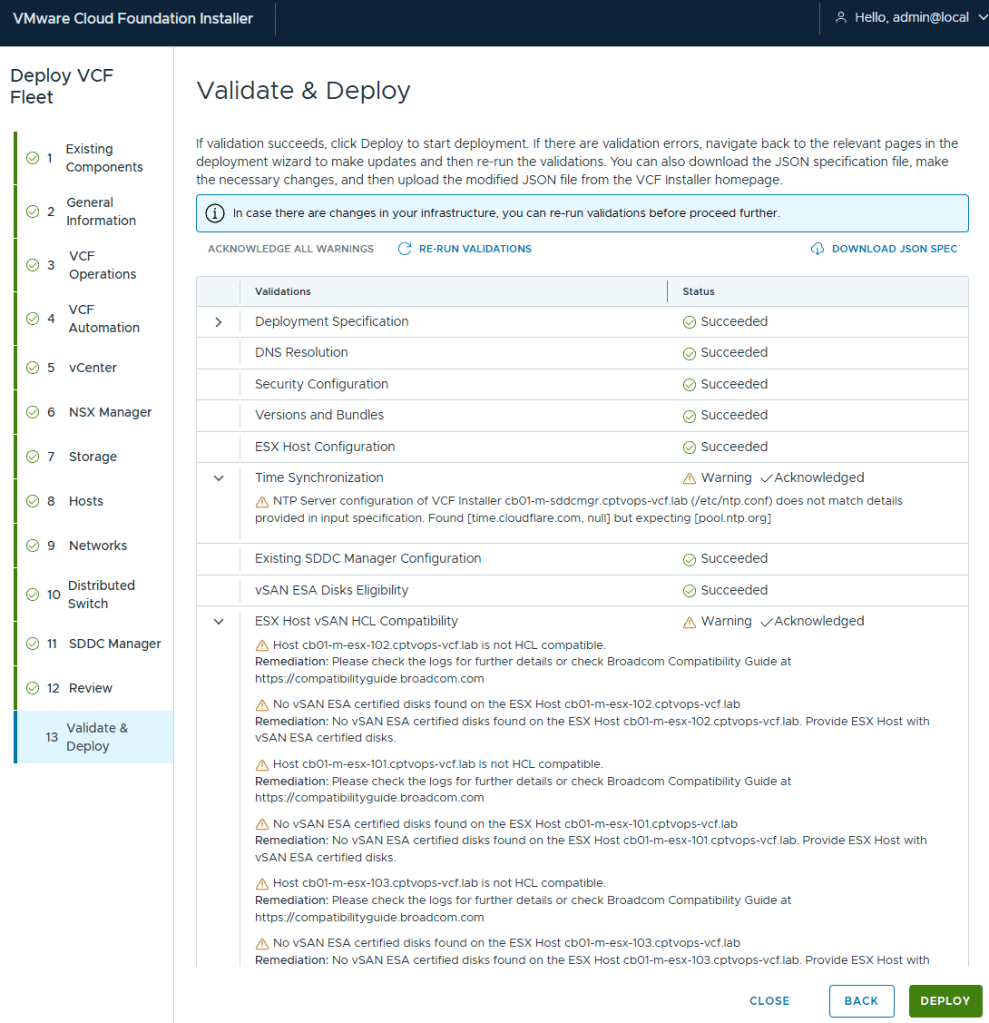
If you remember my previous post HERE, I talked about what will happen on this screen if you did not use a 15 character password for the local user (admin/Administrator).
As expected, the pre-check validation returned a WARNING on the vSAN ESX Disks Eligibility for not being on the HCL. This needs to be Acknowledged before the [DEPLOY] button becomes available.
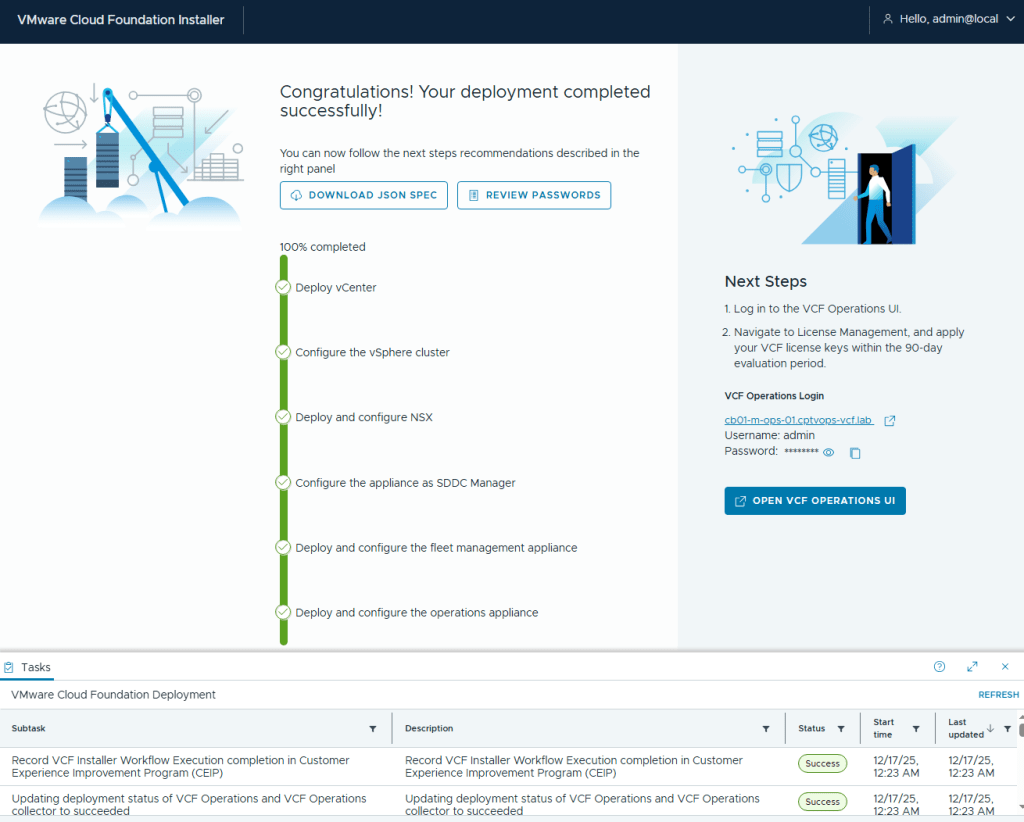
I kicked off the VCF 9 deployment in my home lab at roughly 5:03pm. The deployment finished about 7 hours later (12:23AM to be exact). Honestly, it was the NSX OVA deployment that took roughly 6 hours to complete. The VCF Fleet Manager, VCF Operations, and VCF Ops collector deployed around an hour I believe.
In my next blog, I’ll run through getting VCF Operations connected to the Broadcom Cloud Services portal to activate my licenses in my home lab.
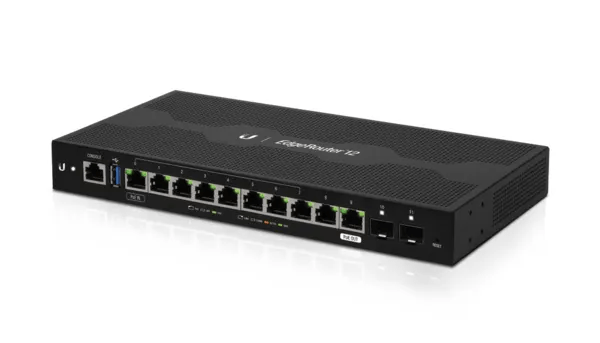
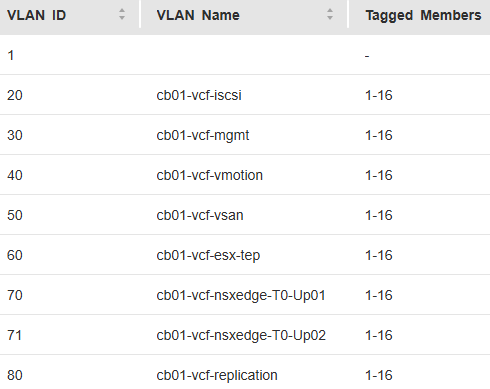
Below is the basic network Topology and vlan config for my new VMware Cloud Foundation home lab. For my home network, I had replaced my off the shelf consumer wifi router a few years ago, and purchased a Ubiquity EdgeRouter 12 so that I could have vlans for my VMware Home lab, that lasted me from vSphere 6 to vSphere 8.
On this router, I have defined and hung the vlans off from the built in virtual switch (192.168.X.1).
vlan (10.0.X.1)
Description
20
iscsi storage straffic
30
Management
40
vmotion
50
vsan
60
ESX TEP
70
NSX Edge T0 Uplink01
71
NSX Edge T0 Uplink02
80
Replication
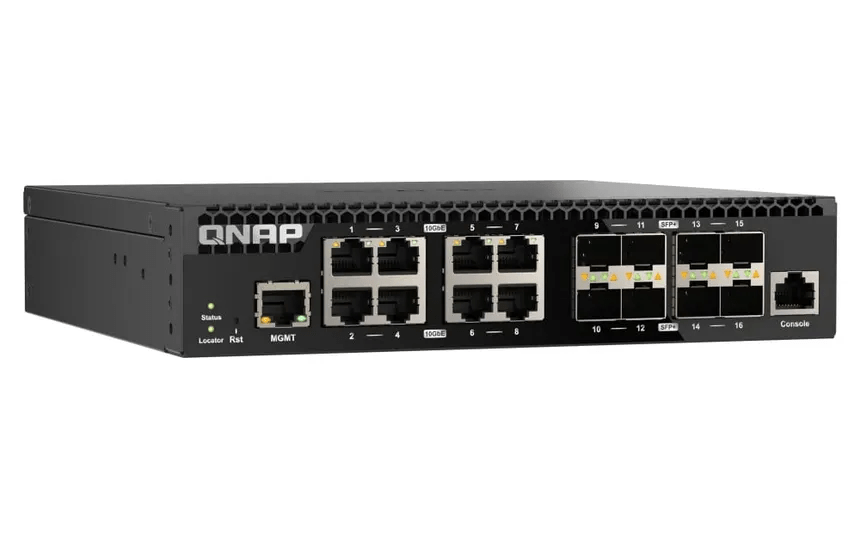
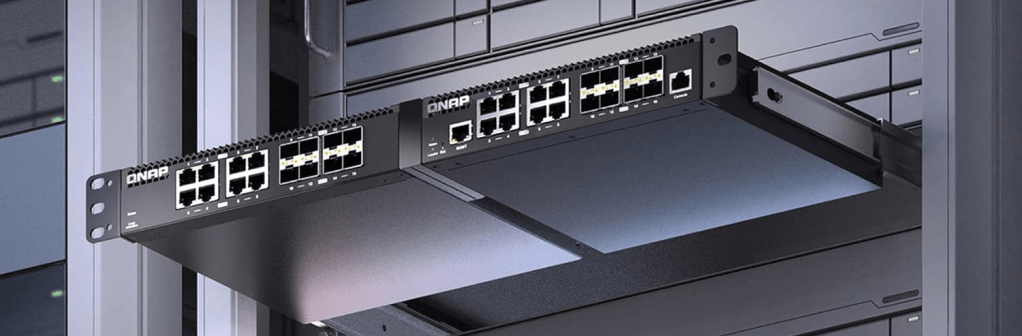
As detailed in my VCF 9 Home lab BOM, I chose to go with the QNAP (QSW-M3216R-8S8T-US) Layer 2 for my TOR switch. This Layer 2 managed switch supports 10G on the standard ethernet ports and on the SFP+ ports, giving me lots of options for connectivity.
I can also mount two of them side by side in a standard 19 inch width rack offering more space save opportunities for future home lab expansion.
— AMD PBS (**THIS IS OPTIONAL BASED ON YOUR CONFIG**) — PCIe/GFX Lane Configuration – x8 — GFX Lane Speed – Gen 4 — SSD0 – Gen 4 — SSD1 – Gen 4 — SSD2 – Gen 4
— AMD CBS — NBIO Common Options — IOMMU – Enabled — PSPP – Performance — FCH Common Options — AC Power Loss – Previous — SMU Common Options — TjMax – 78
In my next Blog, I will cover my basic network set.
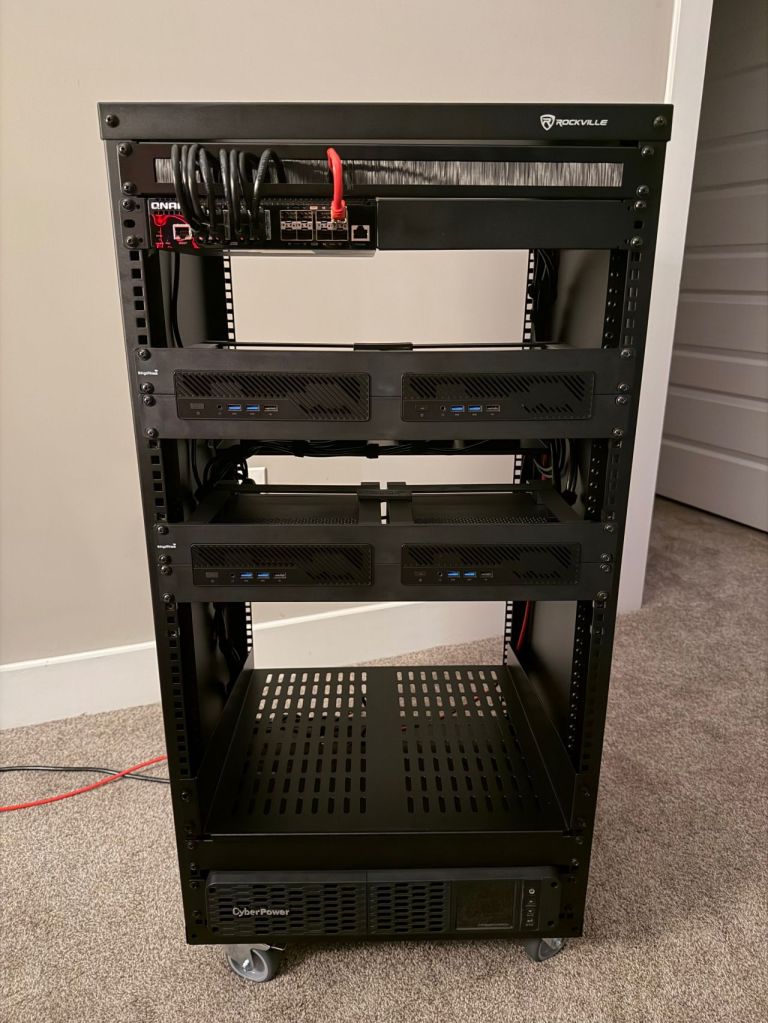
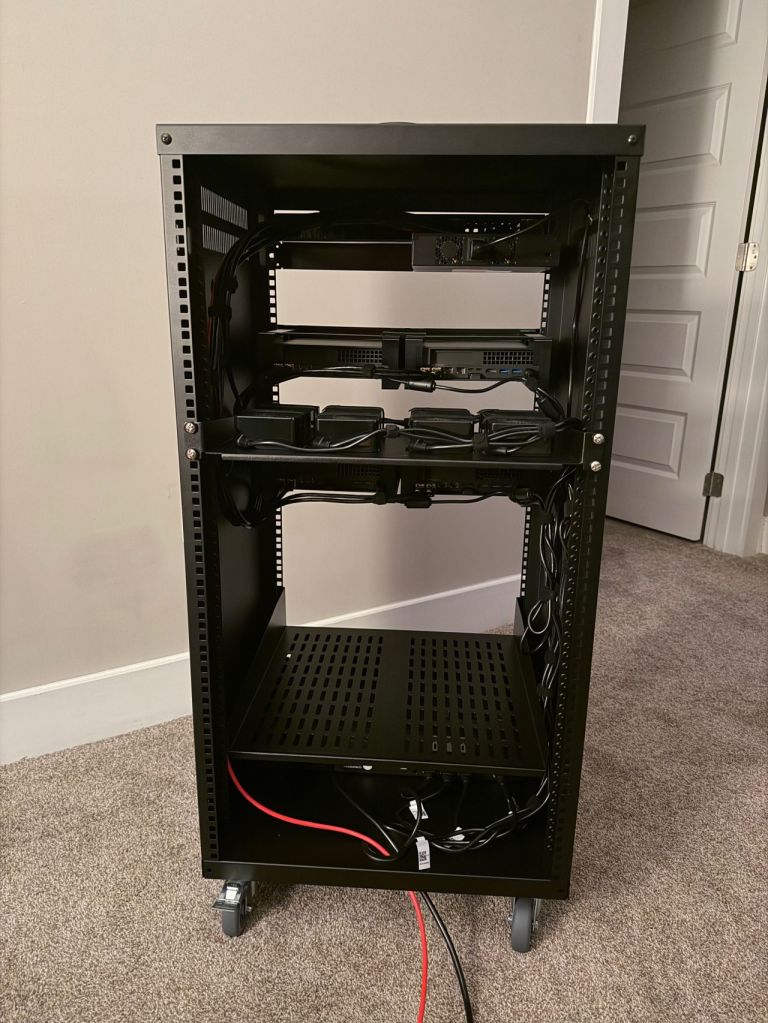
I went over the mini pc components and x4 MINISFORUM MS-A2 9955HX systems. In this blog I’ll cover the rack, rack mounts for the MS-A2s, UPS, and the 10G switch.
I am quite pleased with the wiring now that I have everything tidied up, although I forgot what a PITA cage nuts are. I’ve installed a shelf at the bottom for a future migration of my old lab 2x SuperMicro boxes that will either be used to host VCF Holodeck, or perhaps I’ll use them for a dedicated workload domain backed by NFS storage. The CPUs were depreciated in ESXi 8, but they still have some life left in them. Reaching into the way back time machine, that kit was Current CaptainvOPS Homelab 2020.
For the additional rack, rack mounts for the MS-A2s, UPS, and 10G managed switch:
It’s that time to give the home lab a big refresh, and purchase new hardware for VMware Cloud Foundation sandbox. As a VMware employee, I had access to internal labs that I could quickly spin up if I needed to test something with VCF. With every software company purchase, Broadcom has spun off the majority if not all of their newly acquired Professional Services division, and VMware was no different. Now back in Partner life, I needed to reinvest in my home lab. VMware Cloud Foundation is and expensive investment for customers, and as it turns out, it is not cheap for the home lab either lol.
Your tax and shipping costs may vary. I am still looking for 10G switch, rack, and rack mount hit for these to keep things tidy. I expect my total costs to come in under 8K USD. I’ll update this blog with the additional hardware when it comes in.
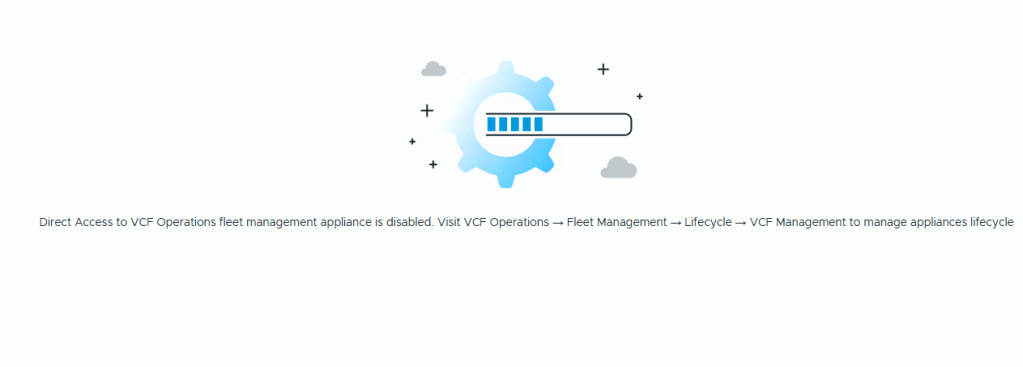
Aria Suite Life Cycle Manager has been renamed to VCF Fleet Management, and no longer has it’s own accessible UI.
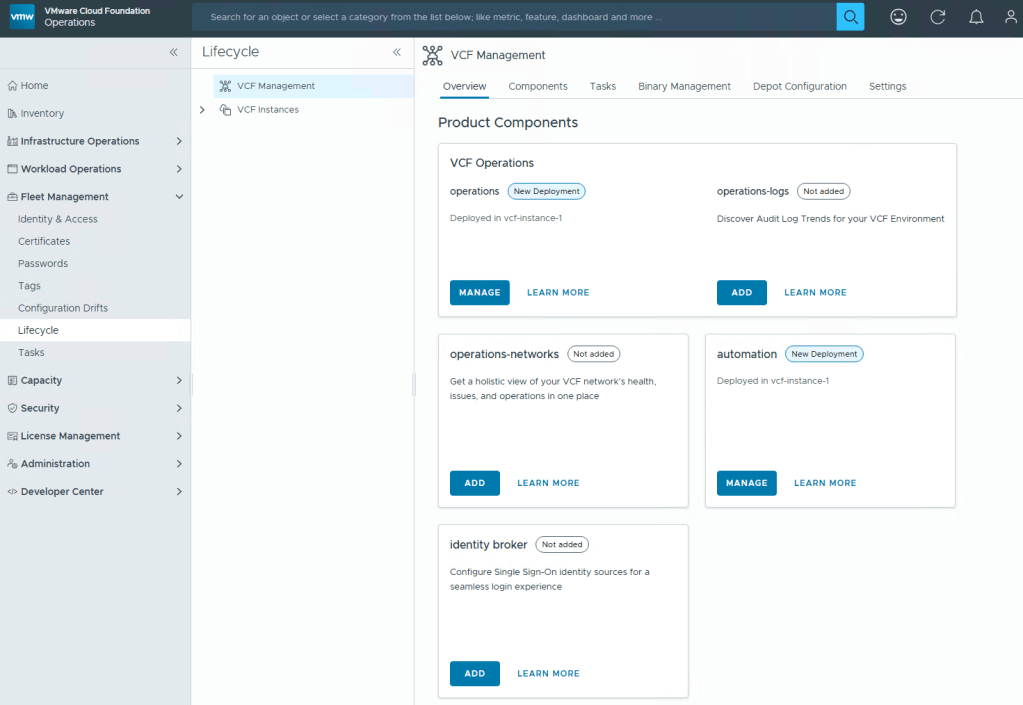
VCF Operations, formally Aria Operations, will now be your go to place to manage the lifecycle of Operations, Logs, Automation, and Network Operations. This will all be done through a new section on the left navigation menu, called Fleet Management.
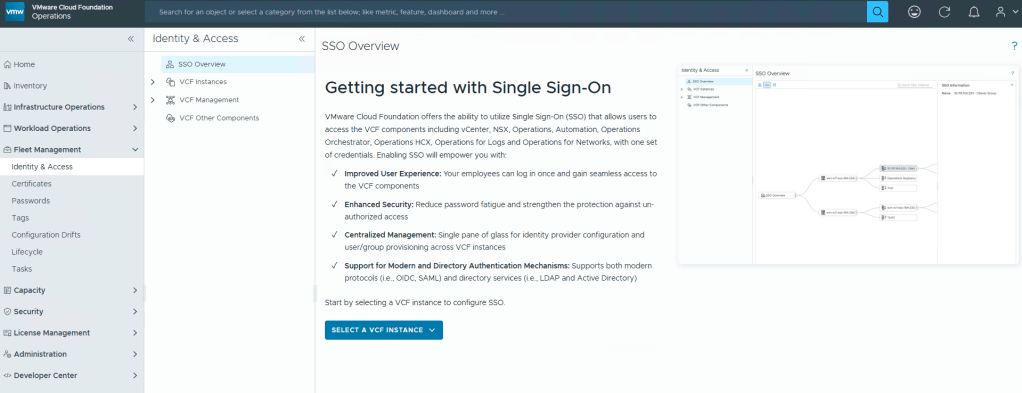
VMware Identity Manager/Workspace One Access finally has a successor, Identity Broker, that will be configurable through VCF Operations Fleet Management.
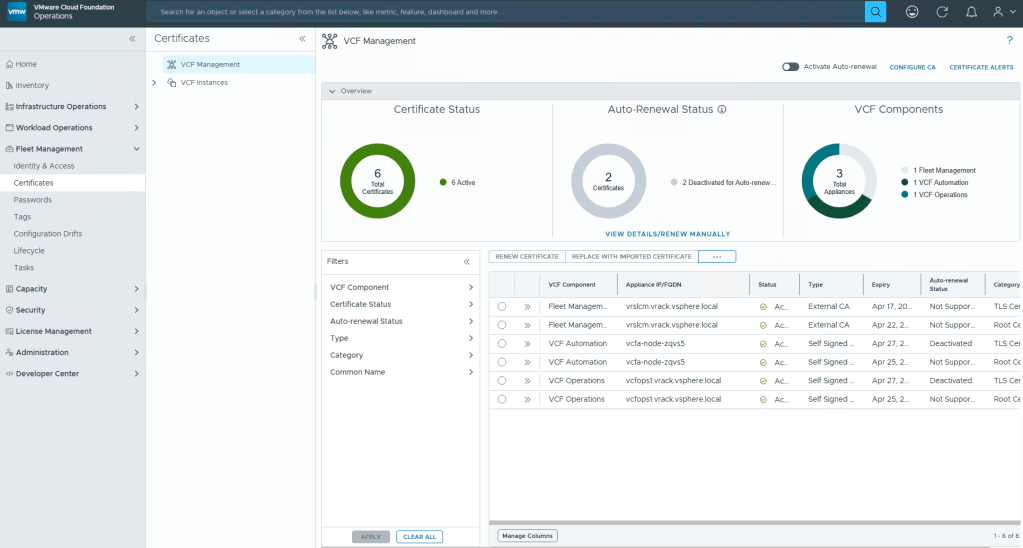
New capabilities are also being baked into Fleet Management that will allow Cloud engineers to manage certificates, and more capabilities will become available in the 9.1 release.
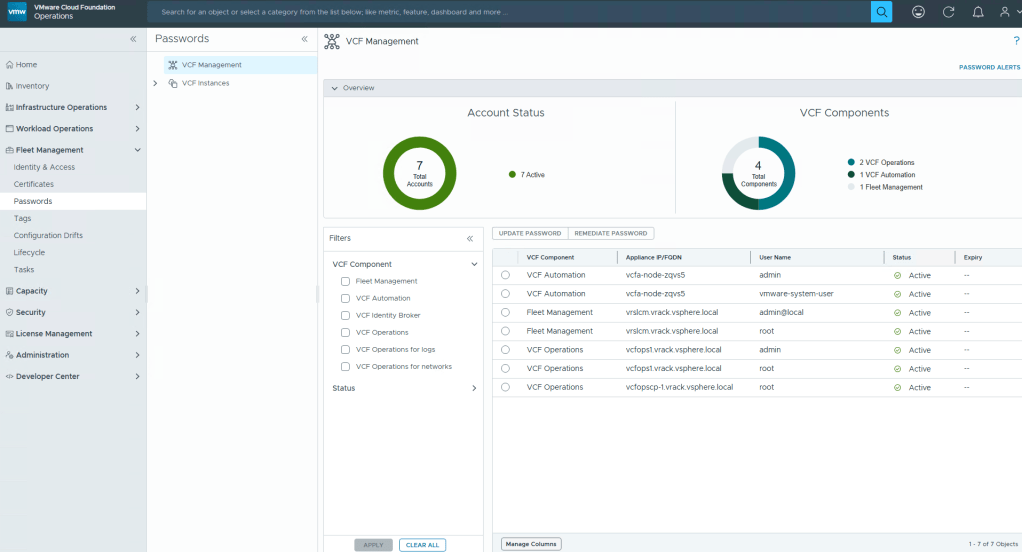
Passwords will also be another administration task that can be done through Fleet Management.
VCF Operations is becoming the center of the Private Cloud Universe to manage VCF. If this is any indication on what’s to come, I can only image that the SDDC manager interface will eventually become less and less relevant.
I for one am happy that the Aria Suite LCM is being sunset, and will eventually be fully integrated into VCF Operations under the Fleet management banner. It is unfortunate however, that remnants of it still remain as a headless server. I would have rather preferred the BU to do the job correctly, instead of this half-baked, “we’ll get it all next time” approach. All to reach those hard deadlines I suppose.


You must be logged in to post a comment.