VMware Cloud Foundation: SDDC Manager Day 2 Configurations: Deploying an Application Virtual Network In The Management Domain.

Blog Date: 10/20/2023

In the previous blog, I went through the process of deploying an NSX edge cluster via VCF in the management domain. In this blog, I will walk through the process of deploying an application virtual network (AVN) for the management domain for the vRealize/Aria suite of products. This deployment assumes that we will be deploying the latter in a VCF aware configuration which would be typical for most deployments. AVNs allow the SDDC Administrator to configure vRealize/Aria management applications for software defined networking through NSX-T Data Center.  AVNs configure a local region and a cross-region SDN segment providing security, mobility and flexibility of vRealize/aria management applications. vRealize/aria components can be moved between regions to maintain operations during planned migration, maintenance or in the case of a DR event.

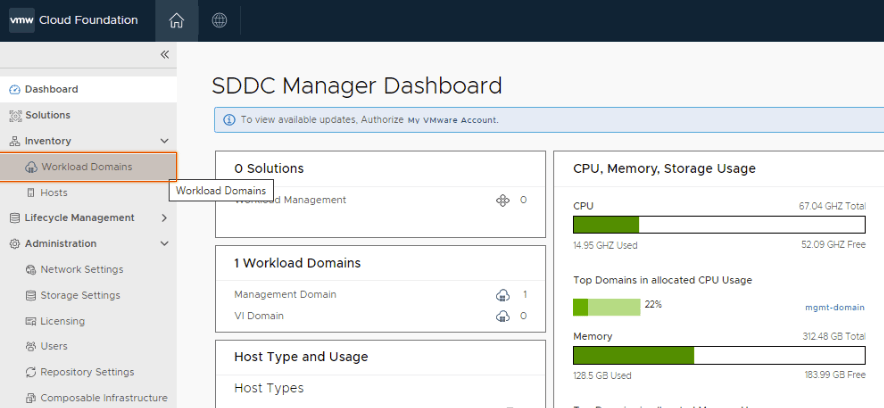
For this, click workload domains.

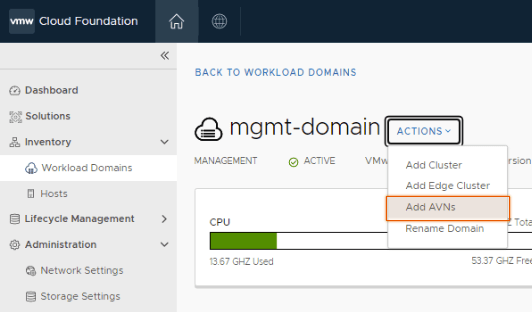
Click on the management domain.

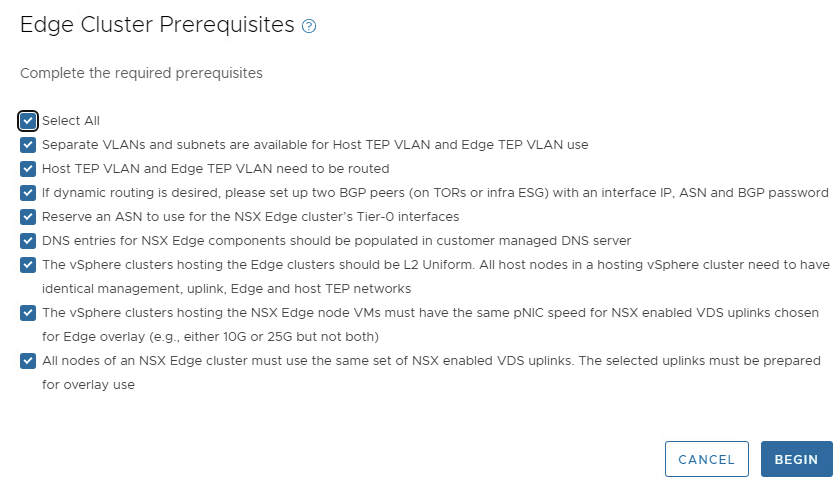
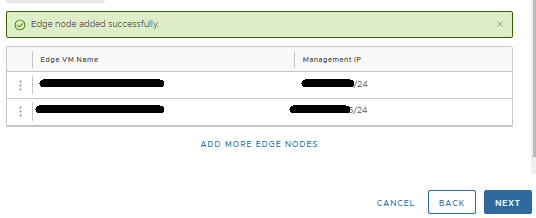
Prior to deploying AVNs, an NSX Edge cluster of two (2) or more nodes is required. In my previous blog, I walked through the SDDC Manager automation that is used to deploy the edge cluster. This post assumes the edge nodes and cluster are in a healthy state, but you can always look via the SDDC manager by clicking on the Edge Clusters tab.

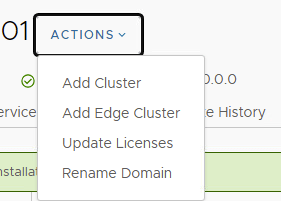
Assuming the edge cluster and nodes are healthy, click Actions and then Add AVNs.

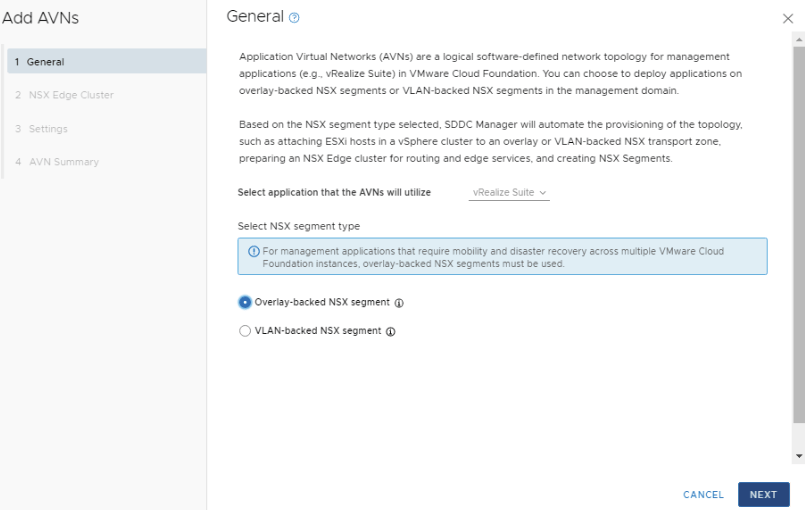
Select Overlay-backed NSX segment and click NEXT.

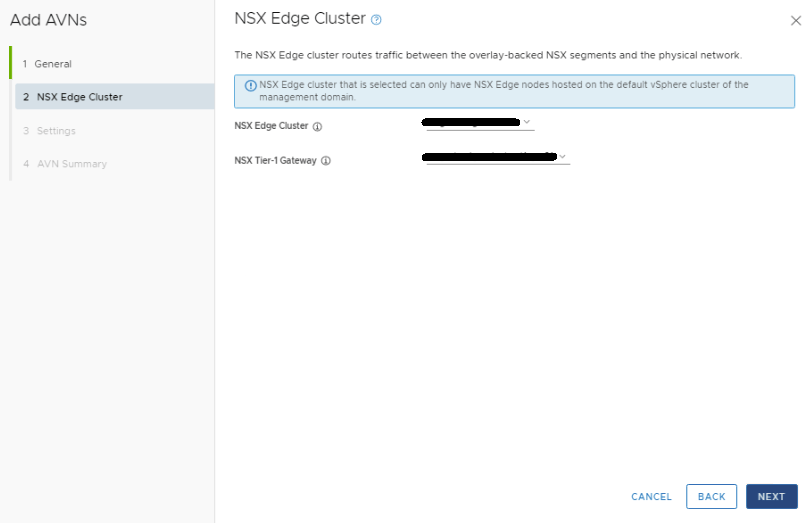
In the NSX Edge Cluster drop menu, select the management edge cluster. In the NSX Tier-1 Gateway drop menu, select the gateway. Click NEXT.

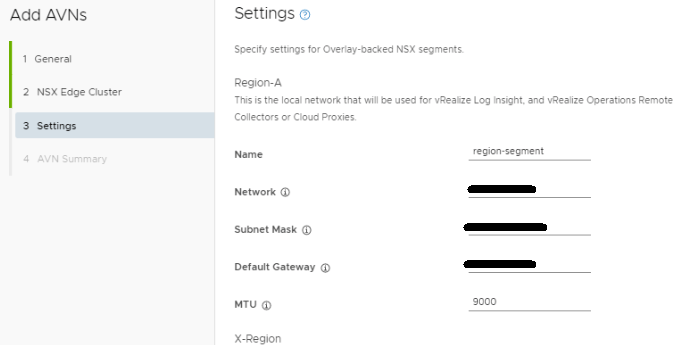
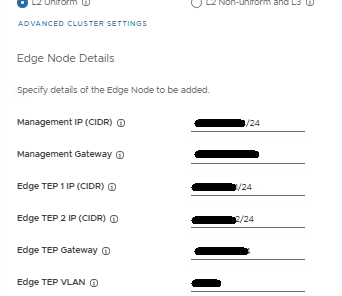
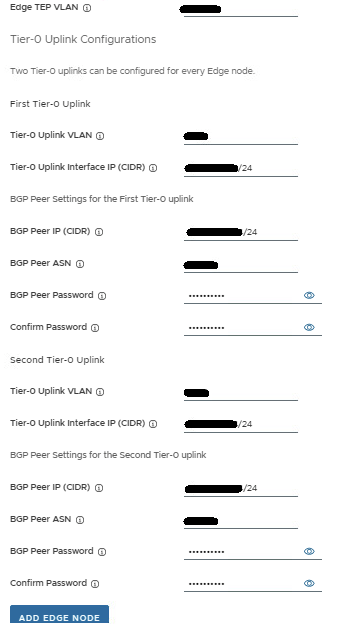
Fill out the network specs for Region-A. An MTU of 9000 was used here to keep the MTU consistent in the environment.

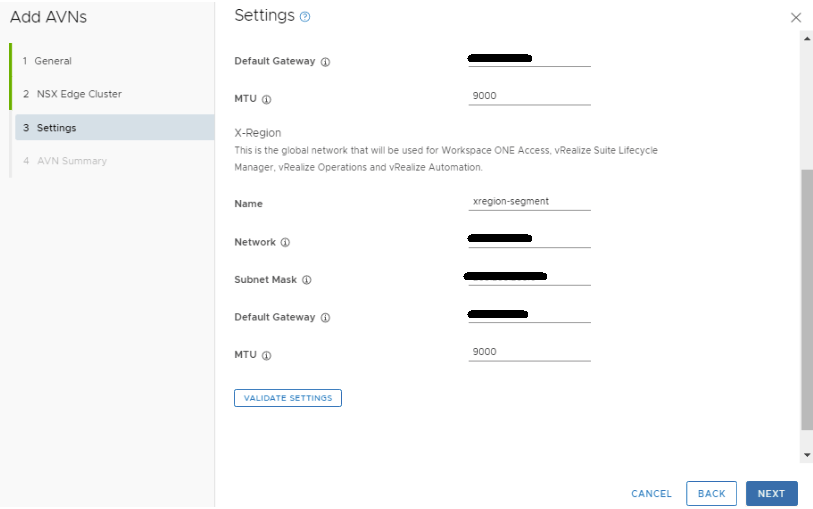
Fill out the network specs for the X-Region section. An MTU of 9000 was used here to keep the MTU consistent in the environment. Click VALIDATE SETTINGS, and then click NEXT after the validation succeeds. Otherwise, remedy the errors and validate the config again.

Review the configurations for accuracy, and click FINISH.

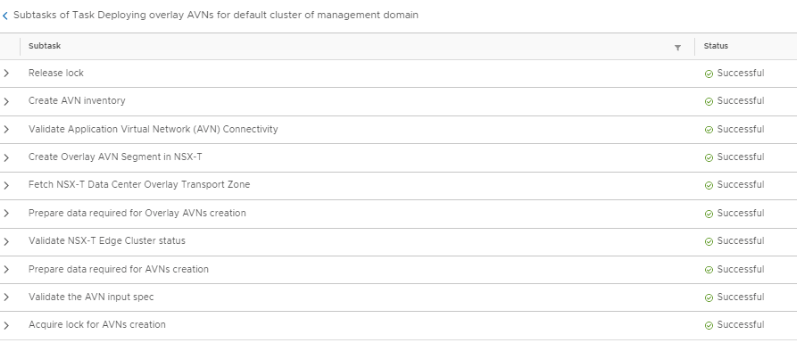
Watch the tasks window in the SDDC manager for deployment task to succeed.

You can also click the main task to see all of the sub tasks and watch for them to successfully complete.

Going back to the summary tab of the management domain, below the NSX-T configuration, you will now see the details of the AVN network just deployed.

Now we have the AVN ready for the vRealize/Aria suite deployment through the SDDC manager.

For more information, see VMware’s documentation Deploying Application Virtual Networks in VMware Cloud Foundation.

VMware Cloud Foundation: SDDC Manager Day 2 Configurations: Deploying an NSX Edge Cluster In The Management Domain.

Blog Date: 10/13/2023

After VCF has been deployed, and the tier 0 and tier 1 gateways have been configured in NSX, you can log into the SDDC manager and configure the NSX Edge Cluster for the management domain/consolidated domain deployment. A similar process is also used for the NSX Edge Cluster in a workload domain. During the design preparations for the VCF deployment, the NSX cluster would have been defined, along with the network information. Those design considerations and work wont be covered here, and it is assumed you are ready to deploy the edge cluster.

In the left pane of the SDDC Manager, select Workload Domains, and then click the management domain link. In the right pane, click the ACTIONS drop-down menu and click Add Edge Cluster.

Review the prerequisites, select the Select All check box, and click BEGIN.

Provide the following information for the new edge cluster. In this example, we are using an MTU of 9000 for simplicity.
Edge Cluster Name:
MTU: 9000
Tier 0 Name:
Tier 1 Name:
Edge Cluster Profile Type: Default

Enter the desired password for the password boxes. Click NEXT. Enter the details for what the edge cluster will be used for. On the Edge Cluster Settings, in this example we will select Custom.

The edge cluster size will be determined during the design phase of the NSX edge cluster. In this example, we have Large selected. Your mileage may vary.

Validate that the Tier0 Service High Availability is Active-Active. Validate that EBGP is selected as the Tier0 Routing Type. Enter the correct ASN number for your environment. Click NEXT.

Provide the cluster details for the first edge node. Cluster type setting will vary depending on your environment configuration:

Fill in the Edge Node details for the TEPs.

Now add the first Tier-0 uplink and BGP info, and second Tier-0 uplink and BGP info.

Review the values entered to insure accuracy, and then click the ADD EDGE NODE button. The config for the first edge node has been saved.

Now you need to add the config details for the second edge node. Click ADD MORE EDGE NODES which takes you to the top of the Edge Node Details page. You’ll notice the previous values entered are still present. Starting from the top, work your way to the bottom, and carefully update all entries with the second edge node config.

Review the values entered to insure accuracy for the second edge node, and then click the ADD EDGE NODE button. The config has been saved.

At this point, two edge nodes should be shown. More can be added if needed, but two nodes offer sufficient redundancy. Click NEXT.

Review the summary and ensure that you entered the values correctly.

IMPORTANT:

Ensure that you entered the IP addresses, FQDNs, and VLANs correctly by comparing all values with the network diagram. Any data entry error will cause errors in deployment.

Click NEXT

Wait for validation to complete.

If any checks fail, record the cause, and verify that no values are incorrectly entered in the wizard. CAUTION: Do not click FINISH unless the validation succeeds for all checks. If the validation checks succeed, click FINISH.

You can monitor the deployment in the SDDC manager tasks pane in the bottom of the screen. If you click on the task name for adding the edge cluster, the sub-deployment tasks will be shown.

Wait for the edge cluster deployment task to complete before deploying application virtual networks.

For more information, see VMware’s documentation on Managing NSX Edge Clusters in VMware Cloud Foundation.

VMware Cloud Foundation: SDDC Manager Day 1 Configurations: Configure Certificate Authority

Blog Date: 10/6/2023

After VCF has been deployed, you can log into the SDDC manager and configure a certificate authority. This is useful if there’s a desire to use custom signed certificates. SDDC manager has the ability to run OpenSSL and create certificates for the associated VMware products in the SDDC. Alternatively, you can also configure the Certificate Authority to use a Microsoft CA. In this blog I will cover the steps to setup the OpenSSL. One thing to note is that by default, the certificates authored using the method will be valid for a year.

In the left pane, scroll down and click Certificate Authority under Security. In the right pane, click the EDIT button. In the Certificate Authority Type, select OpenSSL. Fill in your environment specific details, and then click SAVE.

The CA Configuration Saved Successfully message appears on the page.

For more information, checkout VMware’s documentation on Managing Certificates in VMware Cloud Foundation.

To update the certificates in SDDC manager, I would first take a snapshot of whatever you are updating the certificate of, then in SDDC manager locate Workload Domains in the left pane under Inventory. Select the management domain (or desired domain), and then click on the Certificates tab.

In this example, place a check mark in the box for sddcmanager, and click the GENERATE CSRS button to configure the CSR details with your organization’s specific details.

Click NEXT.

On the Subject Alternative window, you may wish to add additional info, otherwise click NEXT.

Click the GENERATE CSRS button. Wait for the CSR Generation is successful message before continuing. You might need to refresh the browser periodically.

Now we can generate the signed certificate from the certificate authority, which in this case will be the SDDC manager considering we enabled OpenSSL. Leave sddcmanager selected, and click GENERATE SIGNED CERTIFICATES button. In the Generate Certificates pop-up window, click the Select Certificate Authority drop-down menu and select OpenSSL. Click GENERATE CERTIFICATES. You will need to wait until you see the certificate generation is successful message. View the Certificate Operation Status column to see that the certificate generation was successful.

With the sddcmanager still selected, click the INSTALL CERTIFICATES button. Refresh the browser a few times until you see security warnings about the new certificate as a result of the change. In the end, you should see a Certificate Installation is successful message display.

At this point you can restart the SDDC manager appliance to ensure the new certificate is in use going forward. Now simply rinse, wash, and repeat on the remaining appliances you wish to update the certificate.

In my next blog, I’ll go over the process of deploying an NSX edge cluster in the management domain. this will be used in the future when we create the network segment for vRealize/Aria.