
In this blog, I am going to share a problem I came across on a Professional Services engagement with a customer’s VMware Cloud Foundation 4.x environment, and our inability to remediate the root account of the NSX-T appliances.
Passwords had expired in the environment and showed disconnected in the SDDC manager UI. For the root, admin, and audit accounts, we were able to follow the following knowledge base article and get these accounts active on the NSX-T appliances: Credential operations fail on NSX Components in SDDC Manager. We tested these accounts and everything was working as expected on the appliances.
In the SDDC manager UI, we then were able to remediate and rotate the admin account for NSX-T appliances. However, while trying to remediate the root account with the known password that was already in the SDDC database, the operation failed. So we tried to create a brand new password for the root account on the NSX-T appliances, and then tried the to remediate the account again in the SDDC UI, but received the same error. “Failed to test: SSH credentials throughout the NSX-T cluster.”

Using the Reference Token from the failed task, I established an SSH connection to the SDDC appliance to review the operationsmanager log.
less /var/log/vmware/vcf/operationsmanager/operationsmanager.log
I then searched for the reference token “/OJB1CJ”, and found that the same error message given in the SDDC UI was given in the operationsmanager log. I was also finding javax.net.ssl.SSLHandshakeException error messages. I backed out of the log, and then validated that I could indeed SSH from the SDDC appliance to each of the NSX-T appliances, and that I could SSH from each of the NSX-T appliances back to the SDDC appliance, and validated that I could establish an SSH connection between each of the NSX-T appliances. Logging into the NSX-T UI, everything appeared to be happy and healthy. Lastly, I decided to check the self-signed certificates on each of the NSX-T appliances. NSX01 and NSX02 both looked proper, and had the correct FQDN for each, however, NSX03 appliance did not. Somehow it had the FQDN of the vip.
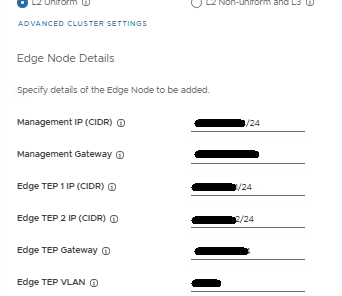
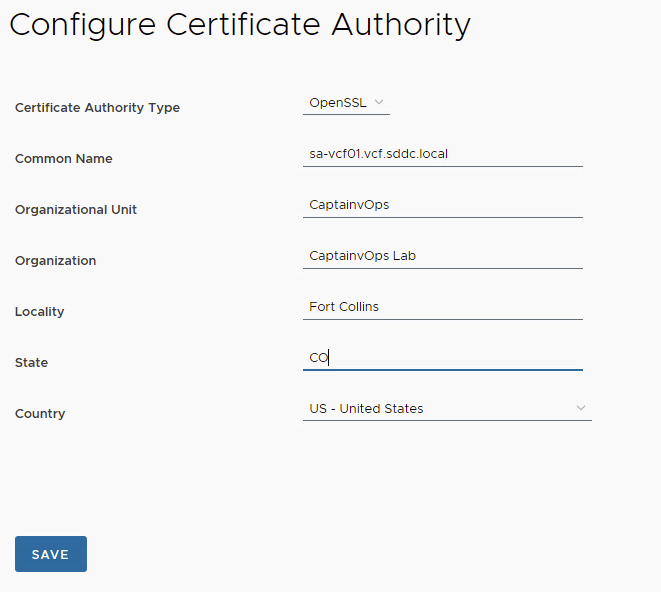
Suspecting it was the certificate on NSX03 that was hosing us, we used the VMware documentation to Replace Certificates of the NSX-T appliances with a signed certificate. We could NOT use the SDDC manager to replace the NSX-T certificates, because SDDC manager requires a good root account in order to use this automated function, and we could not fix the root account without having a proper certificates on the NSX-T appliances. We used one signed certificate across the three appliances and vip, and made sure the vip, NSX01, NSX02, and NSX03 were all in the SAN. We then validated that each NSX-T appliance had a healthy signed certificate with the padlock in the URL.
This introduced a new problem within the SDDC manager because we replaced the certificate of NSX-T outside of the appliance, it did not trust the new certificate, because it needed to be imported into its trusted store. I cover that process in a blog here -> How to Update VMware Cloud Foundation SDDC Manager When NSX-T Certificate Has Been Replaced.
I went back to the SDDC manager UI, and was then able to successfully remediate the NSX-T root account for the workload domain. As previously mentioned above, we used Credential operations fail on NSX Components in SDDC Manager to set the accounts on the NSX-T cluster to match what the SDDC manager had, which is why we chose the password remediation option on the SDDC manager here. Now that we have validated that we have good NSX-T accounts in the SDDC manager, we now rotate the NSX-T cluster credentials so that new passwords will be generated.


You must be logged in to post a comment.