
Blog Date: August 12, 2022
NSX-ALB Controller version: 22.1.1
vSphere version 7.0.3 Build 20150588
In my previous blog: vSphere with Tanzu: Deployment of NSX-ALB Controller, I went over the basic NSX-ALB controller deployment and activation. In this blog, I will go over the configuration of the controller in preparation of deploying Tanzu to the target workload compute cluster.
Picking up where I left off previously, I just assigned the Essentials license to the controller.

Next, we need to configure our default cloud.
Configure the Default Cloud
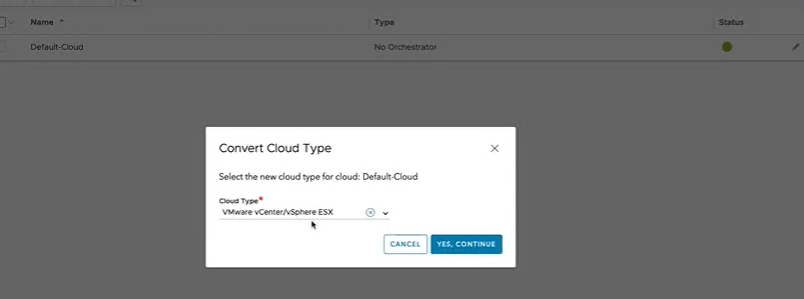
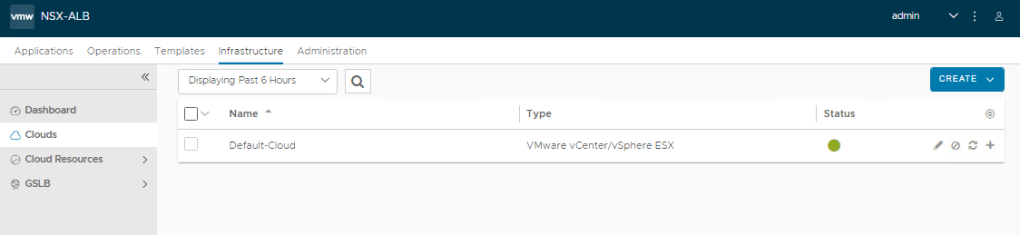
Click on the Infrastructure tab, then select Clouds in the left menu. We see the controller comes with a default cloud already configured, and we can edit this for our needs. To the right of the green dot, you’ll see several icons. Click the gear to the right of the pencil.

On the Convert Cloud Type window, select “VMware vCenter/vSphere ESX” in the cloud type drop menu. Click YES, CONTINUE.
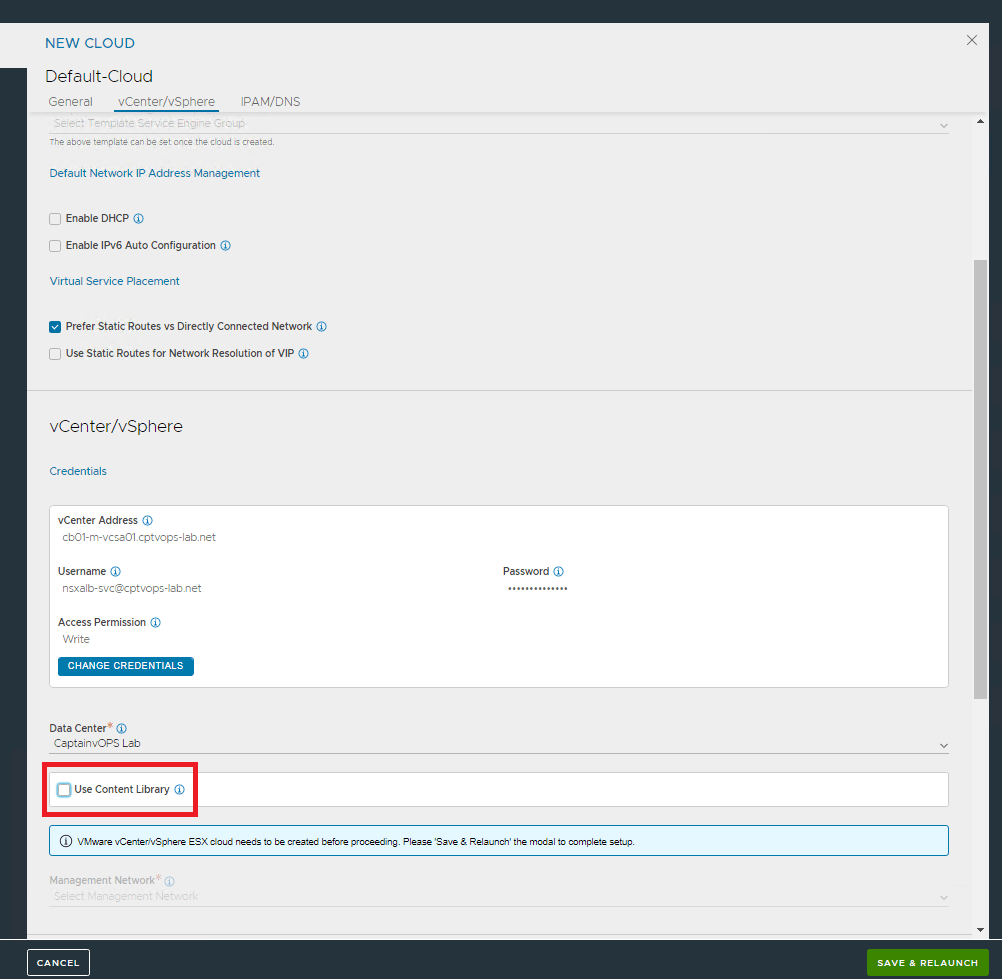
For the Default-Cloud, select “Prefer Static Routes vs Directly Connected Network” under Default Network IP Address Management.
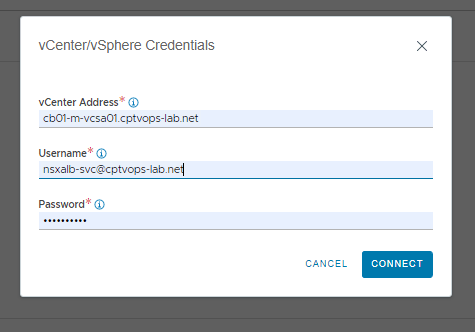
Then under vCenter/vSphere section, click add credentials.

Here you will need to add the FQDN of the vCenter, along with the service account the controller will use to access the vCenter. We can use the example spreadsheet we filled out earlier. Click CONNECT.
This will kick you back to the setup wizard. However we now see a little blue information bar “VMware vCenter/vSphere ESX cloud needs to be created before proceeding. Please ‘Save & Relaunch’ the modal to complete setup.” However, the SAVE & RELAUNCH button in the lower right corner is grayed out. We first need to deselect the “Use Content Library” . Now we can click save & relaunch.
Make sure Data Center drop menu has the desired data center, else select it.
Now we can configure the management network information. Select the management network, add its CIDR and gateway. Under the Static IP Address Pool, we need to click the ADD button. This will need 5 consecutive IP addresses.
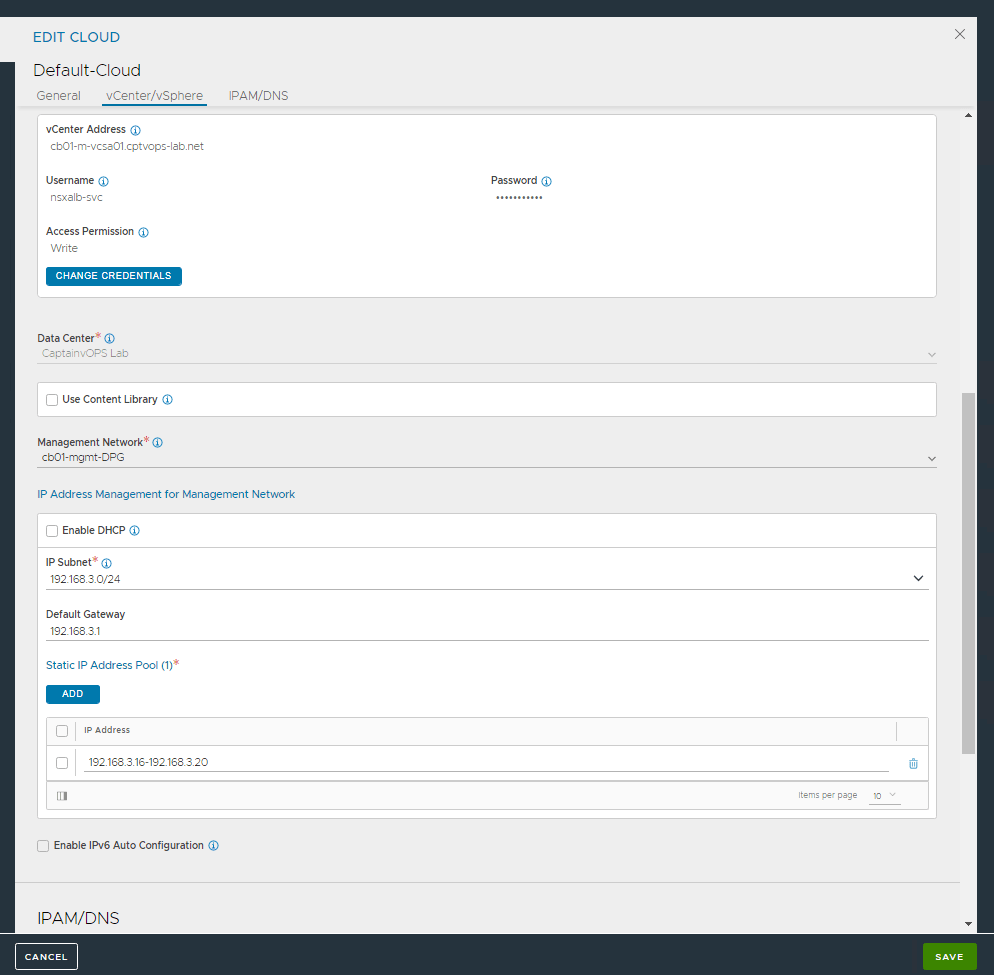
Click the SAVE button in the lower left. We will come back and edit this section later on.
________________________________________________________________________________
Configure the NSX-ALB Controller to use a certificate
Now we need to update the NSX-ALB SSL certificate. We can either use a self signed certificate, or we can create a CSR and sign the certificate with a CA. In my lab, I have applied the signed CA certificate.
Check out my blog where I go over both options and how to create them here: vSphere with Tanzu: Replacing NSX-ALB Controller Certificates Applying a certificate to the controller has to be done before proceeding to the next step!
________________________________________________________________________________
Configure the Service Engines
For that, we click the Infrastructure tab, and then on the left we expand Cloud Resources, and select Service Engine Group.
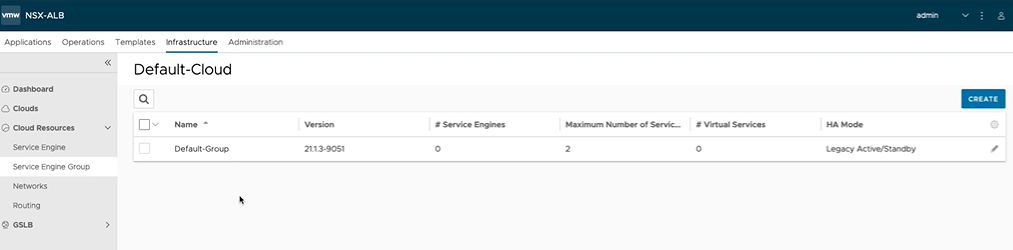
1 – Click the pencil on the default-group.
2 – The default configuration, the Legacy HA is already configured to be Active/Standby. This is the only mode available to the essentials license.
3 – The number of Virtual Services per Service Engine, is 10 at default. This is the number of load balancing services the SE will support. Each Tanzu cluster you create, will consume one of these load balancing services, and every service you expose from the tanzu cluster will consume a service. This can be turned up to 1000 depending on your needs.
4 – The maximum number of service engines is limited by the essentials license used.

Click on the Advanced tab.
Under cluster we need to select the workload cluster that will run Tanzu, and we need to specify all hosts.
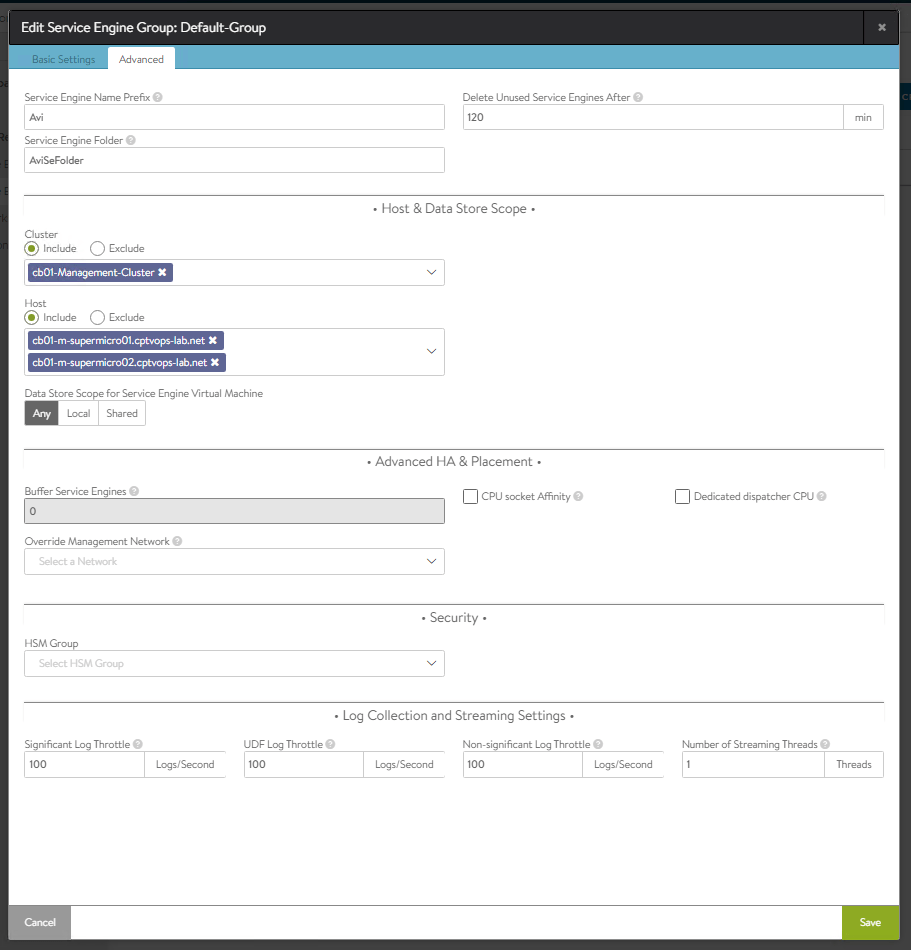
Click Save in the lower right.
Configure The NSX-ALB Controller Networks
Now that we have configured the Service Engine in the previous section, we now need to configure our networks. On the left menu, select Networks under Cloud Resources. We can see that it has detected all of our available networks in the vCenter.

You’ll notice that it does not detect the network settings because we are using static IPs instead of DHCP, so first we will edit the Data network. Click the pencil on the right.
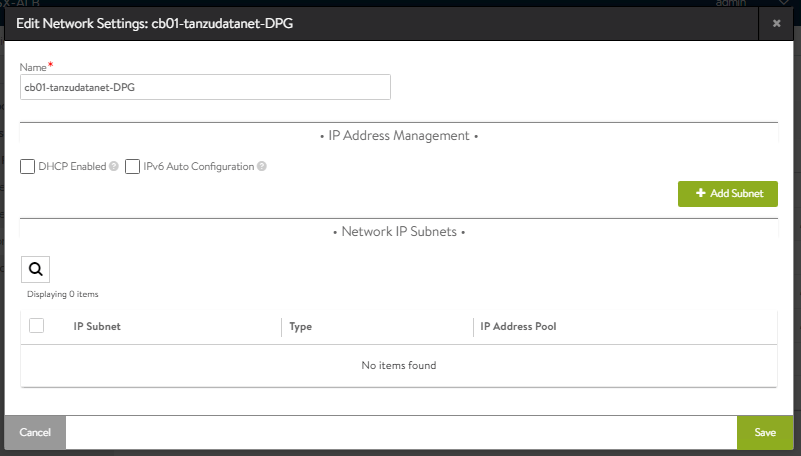
Click the ‘+ Add Subnet’ button. Refer to the spreadsheet again, copy the ‘Data Network CIDR address’, and paste it into the ‘IP subnet field’. Also click the ‘+ Add Static IP Address Pool’ button, and copy the pool for the Data Network off the spreadsheet. End result should look similar to this.

Click Save in the lower right. Click SAVE again on the next screen. Now the Data network is configured. Next we need to configure the routing.
On the left hand side, select VRF Context to configure the routing. To the right of ‘global’ select the edit button.
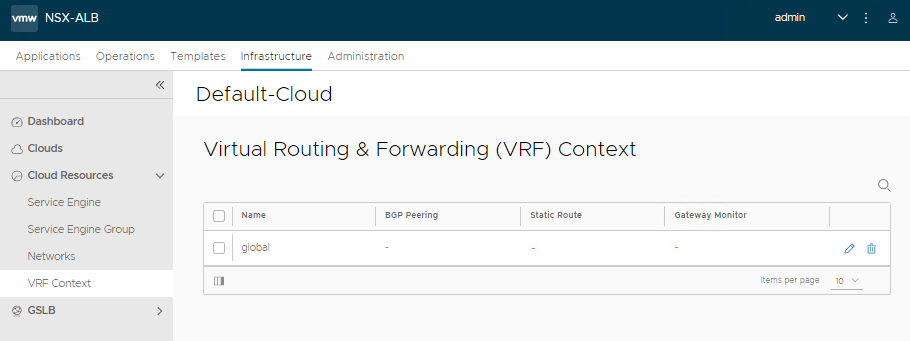
We need add the default gateway route and set to 0.0.0.0/0. In the Next hop, we can add the gateway for the data network from the spreadsheet.

Click Save in the lower right.
Now the Data network has been setup.
Configure the IPAM profile
Next, we need to make sure that the NSX ALB knows which IPs it should use, so we need to setup an IPAM as well.
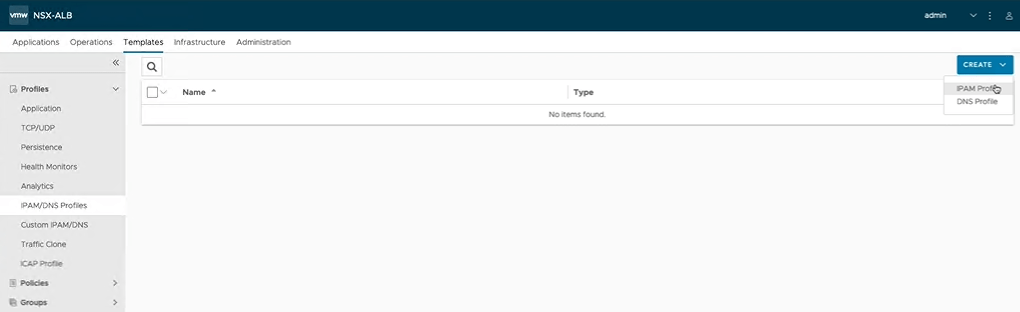
1 – Click on the Templates tab, and then under Profiles, select IPAM/DNS Profiles.
2 – Click the CREATE button, and select ‘IPAM Profile’ from the drop menu. With the essentials license, we can only create an IPAM Profile.
1 – Name the profile. In this example we use: tanzu-ip.
2 – Under Cloud, select Default-Cloud in the drop menu.
3 – Under Usable Networks, click the ADD button, and in the lower menu, select the data network.

Click SAVE in the lower right.
Now the IPAM profile is configured.
Assign the IPAM profile to the Default-Cloud
Next we need to assign the IPAM to the default cloud. Click the Infrastructure tab, select Clouds, and then to the right of the default-cloud, click the edit button.
Now we can update the default-cloud IPAM Profile, with the IPAM profile just created.

Click SAVE in the lower right. Next, wait for the status to turn green if it hasn’t already.
Congrats! We have finished the setup for the NSX-ALB Controller, and are now ready to deploy Tanzu. I’ll cover that in my next blog. Stay tuned.

You must be logged in to post a comment.