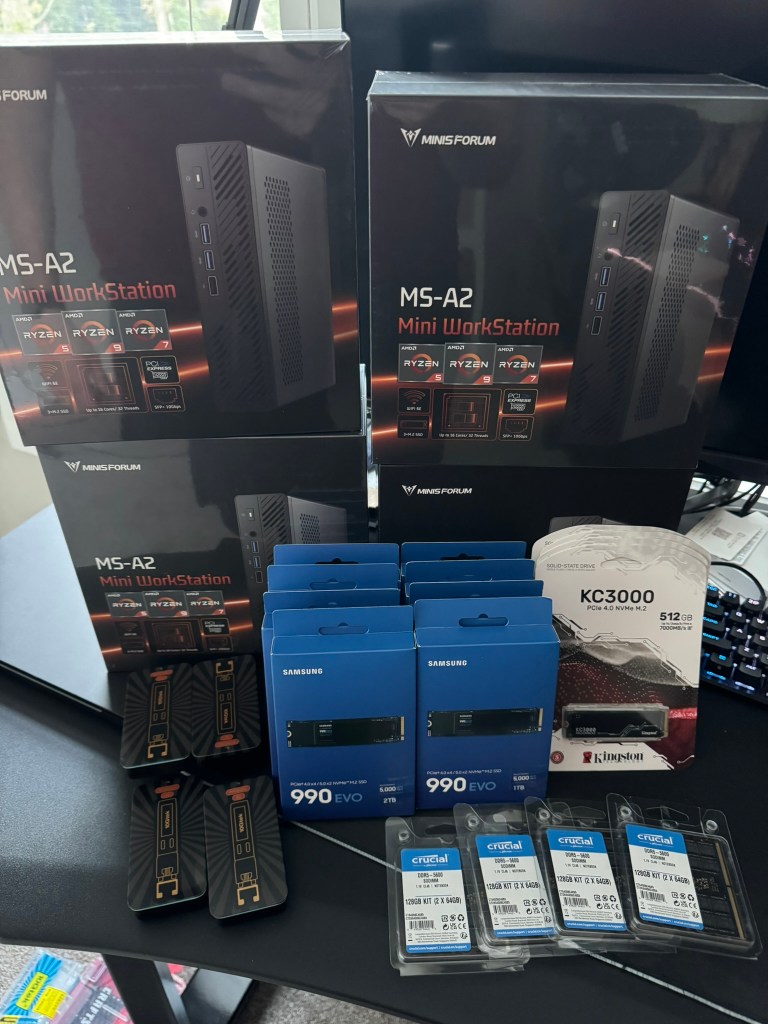
It’s that time to give the home lab a big refresh, and purchase new hardware for VMware Cloud Foundation sandbox. As a VMware employee, I had access to internal labs that I could quickly spin up if I needed to test something with VCF. With every software company purchase, Broadcom has spun off the majority if not all of their newly acquired Professional Services division, and VMware was no different. Now back in Partner life, I needed to reinvest in my home lab. VMware Cloud Foundation is and expensive investment for customers, and as it turns out, it is not cheap for the home lab either lol.
Your tax and shipping costs may vary. I am still looking for 10G switch, rack, and rack mount hit for these to keep things tidy. I expect my total costs to come in under 8K USD. I’ll update this blog with the additional hardware when it comes in.
Hit a frustrating bug that I had been troubleshooting for weeks in a customer’s VMware Cloud Foundation (VCF) 4.x environment, where the SDDC manager was unable to rotate or remediate the svc-{nsxvip-vcenter-fqdn}@vsphere.local service account, that is used to connect the NSX-T to the Compute Manager (vCenter). We could successfully remediate and rotate the service account for the management domain NSX-T, but we could not rotate vi-workload domain NSX-T service account.
In the SDDC UI and operationsmanager.log, we would see an error message similar to:
“Compute manager {wld-vcenter-fqdn} with id {uuid} connection config is invalid. Edit Hostname and provide compute manager credentials.”
Come to find out, this is a known bug for the 4.x versions of VCF workload domains that use a shared NSX-T configuration. It is believed that there is an SSO passwords sync delay between vCenter Servers that causes this.
I don’t believe there’s a resolution for 4.x versions of VCF, and have not tested in 5.x versions of VCF, but here’s the work around. Are you ready?
Log into SDDC Manager
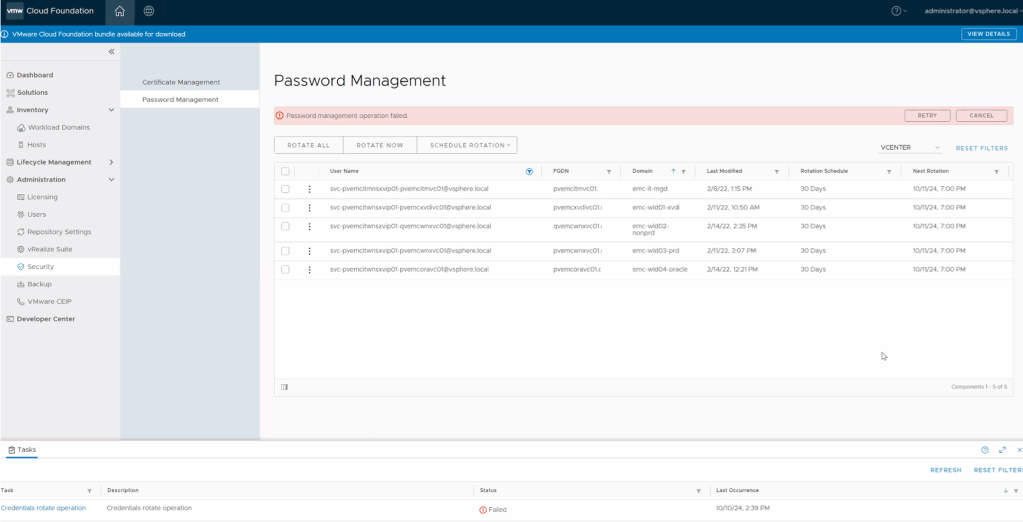
Go to Password management section and select service account in vCenter used by NSX-T to rotate
Initiate the task to rotate the password
Wait for the task to fail like in the picture below.
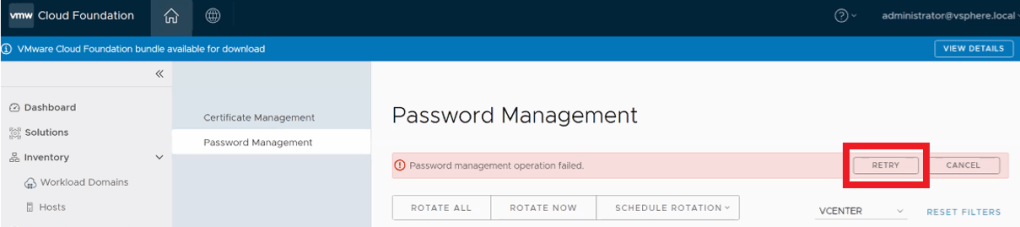
5. Wait 5 to 15 minutes for sync operations on vCenter to complete and then click on RETRY button. (your mileage may vary depending on vCenter activity)
6. Verify task is successful in SDDC Manager. That should do the trick. Otherwise, you might have something else going on and will need to open a ticket with support to investigate further.
On a side note, the “Last Modified” date may not change in the UI, this is another known bug. All we are looking for here is the task to complete successfully.
It doesn’t appear that this account password is stored in the SDDC manager. It is not stored in the usual way that would present the account using the lookup_passwords utility on the SDDC manager.
In my searching, I did happen to come across the following KB to Retrieve the service accounts credentials from SDDC Manager. Even though this shows the svc-{nsxvip-vcenter-fqdn}@vsphere.local service account, it does not provide the password. I digress. Hopefully the above workaround walk-through helps you.
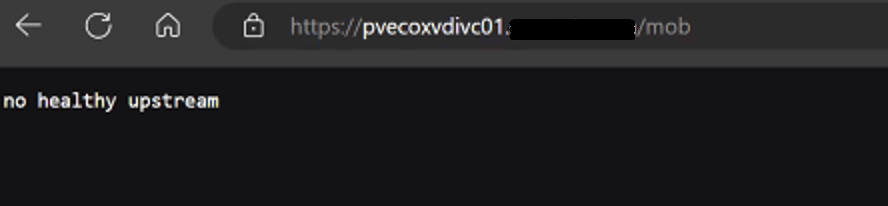
One of my customers had a strange issue where the vCenter MOB wasn’t working on some of their vCenters in their VMware Cloud Foundation 4.X deployment.
The 10 vCenters are running in enhanced linked mode, and out of the 10, we only had one management vCenter where the MOB was working. All other services on the vCenter appear to be working fine.
On the vCenter, we can check and see if the vpxd-mob-pipe is listed in the following directory /var/run/vmware with the following command:
ls -la /var/run/vmware/
If we do not see vpxd-mob-pipe, then we need to look at the vpxd.cfg file. Specifically we are looking for the following parameter: <enableDebugBrowse>. If this is set to false, the MOB will not work.
vi /etc/vmware-vpx/vpxd.cfg
Once the vpxd.cfg opens, we can search the file by pressing the ‘ / ‘ key, and then enter:
/<enableDebugBrowse>
and then press enter.
This should take us to where we need to be. In my case, it was set to false as shown below:
<enableDebugBrowse>false</enableDebugBrowse>
Hit the ‘INSERT’ key, and change >false< to >true<.
<enableDebugBrowse>true</enableDebugBrowse>
Hit the ‘ESC’ key, and then hit the ‘ : ‘ key followed by entering ‘ wq! ‘ to save and exit the vpxd.cfg file.
:wq!
Now we need to stop and start the vmware-vpxd service with the following command:
Continuing from my previous blog post where the VMware Cloud Foundation 4.x SDDC manager was unable to obtain SSH connection to NSX Edges, we determined that at some point, the edges were redeployed via NSX-T instead of through the SDDC manager, and we had to update the edge ID’s in the SDDC manager database. I’d certainly recommend checking that blog out here –> VMware Cloud Foundation SDDC Manager Unable To Remediate Edge Admin and Audit Passwords. Part 1.
In this blog, I will go through the second issue where we identified the HostKey of the edges had been changed by investigating the logs, and the process we used to fix it and restore the SDDC manager’s communication with the edges, so that we can successfully manage them via the SDDC manager in VMware Cloud Foundation.
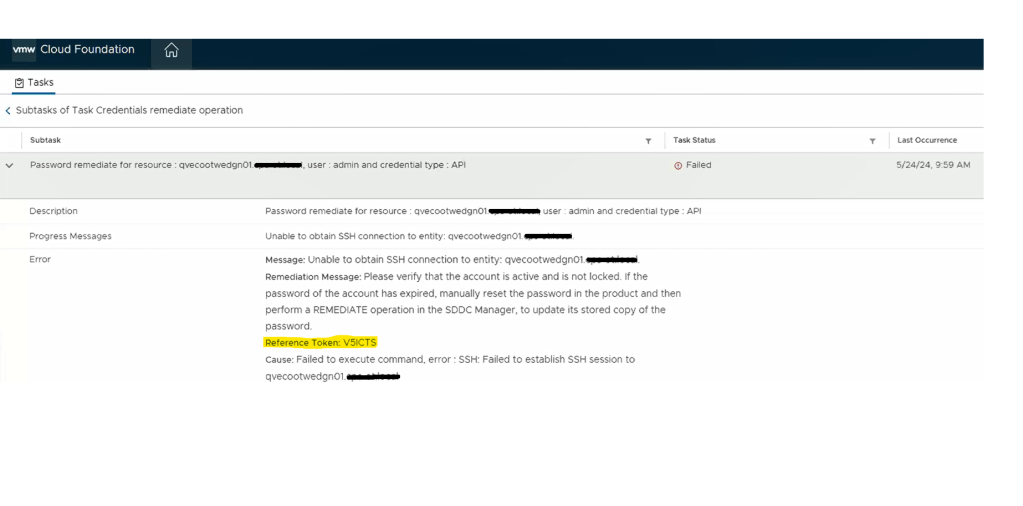
We still see a similar error message in the SDDC manager UI when we attempt to remediate the edges admin and audit passwords. We established an SSH session to the SDDC manager to review the operationsmanager.log located in /var/log/vmware/vcf/. We did a “less operationsmanager.log” and searched for the edge, in this example “qvecootwedgen01”
After searching the log, we can see there’s an error in the operationsmanager.log that the HostKey has been changed. To resolve this issue, we can use a script called fix_known_hosts.sh. The fix_known_hosts.sh script was created by Laraib Kazi to address an issue where SSH attempts from the SDDC Manager fail with an error related to the HostKey. This script removes existing erroneous entries in the known_hosts files and updates them with new ones. It is recommended to take a snapshot of the SDDC Manager before executing the script, which edits 4 known_hosts files. This script is useful when dealing with SSH host key mismatches, which can occur due to various reasons like restoring from a backup, manual rebuild, or manual intervention to change the Host Key. The script can be downloaded from hist github page here.
Upload the script to a safe spot on the SDDC manager. You can put it in the /tmp directory, but remember it will be deleted on next reboot. The script can be run on the SDDC manager as is. HOWEVER, you will want to prep before hand, and get the FQDN of the edge node(s) and IP address(s) in a text file as we will need those when we run the script.
************************************************************************************************************** STOP… Before continuing, take an *offline* (powered off) snapshot of the SDDC manager VM as we will be updating the edgenode HostKey on the SDDC manager. **************************************************************************************************************
Disclaimer: While this process has worked for me in different customer environments, not all environments are the same, and your mileage may vary.
Run the script:
./fixed_known_hosts.sh
You’ll want to enter the FQDN of the nsx-t edge being fixed. The resulting example output should follow:
Re-run this script against additional NSX-T edges as needed.
Now you’re ready to try password operations again in the SDDC manager against the edge(s). If you elected to create a new password on the NSX-T edge, you’ll need to choose the password “remediation” option in the SDDC manager to update the database with the new password created. If you set the password on the NSX-T edge back to what the SDDC manager already had, then just use the password “rotate now” function.
SDDC password operations should now be working as expected. If this did not resolve the issue, I would revert back to snapshot, and contact support for further troubleshooting.
If this resolved your issue, don’t forget to clean your room, and delete any snapshots taken.
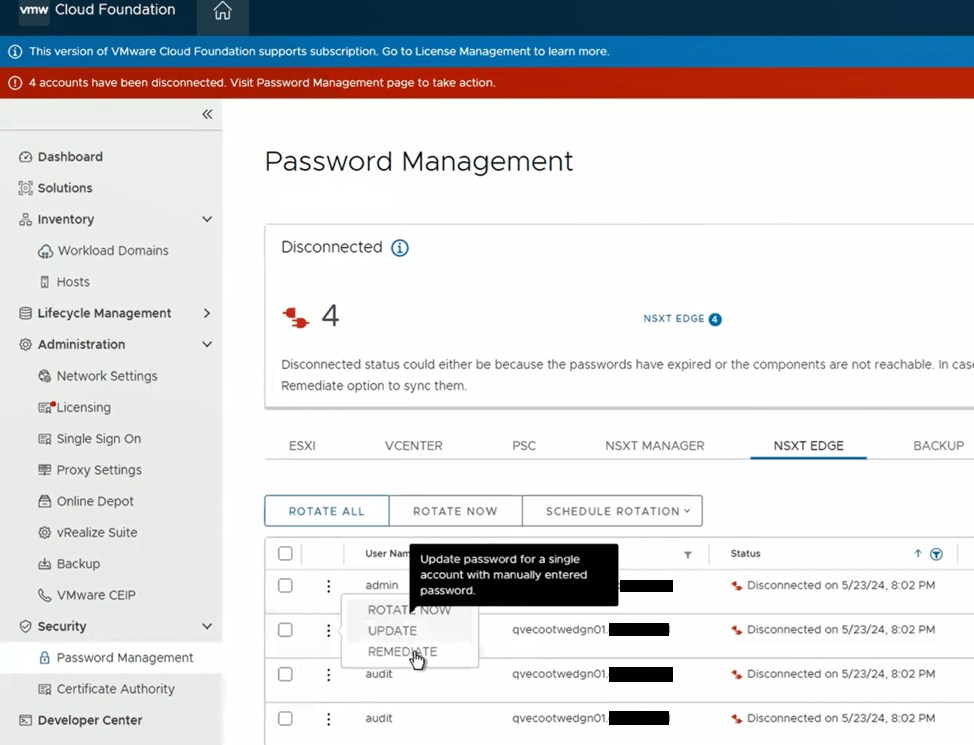
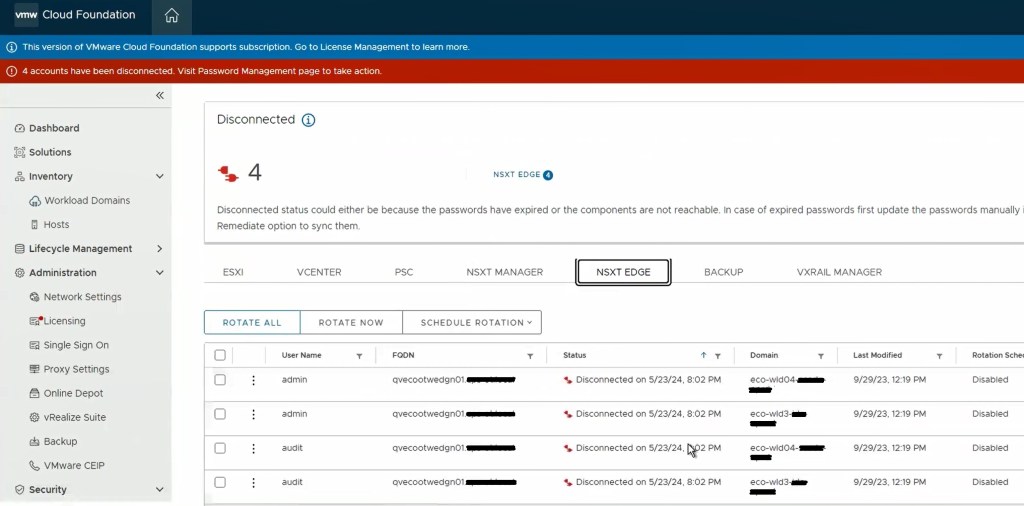
One of the cool features of VMware Cloud Foundation has, is the ability to manage VMware endpoint passwords from SDDC manager i.e.: NSX, edges, vCenter, ESXi hosts, and Aria Suite Lifecycle Manager. I wanted to share an experience I had on a recent VMware Cloud Foundation (VCF) 4.x project, where the NSX-T edge root, admin, and audit accounts expired and showed disconnected in SDDC manager.
I’ve decided to split this blog into two parts, because we ended up having two different issues. The first being that the edges, had been redeployed through NSX-T, and the second being a result of the first, that the known HostKey had changed for the edges.
Although we were able to remediate the root accounts on the edges, we could not remediate the admin and audit accounts.
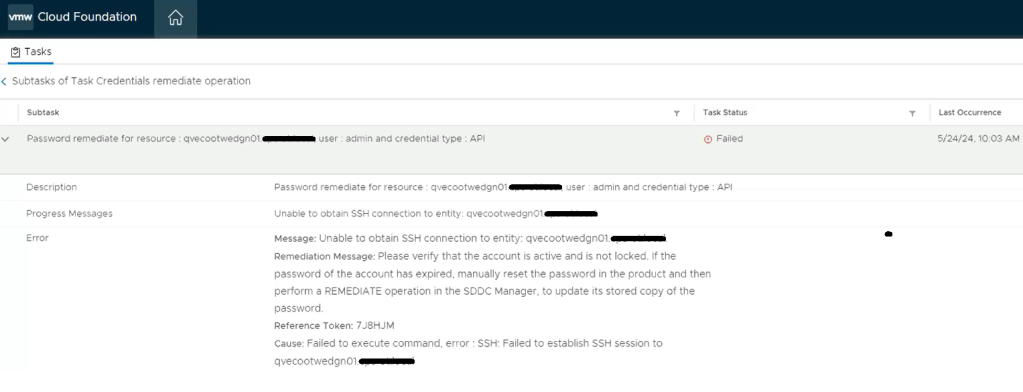
Going back to the SDDC manager, we are now able to remediate and rotate the root account of the NSX-T edges. However, the admin and audit accounts won’t remediate and we see the following error displayed in the SDDC manager UI.
Digging deeper into the problem, we established an SSH session to the SDDC manager to review the operationsmanager.log located in /var/log/vmware/vcf/. We did a “less operationsmanager.log” and searched for the edge, in this example “qvecootwedgen01”. We found that the SSH connection could not be established due to the HostKey being changed.
With this error message, we wanted to validate the edge IDs in the SDDC manager database, and compare those to the ones in the NSX-T manager, suspecting the edge IDs had changed likely to being redeployed directly through the NSX-T manager instead of the SDDC manager.
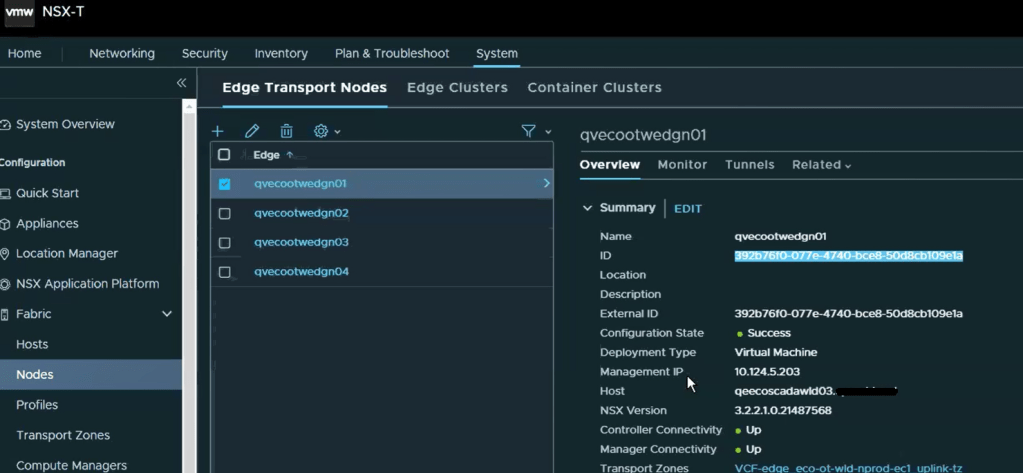
Looking in the NSX-T manager UI, we can get the edge node ID.
Copy the edge ID to a text file. Let’s compare that to what the SDDC manager has. SSH to the SDDC manager, and su root.
Run the following curl command to gather and output the NSX-T edge clusters to a json for review.
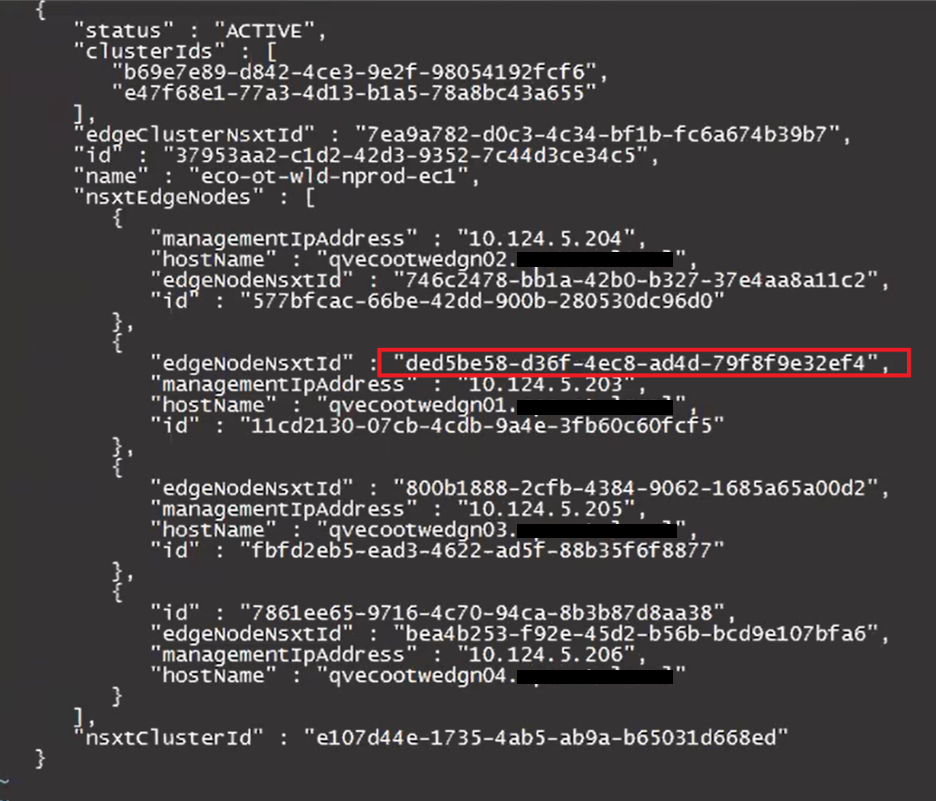
Now, let’s check the json output to compare the edge node ID. change directory to the tmp directory and do a less on the cluster.json.
less cluster.json
To find the edge node we are looking for, do a /<edgenode> and hit enter. For this example, we are looking for edge “qvecootwedge01”.
Looking at the “edgeNodeNsxtId” of the example edge qvecootwedge01, we can see the ID does not match what was found in NSX-T UI, which would be an indication the edge had been updated/redeployed at some point. This is one of the reasons why the edge shows disconnected in SDDC manager UI, and it needs to be corrected.
At this point, there’s enough evidence to contact support. However, after having been through this in VCF 4.x deployments, I have detailed steps here in this blog and the next, that I have used to resolve this issue. For those willing…. Grab a partner; we’ll be doing open heart surgery on the SDDC manager database…
************************************************************************************************************** STOP… Before continuing, take an *offline* (powered off) snapshot of the SDDC manager VM as we will be updating the edgenode ID (edgenodeNsxtId) in the SDDC manager database. **************************************************************************************************************
Disclaimer: While this process has worked for me in different customer environments, not all environments are the same, and your mileage may vary.
It’s important to note that we will not be interacting with the NSX-T edge node, and we are only updating the SDDC manager database. There’s no impact to the edge node traffic. There is always an associated risk with updating the SDDC manager database, which is the reason for the snapshot. We can always revert back to the snapshot and undo the change if needed.
Change to the tmp directory if not already there.
With the next command, we’ll be cloning the nsxt-edgecluster config into a cluster.json for us to modify for the purpose of updating the edgenodeNsxtId value of the edge, to match the ID that was in the NSX-T manager. Modify the following command and update with the FQDN of the SDDC appliance:
Now that we have a current export of the config, we’ll clone the config.json to a new file we will edit.
cp cluster.json cluster_fixed.json
Let’s edit the new cluster_fixed.json.
vi cluster_fixed.json
The contents of this json contain all of the NSX-T edge clusters for the particular NSX-T cluster. This may have more edge clusters or less depending on the deployment model chosen for VCF. Page Down until you find the desired edge cluster that needs to be updated.
Next, we’ll need to delete everything else in the json and only keep the desired edge cluster that needs to be updated, because we will eventually pass this json back to the SDDC manager, and this is the only way it will accept the updated edge IDs for the edges that are part of this cluster.
In this example, we are only keeping the config for the edge cluster “eco-ot-wld-nprod-ec1”. There will be a ‘ ] ‘ at the end of the json that will need to be deleted. The resulting json should look something like this.
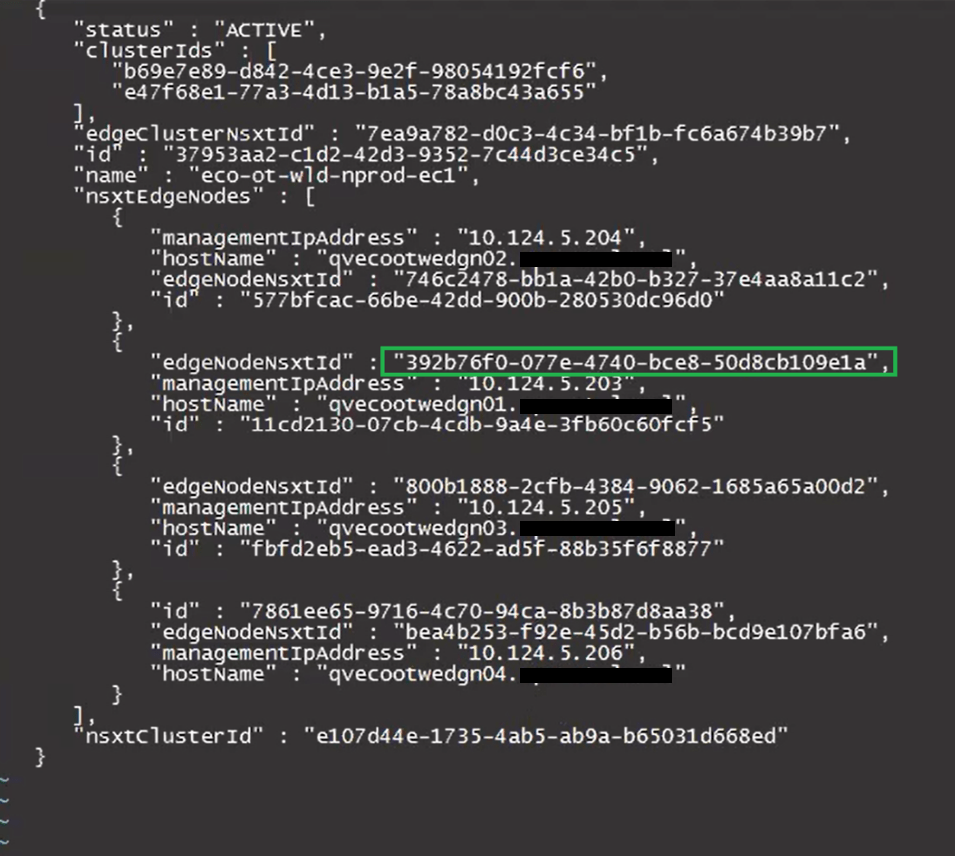
Update the desired “edgeNodeNsxtId”(s) with the desired ID(s) we got from the NSXT UI earlier.
Before:
After:
Keep the new edge ID handy, as we will need it for the curl command later on when we pass the updated cluster_fixed.json back to the SDDC manager.
Press ‘esc’. Enter ‘:wq’ to save the cluster_fixed.json.
Modify this curl command to update the SDDC manager host name where it says localhost, update the json name to replace test.json, and place the ID for the nsxT edge cluster at the end after the ‘/’.
curl -X PUT -H "Content-Type: application/json" --data @test.json http://localhost/inventory/nsxt-edgeclusters/
The updated curl command should look something like this example:
curl -X PUT -H "Content-Type: application/json" --data @cluster_fixed.json http://pvecootvcf01/inventory/nsxt-edgeclusters/37953aa2-c1d2-42d3-9352-7c44d3ce34c5
Paste the command into the terminal and hit enter to run. The output should be similar to this example:
You may need to repeat this process for additional edge IDs that need to be updated.
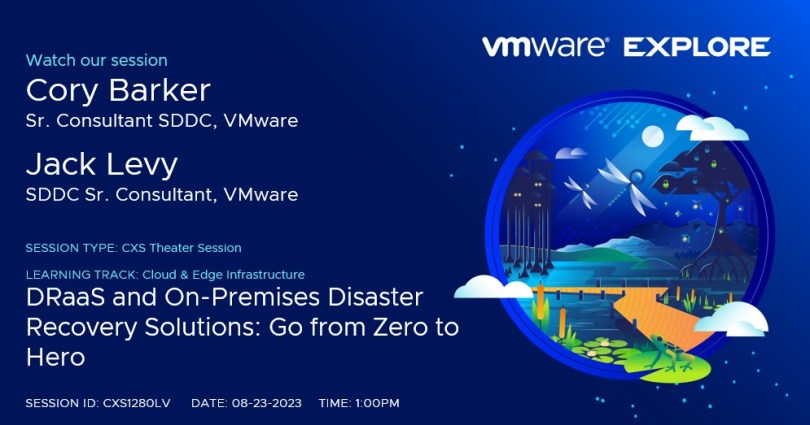
It’s that time of year again, and I am very excited that VMware Explore has been moved back to sunny Las Vegas! To that end, I am also very excited to announce that I get to co-present a CSX Theater session CXS1280LV this year with Jack Levy.
VMware customers interested in leveraging new or existing cloud investments for Disaster Recovery and Ransomware Recovery, will most certainly be interested in attending our 45 minute presentation at the CSX Theater in the solutions exchange area.
In today’s world, disaster recovery is not only about protecting the enterprise during a data center failure. The truth is there are bad actors out there also trying to extort money through ransomware. It’s time to get serious about disaster recovery, and VMware is here to help. Protect your business from human, climate and ransomware disasters. Learn from our experts about VMware’s various disaster recovery solutions from on-premises to our disaster recovery-as-a-service (DRaaS) offerings with ransomware recovery options in the cloud. Define the recovery strategy and protect your assets. In this session, we’ll be covering VMware Site Recovery Manager with vSphere replication, VMware Cloud Disaster Recovery plus the optional Ransomware recovery capabilities, and we’ll have a couple brief recorded demos of the setup process.
We will also be giving an exclusive presentation for our TAM and VMware Success 360 customers in a session that won’t be found in the content catalog TAM3792LV.
I’ll admit that I have always been excited to attend VMware Explore when I was a customer, back when it was called vmworld. My first time as a customer, was back in 2016 when vmworld was moved to Las Vegas. This year, the new Explore will be in Las Vegas for the first time, and it will be my first time presenting as a VMware employee. Does that mean I have come full circle?
Regardless, I am looking forward to the event, being able to meet with my customers I have worked with over the years as a consultant, and getting to meet some of my VMware colleagues that I have had the pleasure to work with over the years.
Jack Levy and I started around the same time on the same team Americas Professional Services Org, and became fast friends.
We are both excited about the opportunity to present at VMware Explore, and we look forward to seeing you at our session!
Blog Date: 3/03/2021 Versions Tested: vCSA: 7.0.1 ESXi: 7.0.1 Microsoft CA Server: 2016
Recently I had a customer that wanted to install their custom certificates on a new vCenter, and have it act as an Intermediate CA to install approved certificates on their hosts. This is common, but is something I have never done myself, so I ended up testing this out in my lab. In this long blog post, I will walk through:
Generating a Certificate Signing Request (CSR) for the vCenter.
Signing the request, creating the certificate using a standalone Microsoft CA.
Creating a trusted root chain certificate.
Installing the custom signed machine SSL certificate.
Installing the custom signed VMCA root certificate.
Renew host certificates and test.
Before we get started, it is worthwhile to note if you were unaware that there are different certificate modes in vSphere 7. Bob Plankers does a great job explaining these modes in the following VMware Blog: vSphere 7 – Certificate Management
I have done my best to focus the steps involved, and provided those below while testing this out in my home lab. Your mileage may vary. _________________________________________________________________________________________________________
Snapshot the vCenter
We will be applying Custom Machine and Trusted Root certificates to the vCenter, and it is good practice to take a snapshot of the vCenter appliance beforehand.
We will be using WinSCP to transfer the files to and from the vCenter. You should validate that you can connect to yours first. If you are having problems connecting to the vCenter win WinSCP, follow this KB2107727.
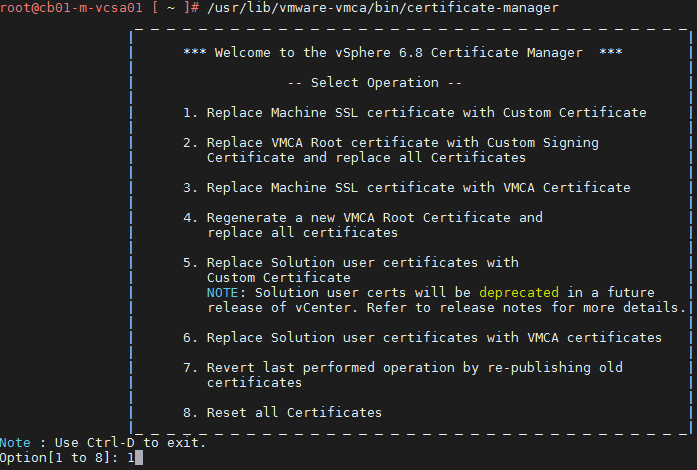
Start an SSH session with the vCenter appliance, and enter “/usr/lib/vmware-vmca/bin/certificate-manager” to launch the utility. We want option #2
Enter “Y” at the prompt: Do you wish to generate all certificates using configuration file : Option[Y/N] ? :
Enter privileged vCenter credentials. The default administrator@vsphere.local will do the trick. Hit Enter key, then input the password and hit the enter key again.
If there is a valid certtool.cfg file that exists with your organizations information you can select N here.
Else if
IF there is no certool.cfg file or you would like to look at the file, use option “Y” here.
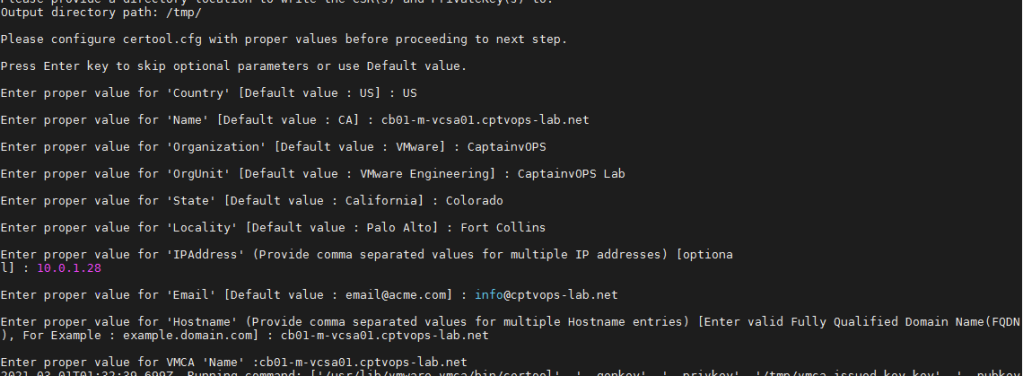
In the next series of prompts, you will be required to enter information specific to your environment. The inputs in purple below are examples I used for my lab, and yours will be different: value for ‘Country’ [Default value : US] : US value for ‘Name’ [Default value : CA]: cb01-m-vcsa01.cptvops-lab.net value for ‘Organization’ [Default value : VMware]: CaptainvOPS value for ‘OrgUnit’ [Default value : VMware Engineering]: CaptainvOPS Lab value for ‘State’ [Default value : California]: Colorado value for ‘Locality’ [Default value : Palo Alto] Fort Collins value for ‘IPAddress’ (Provide comma separated values for multiple IP addresses) [optional]: 10.0.1.28 value for ‘Email’ [Default value : email@acme.com] : info@cptvops-lab.net value for ‘Hostname’ (Provide comma separated values for multiple Hostname entries) [Enter valid Fully Qualified Domain Name(FQDN), For Example : example.domain.com] : cb01-m-vcsa01.cptvops-lab.net Enter proper value for VMCA ‘Name’ : cb01-m-vcsa01.cptvops-lab.net
Enter option “1” to Generate Certificate signing requests
It will prompt for an export directory. In this example I used /tmp/
Now using WinSCP, copy the files off to the workstation you will be using to connect the the Microsoft CA.
SIGNING THE REQUEST, CREATING THE CERTIFICATE USING STANDALONE MICROSOFT CA
I am using a standalone Microsoft CA I configured on my lab’s jump server, and don’t have the web portal. Launch the Certification Authority app.
Right-click the CA, select all tasks, and select Submit new request.
Once you browse to the directory where you stored the “vmca_issued_csr.csr” and “vmca_issued_key.key” files, you will need to change the view to “All Files (*.*)” in the lower right.
Now select the “vmca_issued_csr.csr”
Now go to “Pending Requests”. Right-click on pending cert request, go to “all tasks”, and select “Issue”.
Now go to “Issued Certificates”, double-click to open the certificate, go to the “details” tab and click the Copy to File… button.
When the wizard starts, click Next.
Select “Base-64-encoded X.509 (.CER), and Click Next
Click Browse
type in the file name and click save. In this example, I just use “vmca”.
Click Next, and then click Finish. Now click OK to close the wizard.
For this next part we will need the root certificate from the Microsoft CA. Right-click on the CA and select “Properties”
On the General tab, click the “View Certificate” button. Then on the new Certificate window that opens, click the details tab and then the “Copy to File…” button
When the wizard starts, click Next.
Select “Base-64-encoded X.509 (.CER), and Click Next
Just like before, browse to a locate to save the cert, and give it a meaningful name. In this example, I just use “root-ca”
Click Next and then click Finish. Close the windows.
In order to create a trusted root, we need to create a new file that has the root chain. This file will include the vmca.cer first, and then the root-ca.cer beneath it. I just open the vmca.cer file and root-ca.cer file with Notepad ++
Save it as a new file. In this example I use: vmca_rootchain.cer.
Using WinSCP, I create a new directory in the vCenter’s root directory called CertStore, and then copy the “vmca.cer”, “vmca_rootchain.cer”, and the “vmca_issued_key.key” there.
Open an SSH session to the vCenter, launch the certificate-manager: “/usr/lib/vmware-vmca/bin/certificate-manager”. First we will replace the Machine SSL certificate, so select option 1
Again we are prompted for vCenter authoritative credentials, and just like before we’ll use the administrator@vsphere.local account and password.
Now we reach the menu where we will use Option 2 to import custom certificates. Hit enter.
It will prompt for the directory containing the cert file for the Machine SSL. In this example I used: /CertStore/vmca.cer
Now it prompts for the custom key file. In this example I used: /CertStore/vmca_issued_key.key
Now it will ask for the signing certificate of the Machine SSL certificate. Here we will use the custom vmca_rootchain.cer file we created earlier: /CertStore/vmca_rootchain.cer
Respond with “Y” to the prompt: You are going to replace Machine SSL cert using custom cert Continue operation : Option[Y/N] ? :
Assuming all of the information in the files was correct, the utility will begin replacing the machine SSL certificate. Watch the console for any errors and troupleshoot accordingly. 9 out of 10 times fat fingers are the cause for errors. Or dumb keyboards..
INSTALLING THE CUSTOM SIGNED VMCA ROOT CERTIFICATE
Relaunch the certificate-manager: “/usr/lib/vmware-vmca/bin/certificate-manager”. Use Option #2 now.
Enter Option: Y
Enter the authoritative vCenter account and password. Just like before I’m using the administrator@vsphere.local
We already have a known good certool.cfg file. We’ll skip ahead to the import, so use option: N
Use option #2 to import the custom certificates.
We are prompted for the custom certificate for root. Here we will use the custom vmca_rootchain.cer file we created earlier: /CertStore/vmca_rootchain.cer
Here we are prompted for the valid custom key for root. Just like last time we will use: /CertStore/vmca_issued_key.key
Use option “Y” to replace Root Certificates at the next prompt
Now the utility will replace the root certificate.
After clearing the browser cache, we can see the secure padlock on the login page for vSphere 7.
Now log into vSphere, go to Administration, and Certificate Management. Depending on how quickly you logged in after applying the certs, you may see an error on this page. Give it up to 5 minutes, and you’ll see a prompt at the top of the screen asking you to reload. Do it. Now you will see a clean Certificates Management screen. You should see a _MACHINE_CERT with your organization’s details. You will also see three Trusted Root Certificates. One of which will have your Organizations details.
If you have hosts already attached to the vCenter, and you would like to “Renew” the certificate, by default you will need to wait 24 hours before the certificate can be updated. Otherwise you will receive a similar error in vCenter:
If you need to update the certificate right away, follow KB2123386 to change the setting from 1440 to 10. This will allow for updating the ESXi certificate right away. I’d personally change it back after.
Either 24 hours has passed, or you followed the KB2123386 mentioned above. Now you can “Renew” the certificate on the ESXi host(s). You’ll see the Issuer of the certificate has changed, and should reflect your information. This operation doesn’t appear to work while the host is in maintenance mode.
If you browse to the ESXi host, it too will now have a padlock on its login page signifying a valid certificate.
Blog date: September 01, 2020 Completed on vSphere version: 6.7
Today my customer needed to change the root password for roughly 36 hosts across two data centers. These are two data centers that were recently built as part of my residency with them, and they have already seen the benefits of using host profiles. Today I was able to show them one more.
VMware has a KB68079 that details the process should the root password become unknown on a host. Well the same process can be applied and used to update the password on all hosts with that host profile attached. At the time of writing this article, all hosts are compliant with the current host profile, and there are no outstanding issues.
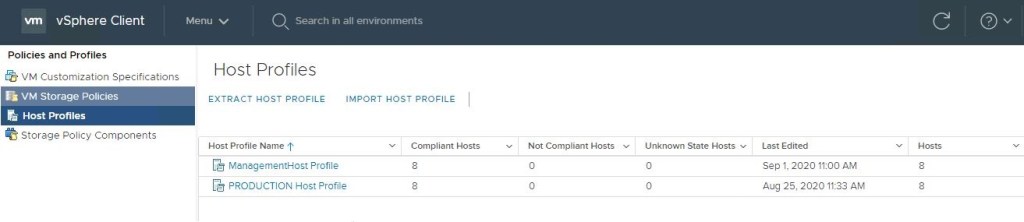
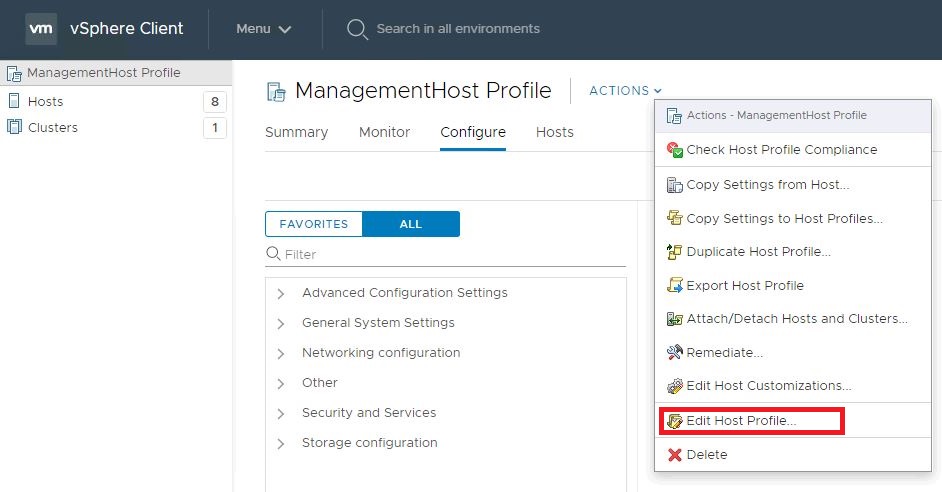
In the vSphere client, go to ‘Policies and Profiles’ and select ‘Host Profiles’ in the left column, click and select the desired host profile on the right.
Edit the desired host profile.
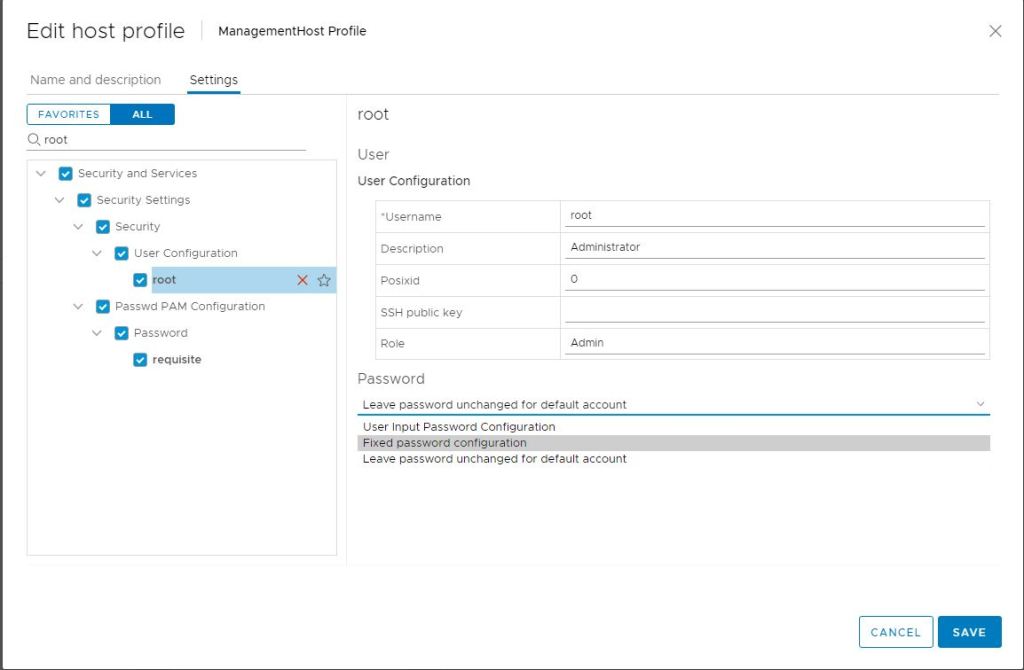
In the search field, type root and hit enter.
Select root in the left column.
In the right column, change the field below ‘Password’ to Fixed password Configuration.
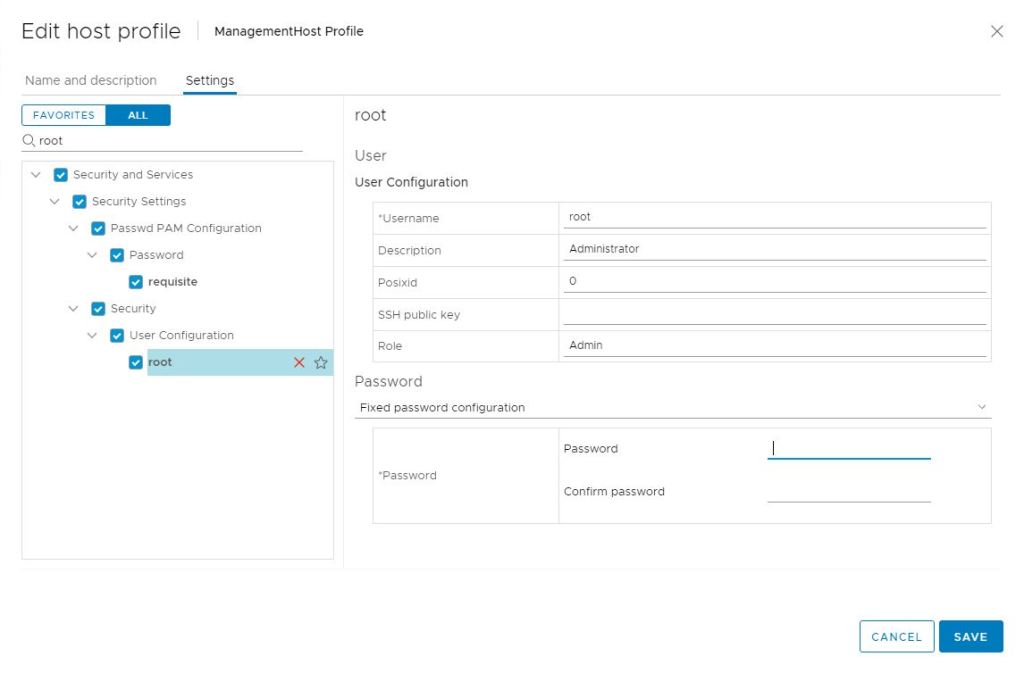
Now you are prompted with password fields and can update the root password.
Click Save once the new password has been entered.
Now you can remediate the hosts against the updated host profile, and the root account will get updated on each host. – Out of an abundance of caution, it is always good to spot check a handful of hosts to validate the new password.
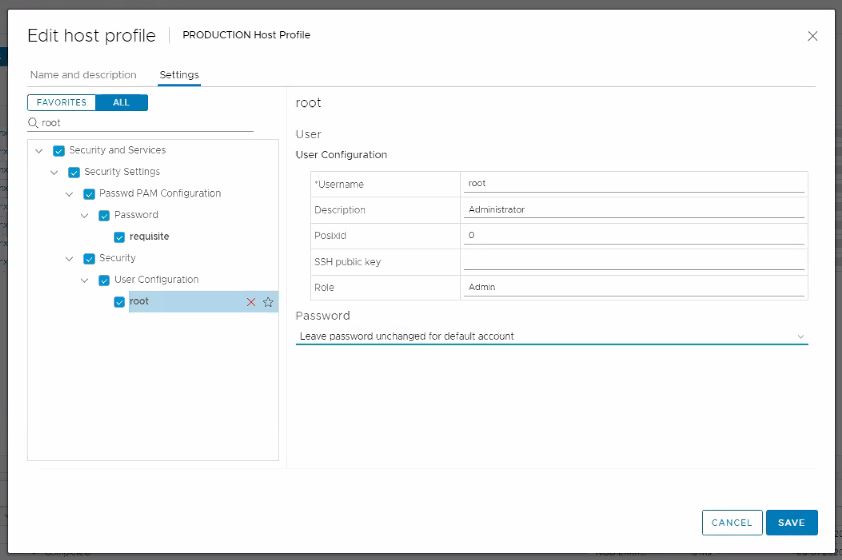
I had my customer go back and edit the host profile once more and change the ‘Password’ field back to: Leave password unchanged for the default account. Click save, and then remediate the cluster again. The new password will stay.
Before I connected with the customer today, they had already researched how to update the root password on all hosts with a script, but this method is simple, automated and built into vSphere.
For the purposes of this demonstration, I will be configuring NFS services on a CentOS 7 VM, deployed to a vSphere 6.7 U3 homelab environment.
NFS Server VM Configuration
Host Name: cb01-nfs01 IP Address: 10.0.0.35 CPU: 2 RAM: 4GB
Disk 1: 20GB – Linux installation (thin provisioned) Disk 2: 100GB – Will be used for the vCD NFS share (thin provisioned)
Configure the vCD NFS share disk
For this demonstration, I have chosen not to configure Disk 2 that was added to the VM. Therefore, this “how-to” assumes that a new disk has been added to the VM, and the NFS server has been powered on after.
1) Open a secure shell to the NFS server. I have switched to the root account. 2) On my NFS server, the new disk will be “/dev/sdb”, if you are unsure run the following command to identify the new disk on yours:
fdisk -l
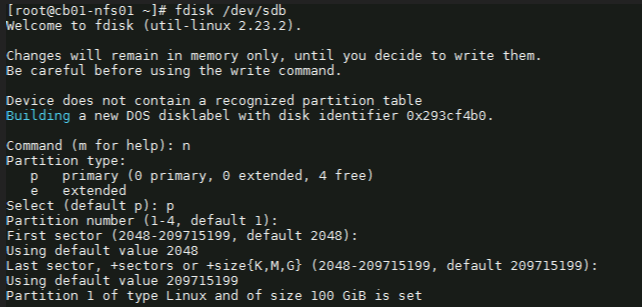
3) We need to format the newly added disk. In my case /dev/sdb. So run the following command:
fdisk /dev/sdb
4) Next with the fdisk utility, we need to partition the drive. I used the following sequence: (for new partition) : n (for primary partition) : p (default 1) : enter (default first sector) : enter (default last sector) : enter
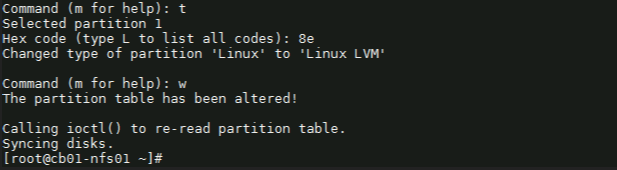
5) Before saving the partition, we need to change it to ‘Linux LVM’ from its current format ‘Linux’. We’ll first use the option ‘t’ to change the partition type, then use the hex code ‘8e’ to change it to Linux LVM like so:
Command (m for help): t Selected partition 1
Hex code (type L to list all codes): 8e Changed type of partition ‘Linux’ to ‘Linux LVM’.
Command (m for help): w
Once you see “Command (m for help):” type ‘w’ to save the config.
Create a ‘Physical Volume, Volume Group and Logical Volume
6) Now that the partition is prepared on the new disk, we can go ahead and create the physical volume with the following command:
# pvcreate /dev/sdb1
7) Now we to create a volume group. You can name it whatever suites your naming standards. For this demonstration, I’ve created a volume group named vg_nfsshare_vcloud_director using /dev/sdb1, using the following command:
# vgcreate vg_nfsshare_vcloud_director /dev/sdb1
Creating a volume group allows us the possibility of adding other devices to expand storage capacity when needed.
8) When it comes to creating logical volumes (LV), the distribution of space must take into consideration both current and future needs. It is considered good practice to name each logical volume according to its intended use. – In this example I’ll create one LV named vol_nfsshare_vcloud_director using all the space. – The -n option is used to indicate a name for the LV, whereas -l (lowercase L) is used to indicate a percentage of the remaining space in the container VG. The full command used looks like: # lvcreate -n vol_nfsshare_vcloud_director -l 100%FREE vg_nfsshare_vcloud_director
9) Before a logical volume can be used, we need to create a filesystem on top of it. I’ve used ext4 since it allows us both to increase and reduce the size of the LV. The command used looks like:
Writing the filesystem will take some time to complete. Once successful you will be returned to the command prompt.
Mounting the Logical Volume on Boot
10) Next, create a mount point for the LV. This will be used later on for the NFS share. The command looks like:
# mkdir -p /nfsshare/vcloud_director
11) To better identify a logical volume we will need to find out what its UUID (a non-changing attribute that uniquely identifies a formatted storage device) is. The command looks like:
To see that it was successfully mounted, use the following command similar to:
# mount | grep nfsshare
Assign Permissions to the NFS Share
14) According to the Preparing the Transfer Server Storage section of the vCloud DIrector 10.0 guide, you must ensure that its permissions and ownership are 750 and root:root .
Setting the permissions on the NFS share would look similar to:
# chmod 750 /nfsshare/vcloud_director
Setting the ownership would look similar to:
# chown root:root /nfsshare/vcloud_director
Install the NFS Server Utilities
15) Install the below package for NFS server using the yum command:
# yum install -y nfs-utils
16) Once the packages are installed, enable and start NFS services:
# systemctl enable nfs-server rpcbind
# systemctl start nfs-server rpcbind
16) Modify /etc/exports file to make an entry for the directory /nfsshare/vcloud_director .
– According to the Preparing the Transfer Server Storage guide, the method for allowing read-write access to the shared location for two cells named vcd-cell1-IP and vcd-cell2-IP is the no_root_squash method.
# vi /etc/exports
17) For this demonstration, my vCD appliance IP on the second nic is 10.0.0.38, so I add the following:
– There must be no space between each cell IP address and its immediate following left parenthesis in the export line. If the NFS server reboots while the cells are writing data to the shared location, the use of the sync option in the export configuration prevents data corruption in the shared location. The use of the no_subtree_check option in the export configuration improves reliability when a subdirectory of a file system is exported. – As this is only a lab, I only have a single vCD appliance for testing. If a proper production deployment, add additional lines for each appliance IP.
18) Each server in the vCloud Director server group must be allowed to mount the NFS share by inspecting the export list for the NFS export. You export the mount by running exportfs -a to export all NFS shares. To re-export use exportfs -r.
# exportfs -a
– To check the export, run the following command:
# exportfs -v
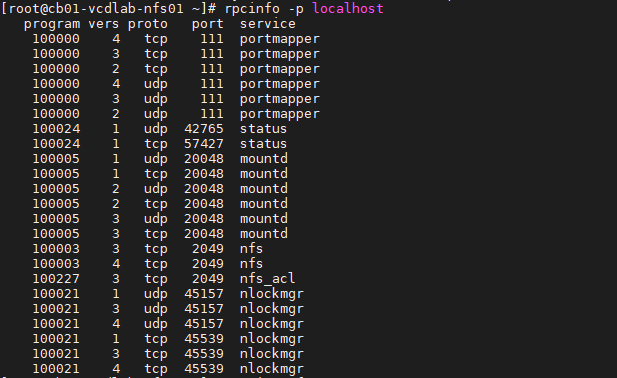
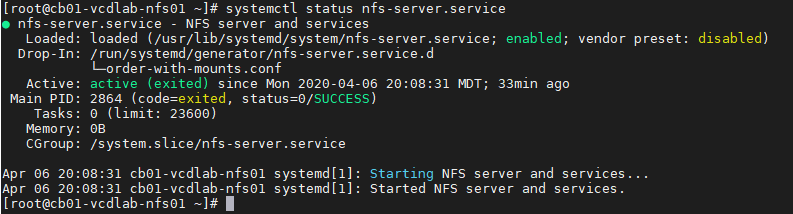
– Validate NFS daemons are running on the server by using rpcinfo -p localhost or service nfs status. NFS daemons must be running on the server.
# rpcinfo -p localhost
or
# systemctl status nfs-server.service
Configure the Firewall
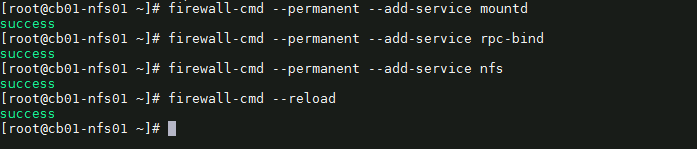
19) We need to configure the firewall on the NFS server to allow NFS client to access the NFS share. To do that, run the following commands on the NFS server. # firewall-cmd --permanent --add-service mountd # firewall-cmd --permanent --add-service rpc-bind # firewall-cmd --permanent --add-service nfs # firewall-cmd --reload
20) That’s it. Now we can deploy the vCloud Director 10.0 appliance(s).
Optional NFS Share Testing
I highly recommend testing the NFS share before continuing with the vCloud DIrector 10.0 appliance deployment. For my testing, I have deployed a temporary CentOS 7 VM, with the same hostname and IP address as my first vCD appliance. I have installed nfs-utils on my test VM. # yum install -y nfs-utils
OT-1) Check the NFS shares available on the NFS server by running the following command on the test VM. change the IP and share here to your NFS server.
# showmount -e 10.0.0.35
As you can see, my mount on my NFS server is showing one exported list for 10.0.0.38, my only vCD appliance
OT-2) Create a directory on NFS test VM to mount the NFS share /nfsshare/vcloud_director which we have created on the NFS server. # mkdir -p /mnt/nfsshare/vcloud_director
OT-3) Use below command to mount the NFS share /nfsshare/vcloud_director from NFS server 10.0.0.35 in /mnt/nfsshare/vcloud_director on NFS test VM.
# mount 10.0.0.35:/nfsshare/vcloud_director /mnt/nfsshare/vcloud_director
OT-4) Verify the mounted share on the NFS test VM using mount command.
# mount | grep nfsshare
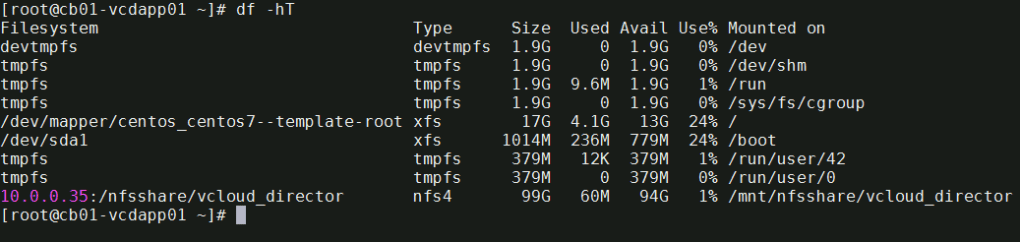
You can also use the df -hT command to check the mounted NFS share.
# df -hT
OT-5) Next we’ll create a file on the mounted directory to verify the read and write access on NFS share. IMPORTANT** during the vCD appliance deployment, it is expected that this directory is empty, else it could make the deployment fail. Remember to cleanup after the test.
# touch /mnt/nfsshare/vcloud_director/test
OT-6) Verify the test file exists by using the following command:
# ls -l /mnt/nfsshare/vcloud_director/
OT-7) Clean your room. Cleanup the directory so that it is ready for the vCD deployment.
# rm /mnt/nfsshare/vcloud_director/test
After successfully testing the share, we now know that we can write to that directory from the vCD appliance IP address, and that we can remove files.
In my next post, I will cover deploying the vCloud Director 10.0 appliance. Stay tuned!
Looking back on this past week, all I can say is that it was pretty crazy. It was my first time to San Francisco, and I honestly left with mixed feelings on the City.
VMworld itself was pretty good! VMware cut back the general sessions to just two days (Monday and Tuesday), and I am honestly conflicted about the missing Thursday general session, as they usually showcase some non VMware related tech for this session.
If I could sum up VMworld in just one word this year, it would be: Kubernetes
VMware debuted their cloud management solution VMware Tanzu with partnership with Pivital, and showcased the ability to manage multiple Kubernetes clusters across multiple clouds, all from one central management dashboard, and Project Pacific, VMware’s endeavor to embed Kubernetes into vSphere.
VMware also added the Odyssey competition this year just outside of the Hands on Labs area. This was in the HOL style, however this only gave attendees hints on what needed to be completed, and really allowed you to test your knowledge and skills in order to complete the task, without the hand holding that the typical HOL provides. Teams were able to compete against each other for the best times, and had some pretty decent prizes.
All in all, it was a decent VMworld, and they will be returning to San Francisco next year. I can’t say that I enjoyed the location, especially with the homeless problem San Francisco has, and I would much rather see VMworld bring it’s 20k+ attendees to a cleaner city, without the drugs, pan handlers, and human waste on the streets. You’d think that as someone who grew up on a farm, and is used to certain sights and smells, that it wouldn’t have bothered me so much, but this took me by surprise
This was also a special VMworld for me this year, as I was finally able to meet Pat Gelsinger. I can tell he really likes the community, and would love to stay longer and chat with everyone. I certainly would have loved the chance to talk with him longer, but I know he had other obligations that night.
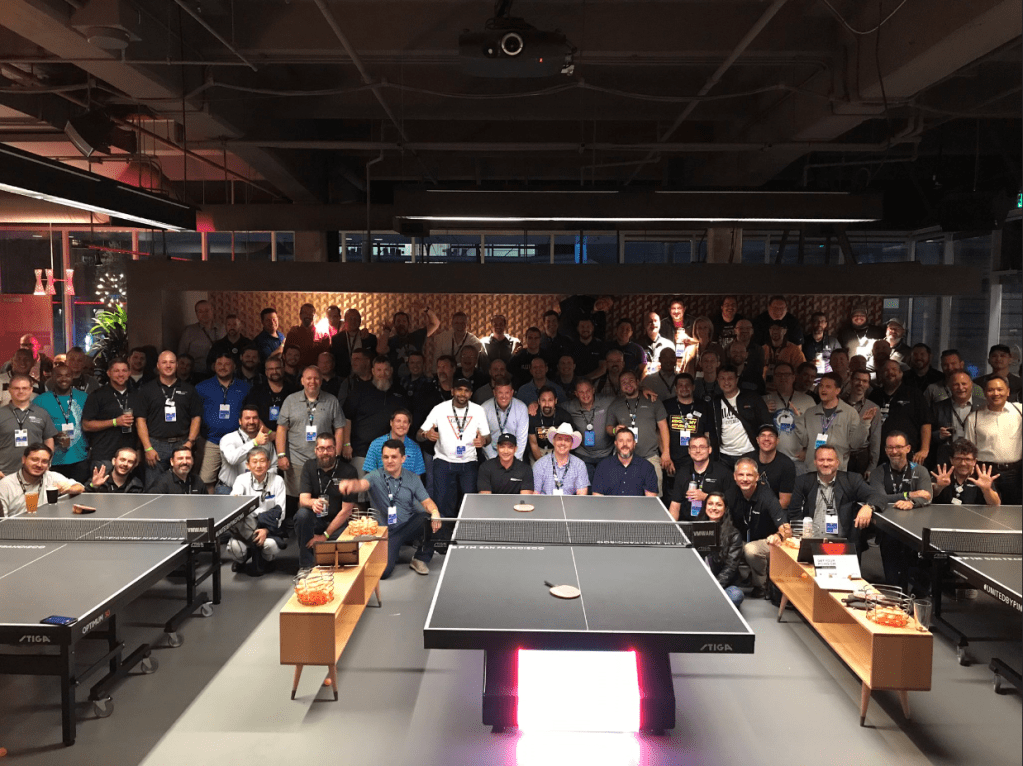
The vExpert party was fun as always, and we were able to get a nice photo of the group.
The last session I attended this year was “If this then that for vSphere – the power of event-driven automation” with keynote speakers William Lam, and Michael Gasch. Several well known VMware employees and bloggers were in attendance, including Alan Renouf, who was two chairs down from me, and for this first time I felt this crippling awkwardness of wanting to take pictures with all of them, but was so star stuck that I couldn’t bring myself to it. I know these guys are just normal folks who just happen to be stars in the vCommunity, but I had to contain myself, and enjoy the keynote. Hopefully our paths will cross again, and I can personally meet them.


You must be logged in to post a comment.