
Blog Date: December 5, 2021 Updated: August 8, 2022
VMware Cloud Foundation 4.3.1 used.
VMware vCenter Server 7.0 Update 2d used.
VMware NSX-T Data Center 3.1.3.1 used.
VMware Photon OS 3.0
On engagements with customers, I’ll have them deploy a developer VM where we can work and I can get them started on their Tanzu and Kubernetes journey. This one VM will have docker, docker credential helper, and the Tanzu Kubernetes CLI installed. For the purpose of this blog series, I’ll do the same.
Getting Started with Photon OS and Installing Docker
The first step was to deploy the Photon OS ova: https://github.com/vmware/photon/wiki. This URL has all of the instructions on getting started as well as running Docker which only requires two commands:
The Docker service needs to be set up to run at startup. To do so, input the following commands:
$ sudo systemctl start docker$ sudo systemctl enable docker(Optional) Once that completes, run the following commands to allow docker to run as non-root:
$ sudo groupadd docker$ sudo usermod -aG docker $USER$ newgrp dockerThe following command will start docker if it is not already running. Likewise you can do a status instead of a start:
$ systemctl start dockerDownloading The Kubernetes CLI
First, if this is going to be a shared box, it will be a good idea to create a directory where we can place the files:
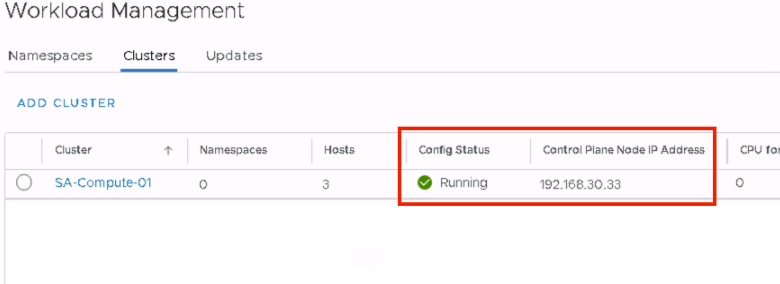
$ mkdir -p /opt/vsphere-pluginIf needed you can locate the control plane node IP address from the workload management section in vSphere.
The Kubernetes CLI can be downloaded from the https:// via wget.
$ wget https://<cluster_ip>/wcp/plugin/linux-amd64/vsphere-plugin.zipUnzip the vsphere-plugin.zip to the ‘/opt/vsphere-plugin’ directory we created before.
$ unzip vsphere-plugin.zip -d /opt/vsphere-pluginConfigure the environment variable PATH to include the extracted ‘opt/vsphere-plugin’ and set up tab auto completion.
$ echo 'export PATH=/opt/vsphere-plugin:$PATH' >> ~/.bash_profile$ echo 'source <(kubectl completion bash)' >> ~/.bash_profilecat the ~/.bash_profile file to verify the new entries. The output should look something like:
$ cat ~/.bash_profile
export PATH=/opt/vsphere-plugin:$PATH source <(kubectl completion bash)
Install and Configure the vSphere Docker Credential Helper
The vSphere docker credential helper helper cli is used to securely push/pull container images to and from the embedded harbor registry. Please see VMware’s official documentation Install the vSphere Docker Credential Helper and Connect to the Registry for more information.
First, if this is going to be a shared box, it will be a good idea to create a directory where we can place the files:
$ mkdir -p /opt/vsphere-docker-credential-helperFrom the developer VM, use the kubectl CLI to connect to the vSphere with Tanzu control plane as the authenticated user.
$ kubectl vsphere login --server <cluster_ip> -u <username@example.domain>To download the vsphere-docker-credential-helper.zip package for Linux operating systems, run the wget command.
$ wget https://<cluster-ip>/wcp/helper/linux-amd64/vsphere-docker-credential-helper.zipRun the unzip command to extract the downloaded zip package to the custom directory created in a previous step.
$ unzip vsphere-docker-credential-helper.zip -d /opt/vsphere-docker-credential-helperNow we need to configure the docker client to use the embedded harbor registry cert. Please see VMware’s Document Create Configure a Docker Client with the Embedded Harbor Registry Certificate for more information.
Create a directory path for the private registry in /etc/docker/certs.d/ that corresponds to the IP address of the Harbor instance.
$ mkdir /etc/docker/certs.d/IP-address-of-harbor/We need to download the certificate for the embedded harbor registry. VMware also has this documented under Download and Install the Embedded Harbor Registry Certificate. For this example I’ll use the vSphere client method.
Select the vCenter cluster where Workload Management and the embedded Harbor Registry are enabled.
– Select Configure > Namespaces > Image Registry.
– In the Root certificate field, click the link Download SSL Root Certificate.
– Save the root-certificate.txt, and rename it to something like ca.crt.
Copy the embedded Harbor Registry ca.crt file that you downloaded to the /etc/docker/certs.d/IP-address-of-harbor/ created in the previous step.
That directory should now look something like:
/etc/docker/certs.d/IP-address-of-harbor/ca.crtRestart the docker service so that the new certificate is used:
$ systemctl restart dockerTo test that the docker credential helper is working, you can log into the embedded harbor registry using your fully qualified domain credentials. As long as you don’t get a certificate trust error, you are good to go.
$ docker-credential-vsphere login <harbor_ip>This blog should have prepped the Developer VM (Photon OS) that we will be using going forward. There will be a future blog post on pushing a docker image to the embedded harbor registry, but I am not going to cover this here. In my next post, I’ll walk through the steps of installing a Tanzu Kubernetes Cluster inside the namespace we deployed using this VM. Stay tuned.

You must be logged in to post a comment.