Creating policies in VMware’s vRealize Operations Appliance can be strait forward, if there is a decent understanding of every platform it’s monitoring. In my last post of this series, I covered the creation of object groups, and that post is important here because policies can be created and assigned to those object groups, allowing the tuning of alerts received for those groups.
Once logged in to the vROps appliance, go into the administration section, and there you will find the policies.
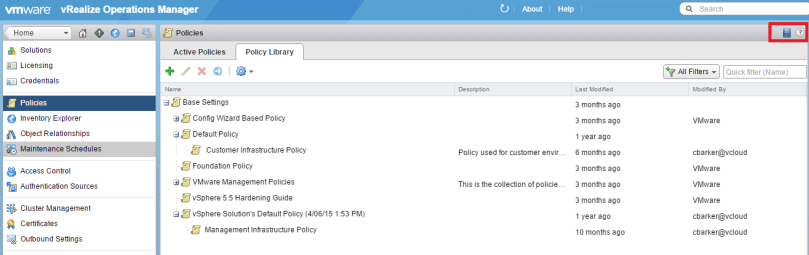
- VMware has included many base policies in the policy library, which in most cases will be fine for the initial configuration for the appliance, but you may want to create additional policies to suite your specific environment needs.
- Also take note of the blue film strip in the upper right corner. This will take you to VMware’s video repository of policies explanation and a brief how-to video. These video links can be found throughout the configuration of the appliance, and more are added with each release.
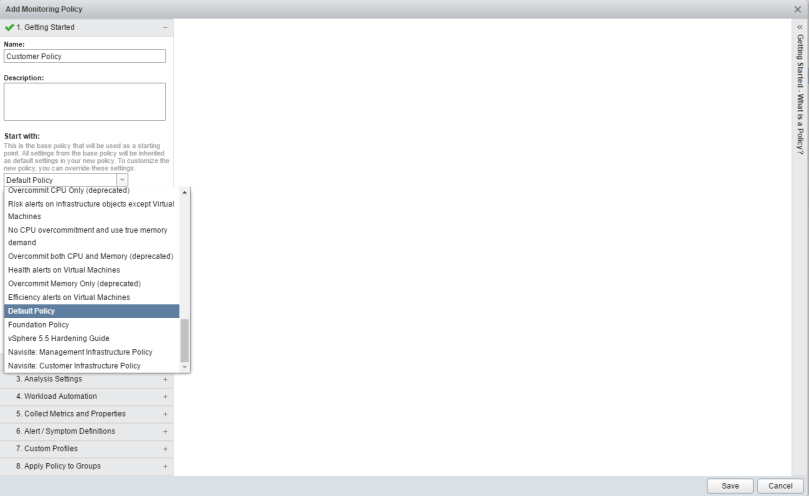
To create a new policy click on the green plus sign to get started. Give the policy a unique name, and it would be good practice to give a description of what the policy is intended to do. When creating a policy, you have the ability to “start with” a VMware pre-defined policy, and I recommend taking advantage of that until there is a firm understanding of what these policies do.
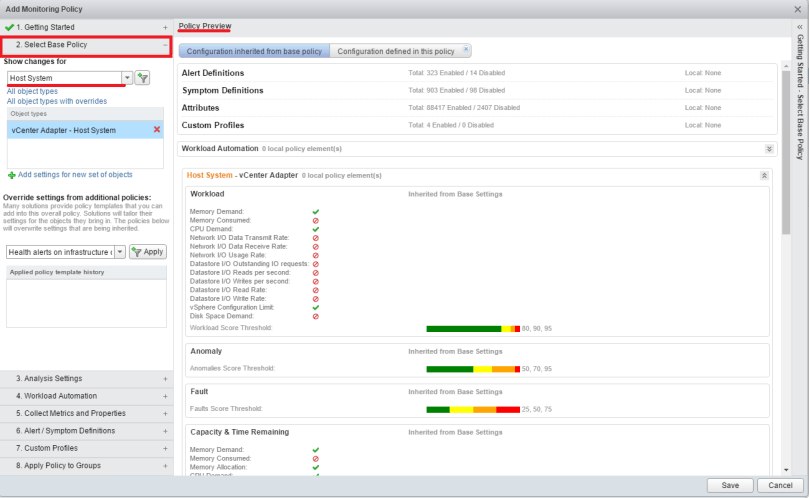
On the Select Base Policy tab, you can use the drop down menu on the left to get a policy overview of what is being monitored. In this example, Host system was selected.
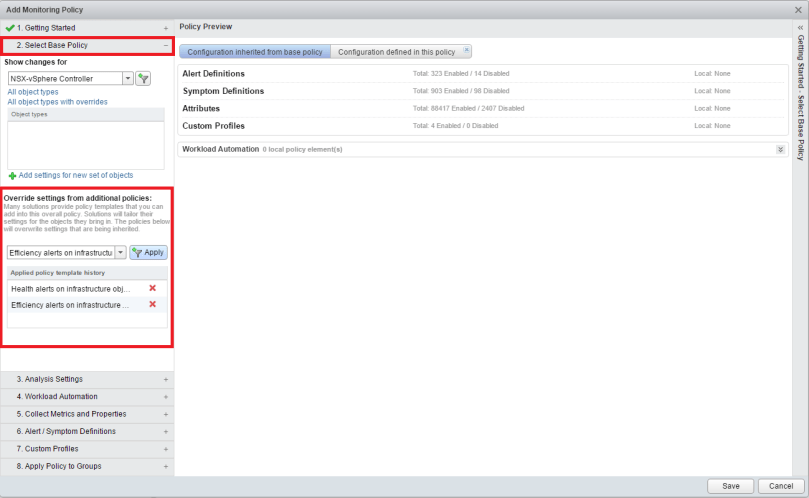
Policy Overrides can also be incorporated into this policy. In other words, if there are certain alerts that you do not want, one of the pre-defined policies may already have those alerts turned off, so those policies can be added to the new policy being created here. Work smarter, not harder right?
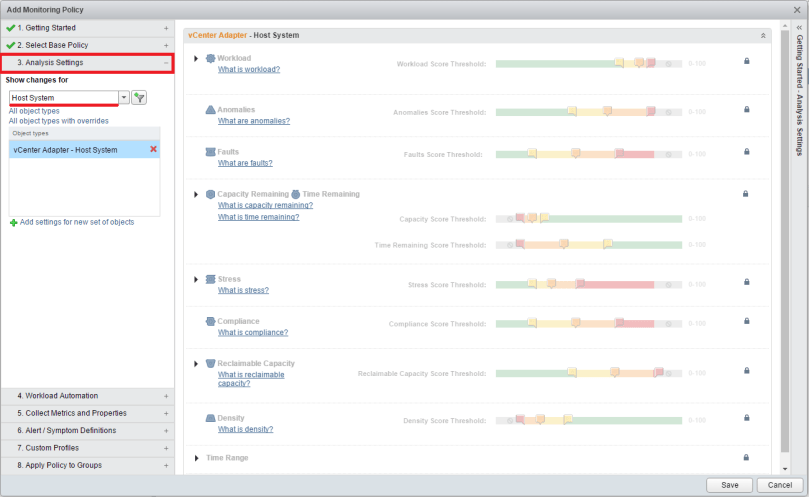
Moving along to the Analysis Settings tab, here you can see how vROps analyses the alerts, determines thresholds, and assigned system badges. These can be left at their current settings per the policy you are building off of, or you can click on the padlock to the right and make individual changes. Keep in mind under the “Show changes for” drop down menu, you will have many objects to select to change the analysis settings on.
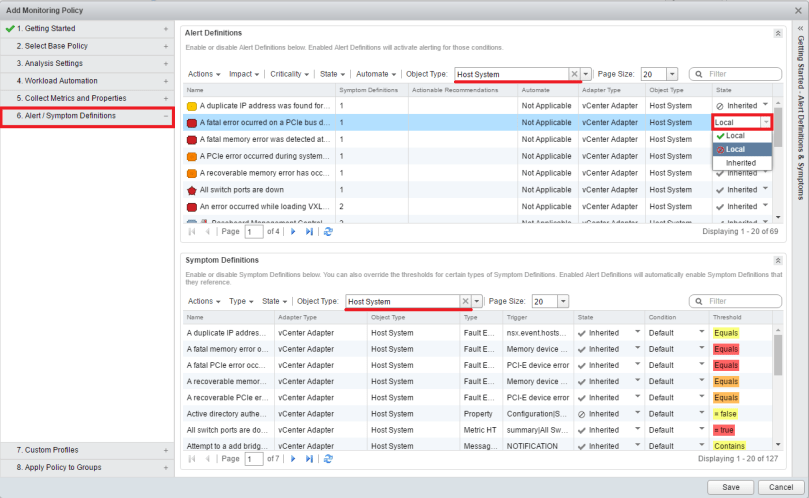
The Alert/Systems Definitions tab is probably where the majority of time will be spent. The “Alert Definitions” box at the top is where alerts can be turned on or off based on the base policy used to create this one, or the override policies used.
- Each management pack installed will have it’s own category for object type. In other words, “host system” is listed under the vCenter category, but if vCloud Director management pack was installed, it would also have a “host system” under its category. Each management pack has the ability to add additional alerts for objects referenced in other management packs. Take time going through each category to see what alerts may need configuring.
- The State of each alert will either be local with a green check-mark: meaning you enabled it, inherited with a grey check-mark: meaning it is enabled via another policy that was used to create this one, Local with the red crossed out circle: meaning you disabled the alert for the policy, or inherited with a grayed out crossed out circle: meaning it is disabled via another policy that was used to create this one. Disabling alerts here will still allow the metrics to be collected for the object, you just wont get the alarm for it.
- The System Definitions section has the same “object type” drop down menu, and you can select the object type here to configure system thresholds for how the symptoms are triggered for the alert selected in the top Alert Definition box above. I typically do these in tandem.
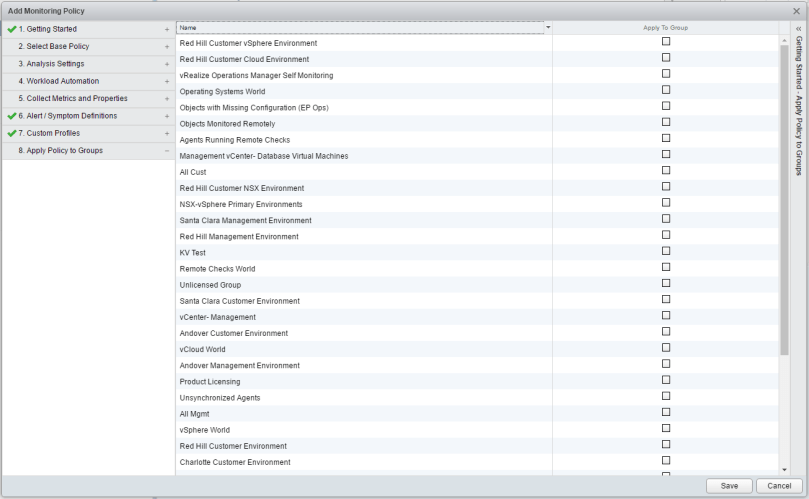
Finally, you can apply the policy to the custom groups you created before in the Apply Policy to Groups tab.
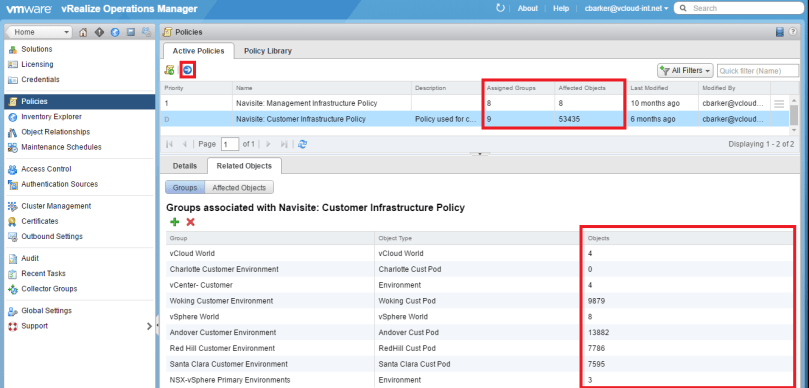
Once you click save, and go back to the Active Policies tab, you will be able to see the new policy created, and within five minutes, you should see the Affected Objects count rise. You can see here that I have a policy marked with “D” meaning it is the default appliance policy. You can set your own policy as default by clicking the blue circle icon with the arrow on the upper left side. It may take up to 24 hours before the active alert page reflects the settings of the new policy. Otherwise you can manually clear those alerts.
Previous post to this series: Configuring VMware vRealize Operations Manager Object Groups

You must be logged in to post a comment.